http://www.craftbits.com/knitting-patterns
Knitting patterns, worth taking a look!!!
Crochet is an art. Arts and hobbies are about passion, magic shared moments, friends, feelings... they are about life... When I decided to start this Blog it was just about that...Making new friends and specially keeping and sharing with my all-of-my-life-Friends. I became a knitting adict.I just can´t help myself getting into any YARN shop I find and buy nice, different, new yarns and textures. I enjoy combining yarns in warm round sweaters. It is all about letting yourself dream.
Tuesday, August 28, 2012
Monday, July 30, 2012
Slipper Boots
 Beautiful slippers! you may even stick something and have them as boots =)
Download for free:
http://www.free-crochet.com/detail.html?code=FC01341&cat_id=332
Silky Beret and Scarf
 Beautiful Hat, just as my daughter wanted it. Will give it a try and post photos =)
Download pattern from below link!
http://www.free-crochet.com/detail.html?code=FC00686&cat_id=470
Santa Hat-
 Beautiful Santa Hat that may be done in different colors!!! Love it.
Download it from below link:
http://www.free-crochet.com/detail.html?code=FC00509&cat_id=470
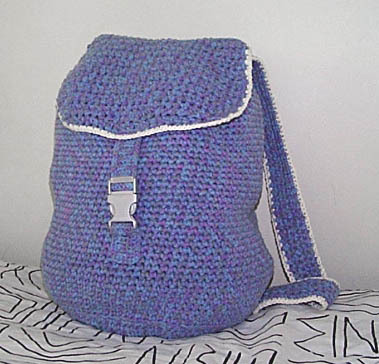
BACK PACK- CROCHET- EASY!!!
Materials
Worsted weight cotton yarn: 500g (18 oz) of main color (Lammy Yarns Florida, color #552) and a small amount of contrasting color for edging and cords
4mm (US G/6) and 7mm (US K/10½) crochet hooks
plastic side release buckle
Gauge: 11 sc and 13 rnds = 10 cm / 4 in, yarn held double
Used Abbreviations
sc = single crochetrnd = round
ch = chain stitch
st = stitch
sl st = slip stitch
rep = repeat
sk = skip
inc = increase
dec = decrease
tog = together
hdc = half double crochet
dc = double crochet
Bottom
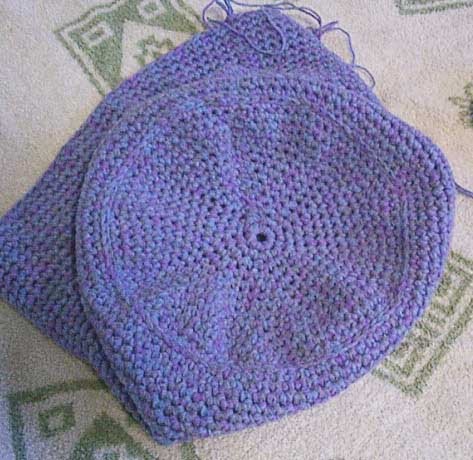
Beginning round: With yarn held double and using the larger hook, ch 4, sl st in first ch to form a ring.
Rnd 1: Ch 1 (counts as 1 sc), work 6 sc in ring, sl st into top of beg ch (= 7 sc). From now on, replace the first sc in the rnd with 1 ch and, in the end of the rnd, join with a sl st to the first ch.
Rnd 2: Work 2 sc in each st around (= 14 sc).
Rnd 3: *1 sc in next sc, 2 sc in next sc; rep from * around (= 21 sc).
Rnd 4: *1 sc in each of next 2 sc, 2 sc in next sc; rep from * around (= 28 sc).
Rnd 5: *1 sc in each of next 3 sc, 2 sc in next sc; rep from * around (= 35 sc). For the rest of the rounds continue adding sc:s in between the increases (for rnd 6: 4 sc; for rnd 7: 5 sc, etc).
(If the bottom doesn’t lay flat, leave out the increases for some of the rounds.)
Edge
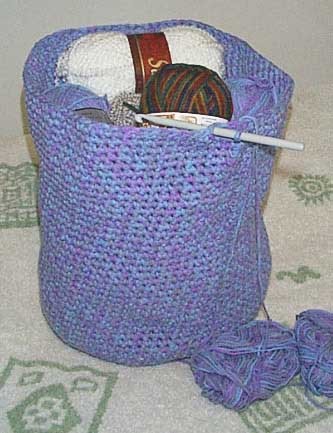
When there are 91 sc in the rnd (approx 14 rnds, bottom diameter 24 cm / 9½ in), start the edge. Work 91 sc around until the edge measures 35 cm / 14 in. You can fasten off and join a new yarn or work with sl sts to the middle of the back for the drawstring hole round.
Drawstring holes
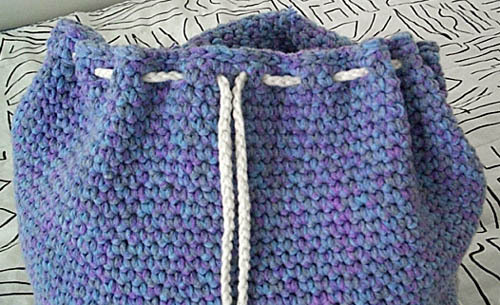
Start at the middle of the back:
14 sc, (ch 1, sk 1 sc, 2 sc) 21 times, ch 1, sk 1 sc, 13 sc (= 91 sc). You should now have 22 drawstring holes in the round (see a picture of the holes).
Next rnd: Work 91 sc around.
Next rnd: Again, start at the middle of the back. 13 sc, 66 sl sts, 12 sc (= 91 sts). Fasten off.
Work one round of sl sts between the last bottom rnd and the first edge rnd.
Flap
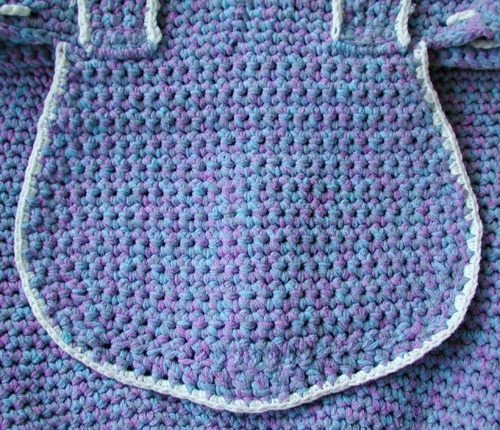
Work a flap out of the 25 sc:s in the back. Starting from the edge, work 4 rnds of sc around, 25 sc each round.
Increases: Inc 1 st at both ends (1 sc before/after the edge st) every 4th rnd 3 times (= 31 sc).
Decreases: When the flap measures 13 cm / 5 in, dec 1 st at both ends every 2nd rnd 3 times (= 25 sc). Then work the last two rnds of the flap:
2 sc tog, 2 sc tog, 5 hdc, 7 dc, 5 hdc, 2 sc tog, 2 sc tog (= 21 sts).
2 sc tog, 5 hdc, 7 dc, 5 hdc, 2 sc tog (= 19 sts). Fasten and end off.
Edging: With one yarn of contrasting color and the smaller hook, work one rnd of sc:s around the edge of the flap. Fasten and end off.
Shoulder straps
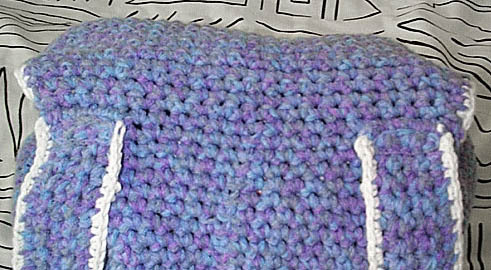
Make two. With double strands of yarn ch — for example — 55 (50 cm / 20 in). Work 4—5 rnds of sc:s and bind off. With contrasting color, work edges as with the flap.
Note: The straps are not adjustable after they’re sewn on, so make sure to measure the length carefully! Or, you can use D-rings and make the straps longer. The width of the straps can also be varied according to your liking.
Sew on the straps at the top of the back approx 10 cm / 4 in apart. At the bottom, sew the straps approx 23—25 cm / 9—10 in (or 25 sts) apart.
NB: Twist the straps once outwards at the bottom. This way the backpack will fit better on your back. Try it on if you’re not sure which way to twist!
Cords
Make two cords (or use a store bought cord). With contrasting color and the smaller hook, chain until the cord measures 60—65 cm / 23½—25½ in length. 2nd rnd: sl st around.Thread the cords in the drawstring holes, one on each side bringing them out at the front middle. Attach at one end, make a knot on the other.
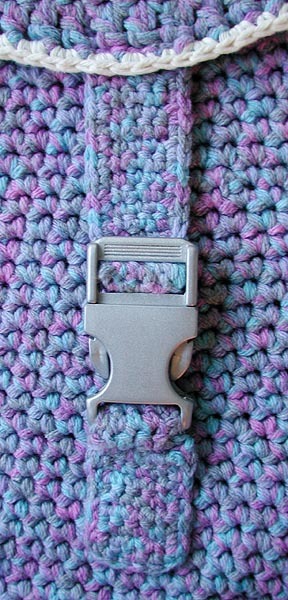
For the plastic buckle, make two straps in main color using only one strand of yarn (or you can use store bought straps). [Note: the width of the strap depends on the width of the buckle you are using!] The longer strap should be approx 13 cm / 5 in long. Attach one buckle end and sew this strap in the middle of the flap underneath it (i.e. on the wrong side). The shorter one is approx 8 cm / 3 in long. Attach the other buckle end and sew this strap in the front middle approx 8 cm / 3 in from the bottom edge (the slip stitch round).

Top of Helmet:
Chain 4, join.
Row 1: Ch 3, 11 dc in ring. Join with sl st. (12)
Row 2: Ch 3, dc in same space, 2 dc in each dc èJoin with sl st. (24)
Row 3: Ch 3, 2 dc in next st, #dc, 2 dc# èJoin with sl st. (36)
Row 4: Ch 3, dc in next st, 2 dc in next st, #dc, dc, 2 dc# èJoin with sl st. (48)
Row 5: Ch 3, dc in next st, dc in next st, 2 dc in next st,#dc x 3, 2 dc# èJoin with sl st. (60)
Side of Helmet:
Rows 1-5: Dc in each dc è slip stitch join, Ch 3…èEar Flap #1
At end of row 5:Row 1: Ch 1, sc in same space and next 8 stitches, Ch 1, Turn
Row 2: Sc, 2tog, sc, sc, sc, 2tog, sc, Ch 1, turn
Row 3: Sc è ch 1, turn
Row 4: Sc, 2tog, sc, 2tog, sc, Ch 1, turn
Row 5 : Sc è Ch 1, turn
Row 6: Sc, Sc3tog, sc, Ch 1, turn
Row 7: Sc3tog, slip stitch in next stitch, Fasten off.
Ear Flap #2
Join yarn in 22nd stitch after end of row 1 of first ear flap.
Follow instructions for Ear Flap #1 for 6 rows.
Row 7: Sc3tog. Do not Fasten Off.
Ties and Edging:
Chain 50, slip stitch in 2nd chain from hook and è
-Sc along side of ear flap, across ends of rows, along first side of 2nd earflap.
-Chain 50, sl st in 2nd ch from hk and è
-Sc along side of earflap, across ends of rows, along second side of first earflap. Fasten off.
Top of Helmet –5 ½ - 6 inches
Side of Helmet –2 ¾ - 3 inches.
Ear flaps are 2 ½ inches wide by 2 inches long
50 chains are approximately 12 inches long
The finished tie is 10 inches long.
Kids hat
 Rnd 1) ch3, 11dc in 3rd ch from hook
Rnd 2) ch2, 2dc in each st around, skipping ch2, sl st into top of first dc (22dc)
Rnd 3) ch2, 2dc in first st(same st as joining), dc in next st, * 2dc in next st, dc in next st, repeat from * around. sl st to top of first dc, (33dc)
Rnd 4) ch2, 2dc in next st, dc in next 2sts, * 2dc in next st, dc in next 2sts, repeat from * around. sl st to top of first dc, (44dc)
Rnd 5-8) ch2, dc in each st around, (44dc)
Rnd 9+10) ch3, working in front of ch3, dc in last st of previous round, * skip next st, dc in next st, working in front of dc, dc in skipped st, (this creates a cross stitch effect) repeat from * around, sl st to top of ch3 (44dc)
Rnd 11) ch2, dc in each st around
Rnd 12) ch1, sc in each st around, fasten off weave in ends.
Posted by Vallieskids at 11:12 AM
Saturday, July 28, 2012
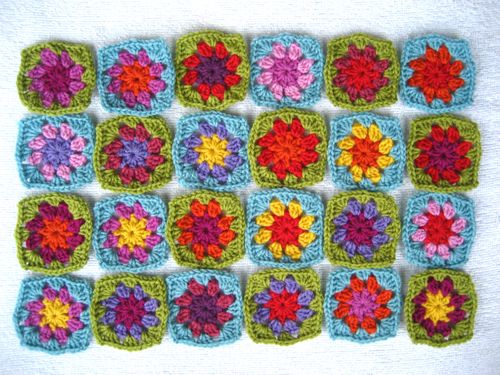
Child´s Crochet Poncho
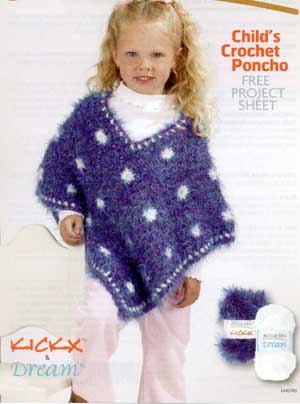 Skill Level: Intermediate
Designed by Glenda Winkleman.
Note: Directions are for size small (12-18 months). Changes for sizes medium (2-4 years) and large (6-8 years) are in parentheses.
Crochet Hook: 5.5mm [US I-9].
Yarn needle.
GAUGE: Rnds 1-2 = 2 ½" across. CHECK YOUR GAUGE. Use any size hook to obtain the gauge.
SPECIAL ABBREVIATION:
Fpdc (front post double crochet): Yarn over, insert hook from the front to the back to the front around the post of the stitch indicated and draw up a loop. [yarn over and draw yarn through 2 loops] twice.
SQUARE (Make 36): With CB, ch 5; join with a sl st in first ch to form a ring.
Rnd 1: Ch 2 (counts as the first hdc), 2 hdc in ring, [ch 2, 3 hdc in ring] 3 times, ch 2; join with a sl st in top of ch-2. Fasten off.
Rnd 2: Attach CA in any ch-2 sp; ch 3 (counts as the first dc), (dc, ch 2, 2 dc) all in some ch-2 sp, skip next hdc, 2 fpdc in next hdc, skip next hdc, * (2 dc, ch 2, 2 dc) in next corner ch-2 sp, skip next hdc, 2 fpdc in next hdc, skip next hdc; rep from * around; join with a sl st in top of ch- 3.
Size Small ONLY: Fasten off.
Sizes Medium and Large-Rnd 3: Ch 1, sc in same st as joining, sc in next dc, * (sc, ch 2, sc) all in corner ch-2 sp, sc in next 5 sts; rep from * twice more; (sc, ch 2, sc) all in corner sp, sc in last 5 sts; join with a sl st to first sc.
Size Medium ONLY: Fasten off.
Size Large-Rnd 4: Ch 1, sc in each sc around and work (sc, ch 2, sc) all in each corner ch-2 sp; join with a sl st to first sc. Fasten off.
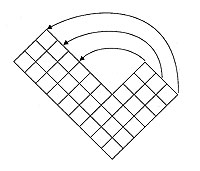
FINISHING: Sew squares together through back lps using CA, matching stitch for stitch and following diagram.
Lower Border-Rnd 1: With right side facing, attach CB in ch-2 sp at front point; ch 1, ** (sc, ch 2, sc) all in corner, ch 1, skip next st, * sc in next st or seam, ch 1, skip next st or seam; rep from * to ch-2 sp at next point; rep from ** once more; join with a sl st to first sc. Fasten off CB.
Rnd 2: Attach CA in ch-2 sp, ch 1, ** (sc, ch 2, sc) all in ch-2 sp, ch 1, skip next sc, * sc in next ch-1 sp, ch 1, skip next sc; rep from * to next ch-2 sp; rep from ** once more; join.
Rnd 3: Ch 1, sc in each sc and each ch-1 sp around, and work 3 sc in each ch-2 sp; join. Fasten off.
Neck Border-Rnd 1: With right side facing, attach CB in first sc to left of center "V" at neck; ch 1, sc in some sc as joining, ch 1, skip next st, * sc in next st or seam, ch 1, skip next st or seam; rep from * around; join with a sl st to first sc. Fasten off.
Rnd 2: Attach CA in same sc as joining; ch 1, sc in each sc and each ch-1 sp around; join with a sl st in first sc. Fasten off.
ABBREVIATIONS: CA = Color A; CB = Color B; ch = chain; dc = double crochet; hdc = half double crochet; lp(s) = loop (s); mm = millimeters; pat = pattern; rep = repeat; rnd (s) = round(s); sc = single crochet; sl = slip; sp(s) = space (s); st(s) = stitch (es); * = repeat whatever follows the * as indicated; [ ] = work directions in brackets the number of times specified.
Pattern © by Coats & Clark Inc. Reproduced with permission from Coats & Clark Inc. PurpleKittyYarns.com is not endorsed by Coats & Clark Inc. It is not permissible to contract production of projects made from designs published by Coats & Clark to a third party for sale or distribution.
Subscribe to:
Posts (Atom)
Daisypath Anniversary
