
Row Two: Fold the piece in half and find the centre point. Join new colour into the space either side of the centre point, between the dc clusters of the first row using slst and ch3 (counts as 1dc) 2dc into the same space, 3dc into each of the next spaces along the row until the end, 1dc into the end space. Fasten off. Repeat on the other side.

The intention, is to make a piece of granny stripe with a gap in the middle which is where the spout will sit!
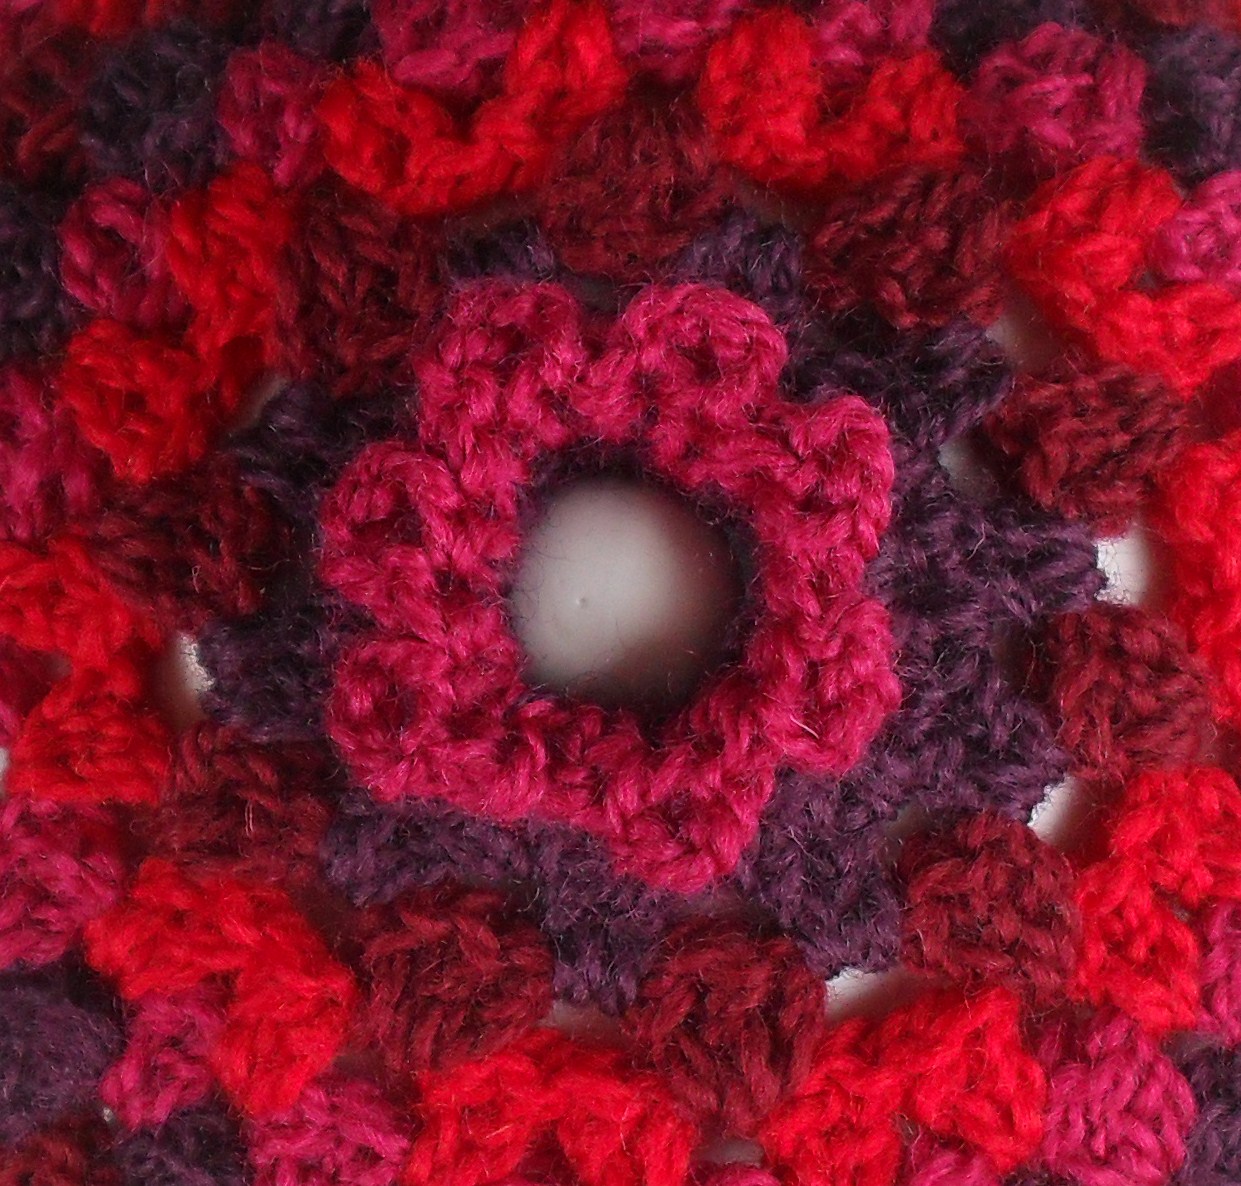
Carry on with these instructions until you have reached the top of the spout and handle. This tea pot needed seven rows in total, including the foundation row… have a good look at this next picture which shows you these seven rows, you will see that each alternating row begins with a 3dc cluster, and the ones between begin with a chain space. This is important because we want to keep the edges straight instead of veering off into a slope!
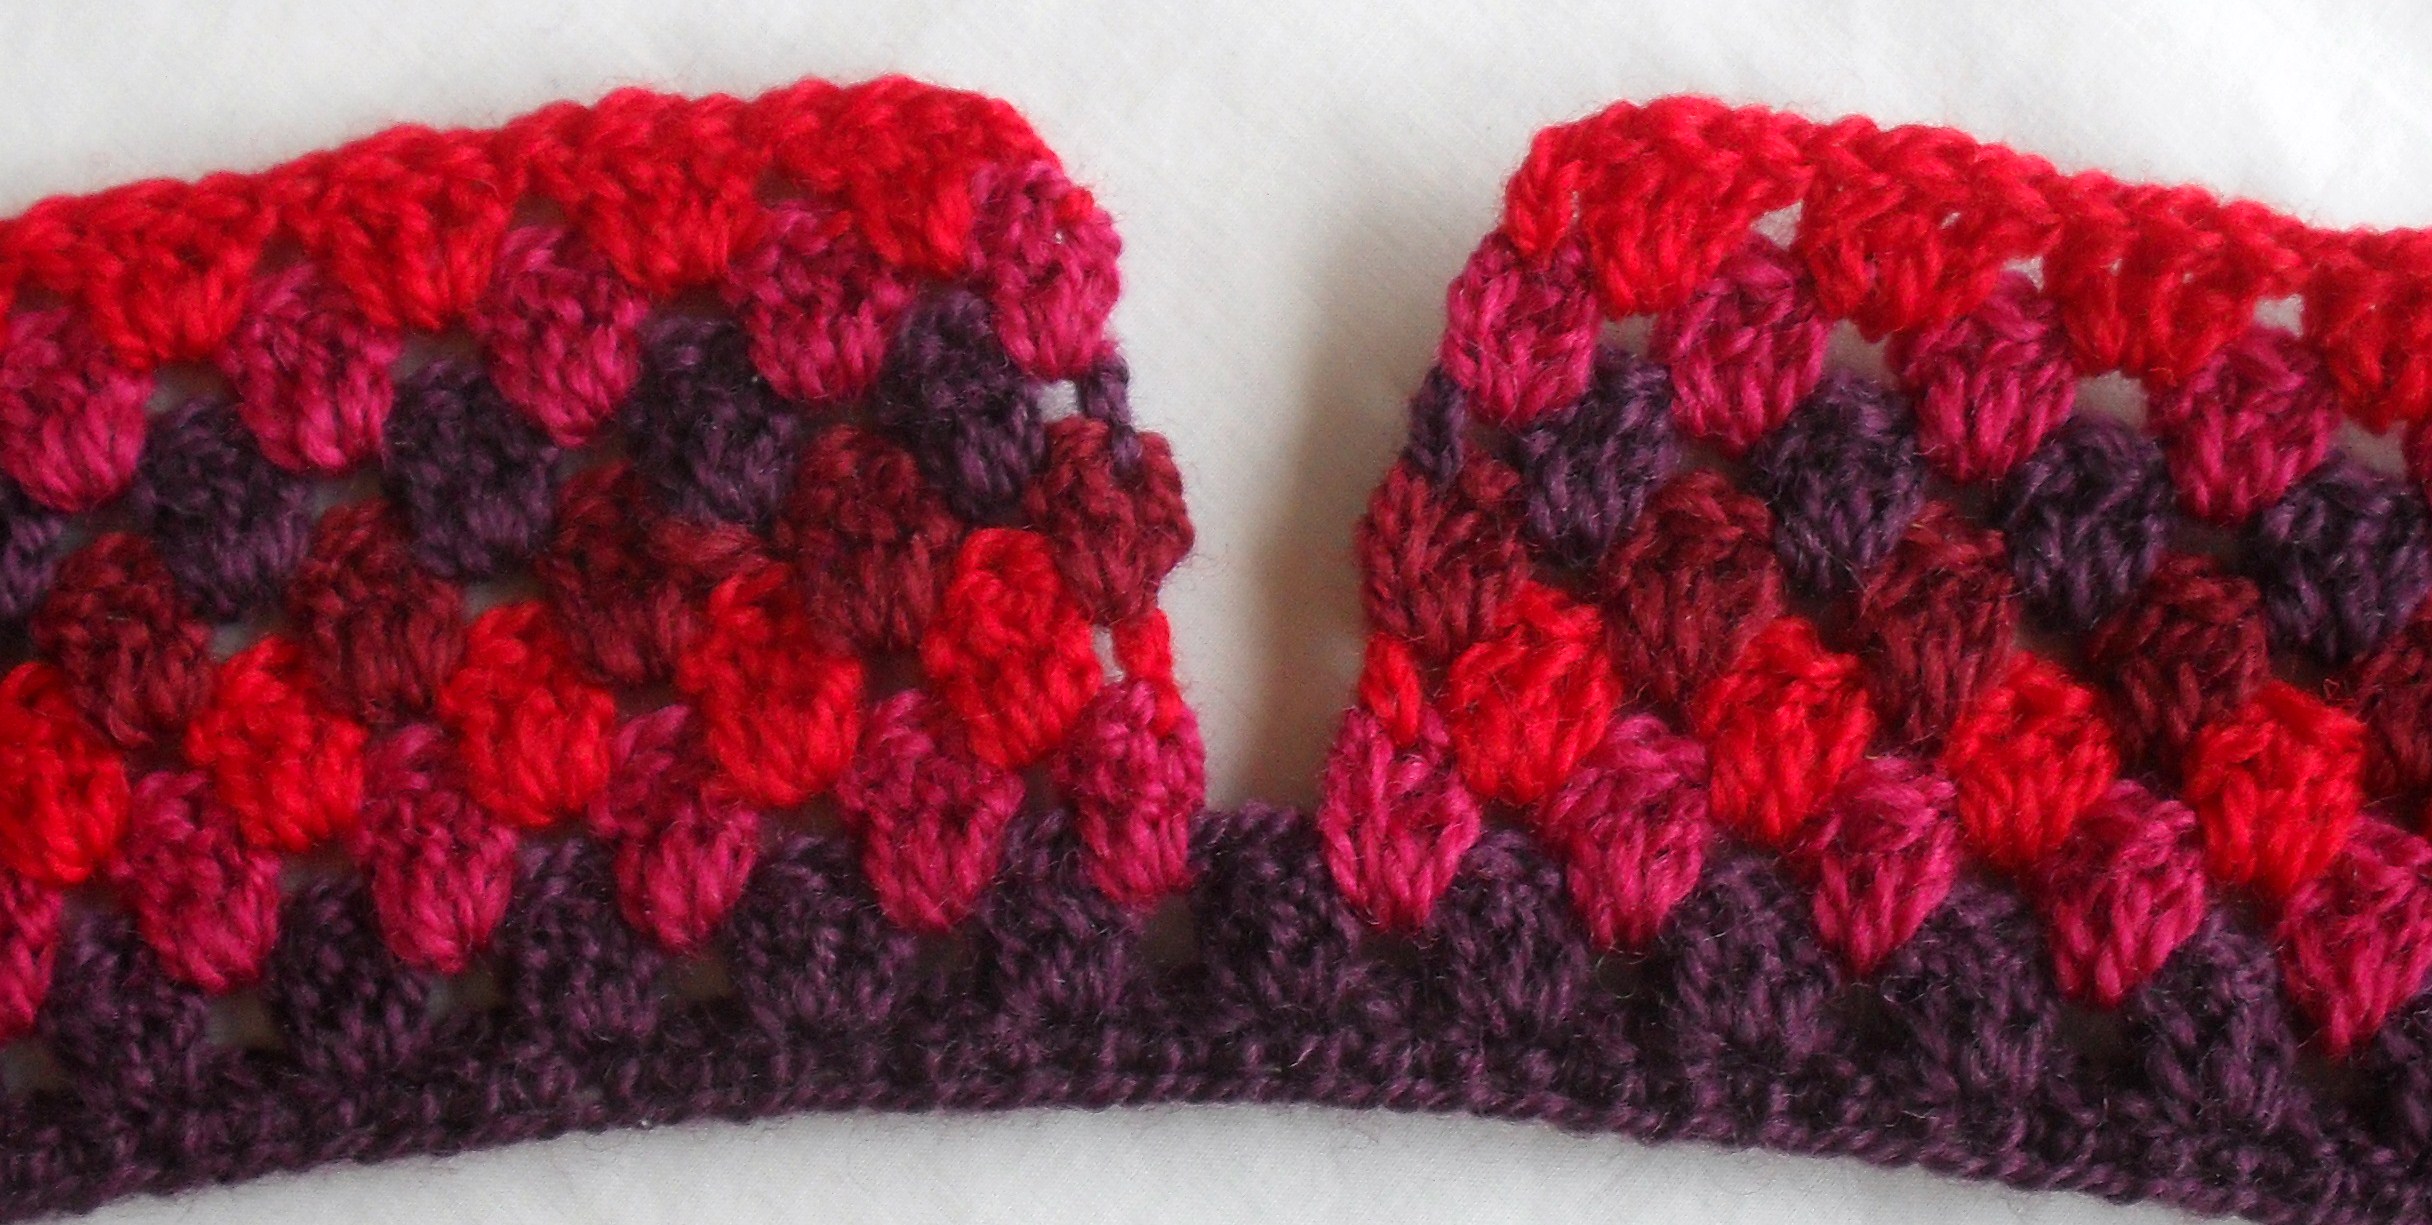
So you’re joining the new rows between the dc’s there… it looks a bit unfinished at this stage, but don’t forget we will be edging all of the edges with some pretty, yet charmingly discrete frills!
Joining the sides: when you have reached the top of the spout and are ready to join the sides to make a circle, join the next colour with a slst in the gap closest to the edge, ch3 (counts as 1dc) and make 2dc into the same space, 3dc into each space until you reach the spout edge. Into the very edge gap, make 2dc, then join the two by making 2dc into the very edge space on the other side. Make sure you make this nice and tight, and don’t have a big saggy stitch in between these two 2dc’s. Carry on around the row making the 3dc clusters until you reach the other edge, join the two edge 3dc clusters with a slst into the 3rd ch of original 3ch and fasten off.
JOINED!
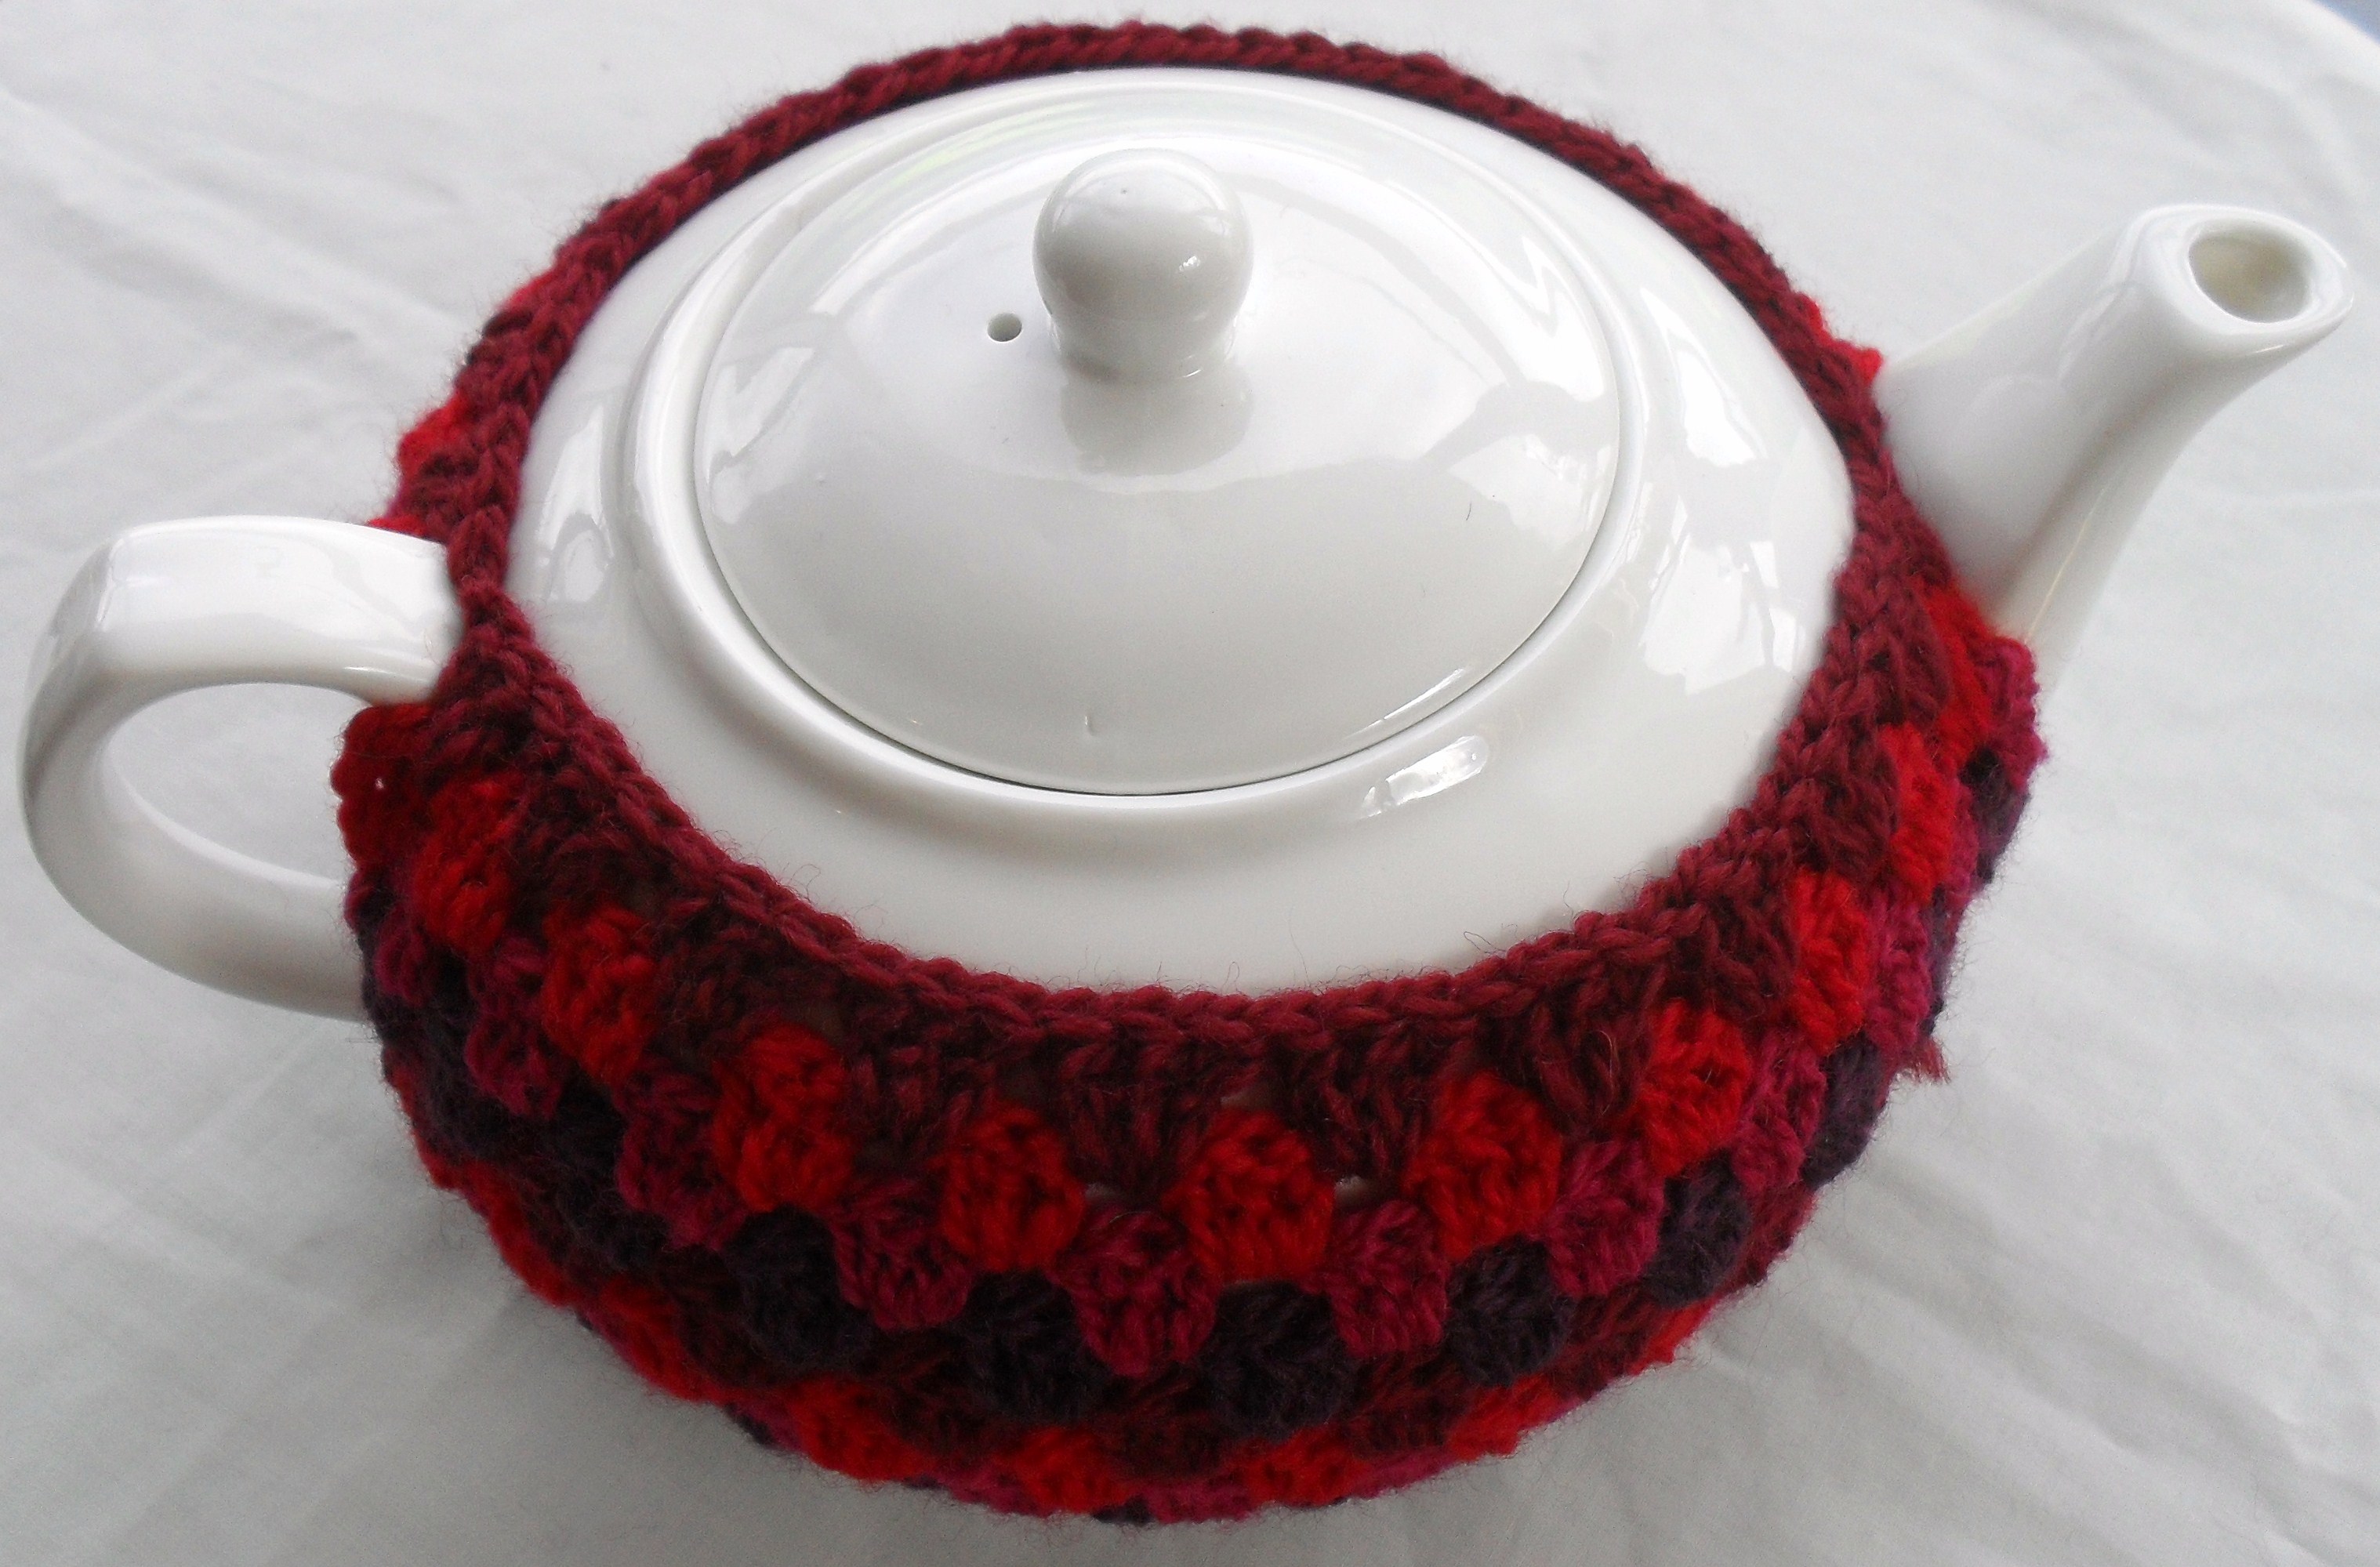
Decreasing: So if you have a tea pot like mine, the decrease will be quite important here, if yours is taller and not so flat on the top, just carry on making the 3dc clusters into each space until you need to decrease. For the next row, join the next colour with a slst and make 3dc clusters right around the row, in each space EXCEPT the spaces where you joined the spout and handle edge, just leave them empty. At end of row, join with a slst.
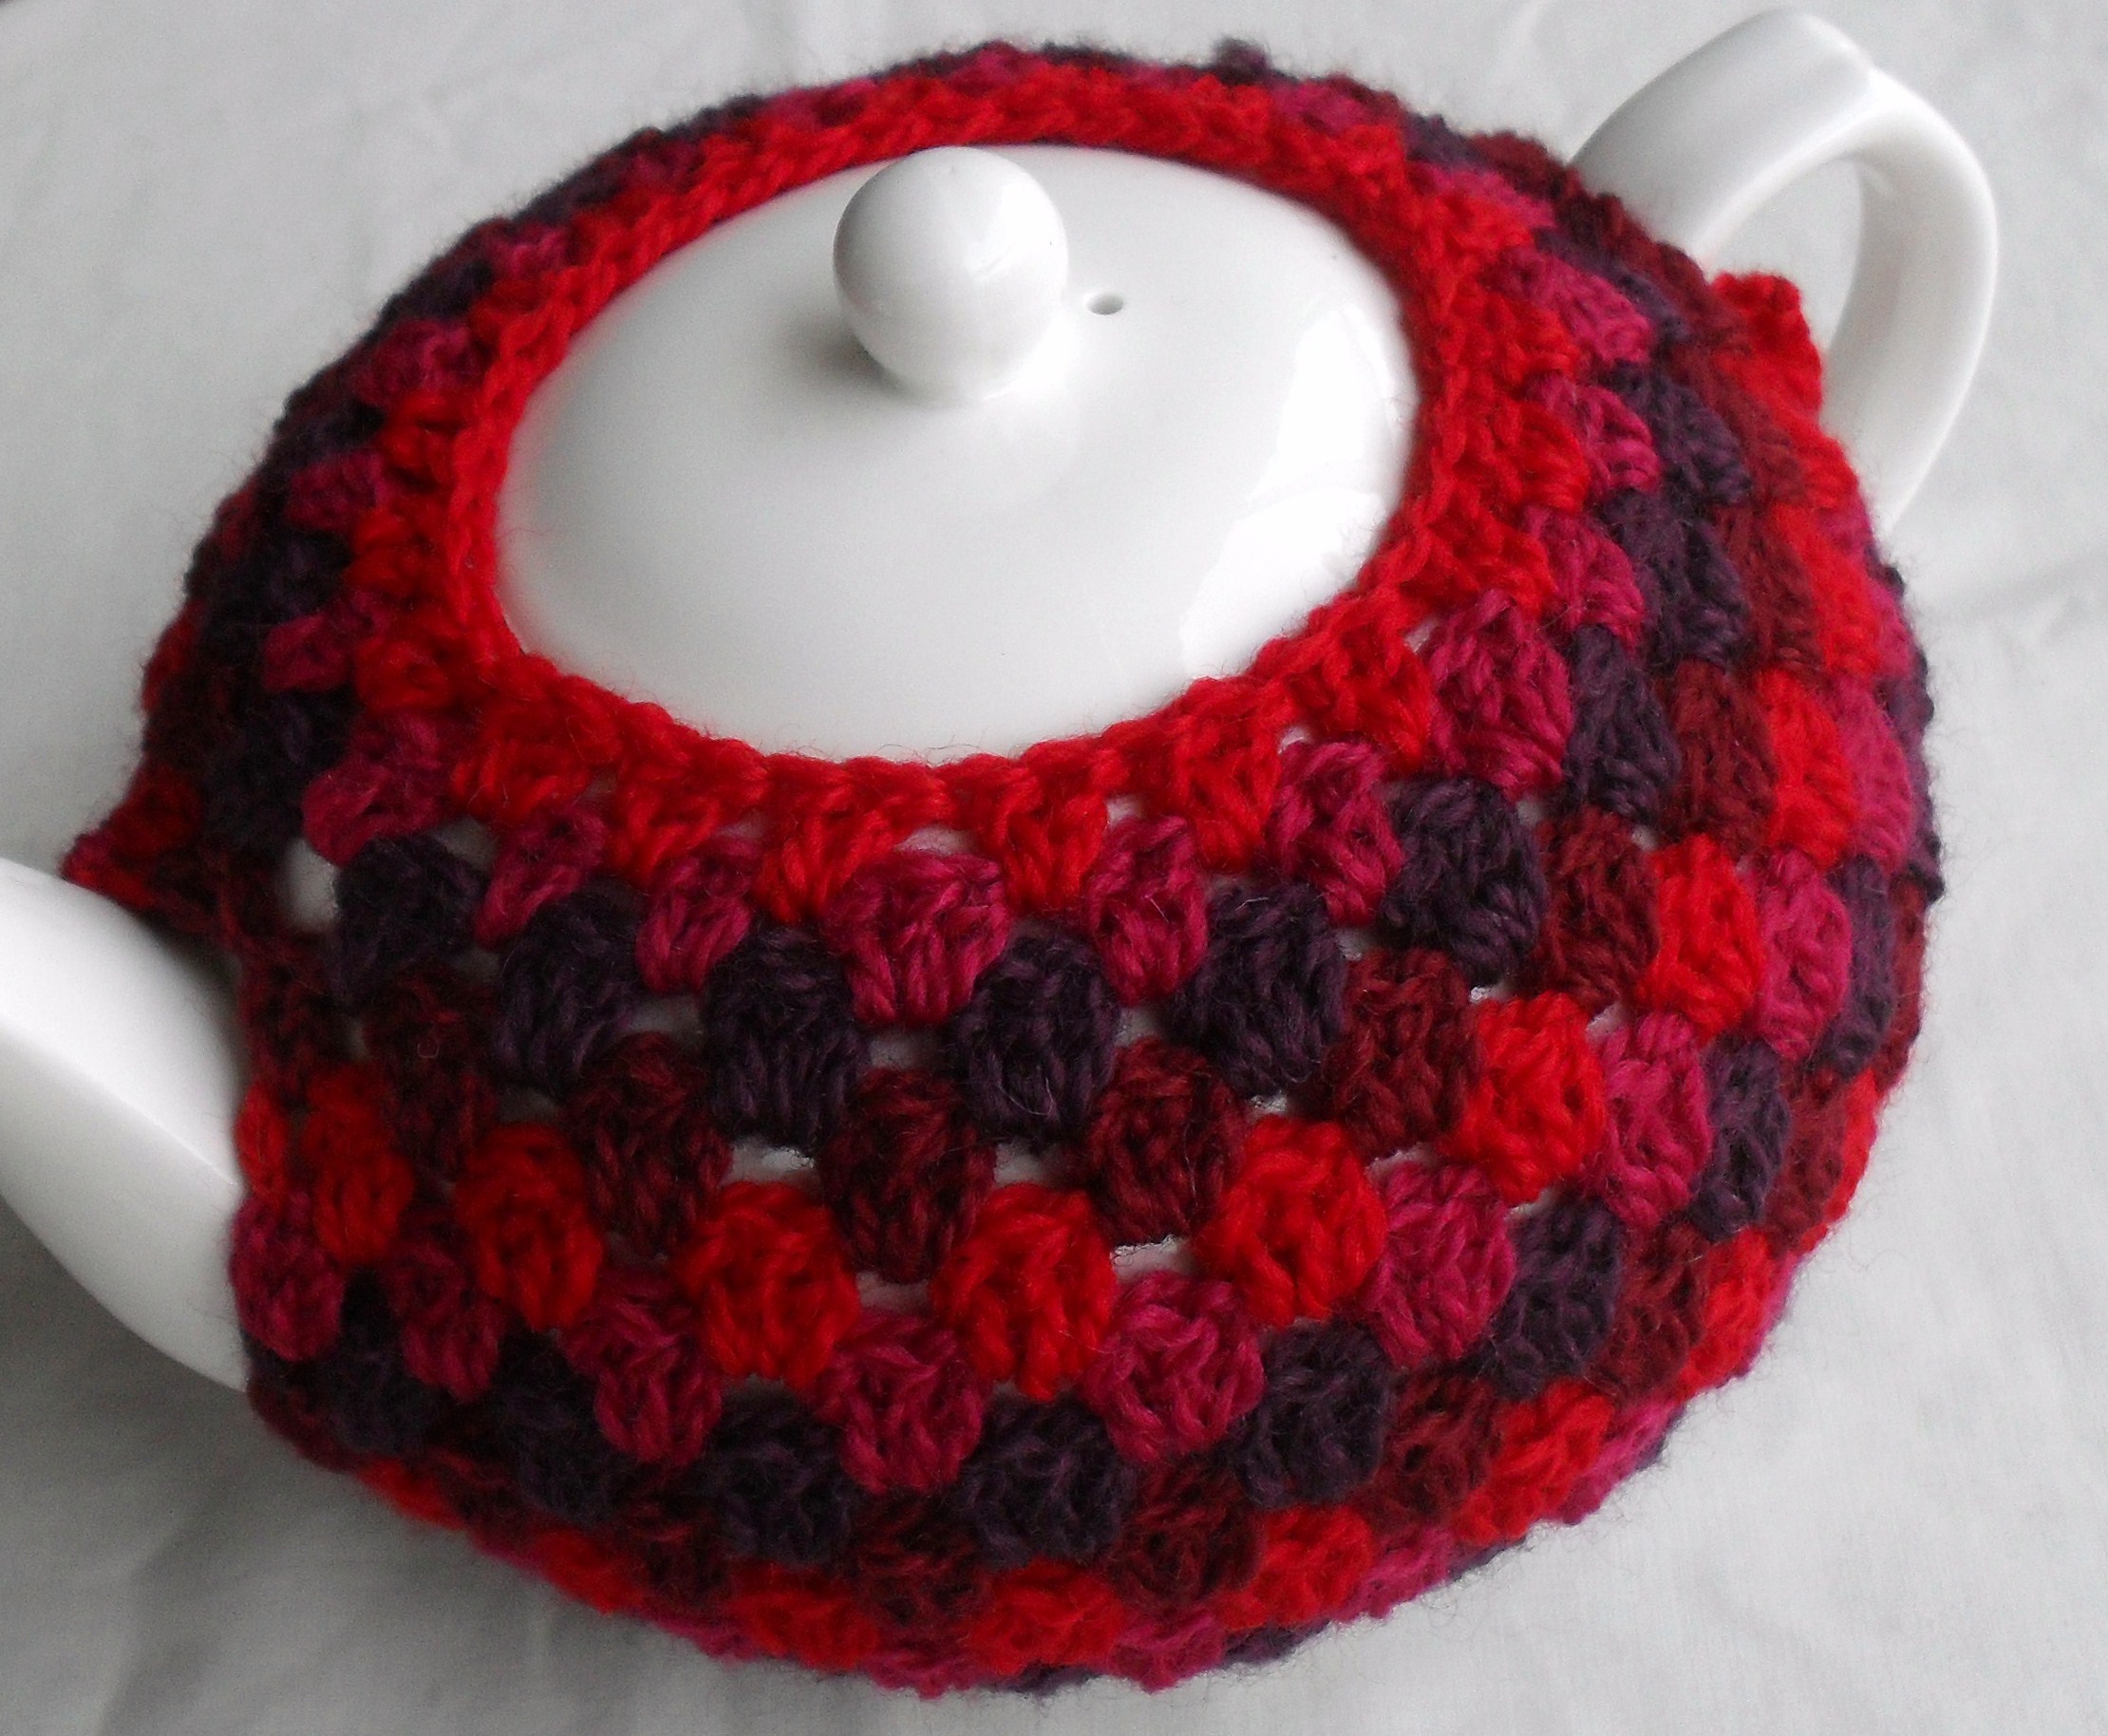
Next row, join new colour, we are decreasing a lot in this row, so once again, please ensure that you are making these stitches nice and tight and that the spaces between the dc’s are tight and not floppy and loose! OK, so you’ve joined the next colour, ch3 (counts as 1dc) 2dc into same space, into the next space, make 2dc, into the next space 2dc, into the next space 3dc. Repeat sequence of 3dc, 2dc, 2dc until end of row, join with a slst.
Next row, join new colour with a slst, ch3 (counts as 1dc) 1dc into same space, into each space make 2dc until end of round, join with a slst.
Next row, join new colour with a slst, make 3dc cluster into every SECOND space until end of the row, join with a slst.
Next row, join new colour with a slst, make 2dc into every space until end of round, join with a slst. Do not fasten off. You are now going to shape the area around the knob, so ch1, 1hdc into each stitch until and of round, join with a slst. Ch1, make 1hdc into every second stitch from previous round, (decreasing here) join with a slst. Ch1, 2hdc into 1st stitch, 1hdc into next, 2 into next, 2 into next, repeat until end of round and join with a slst. Fasten off.
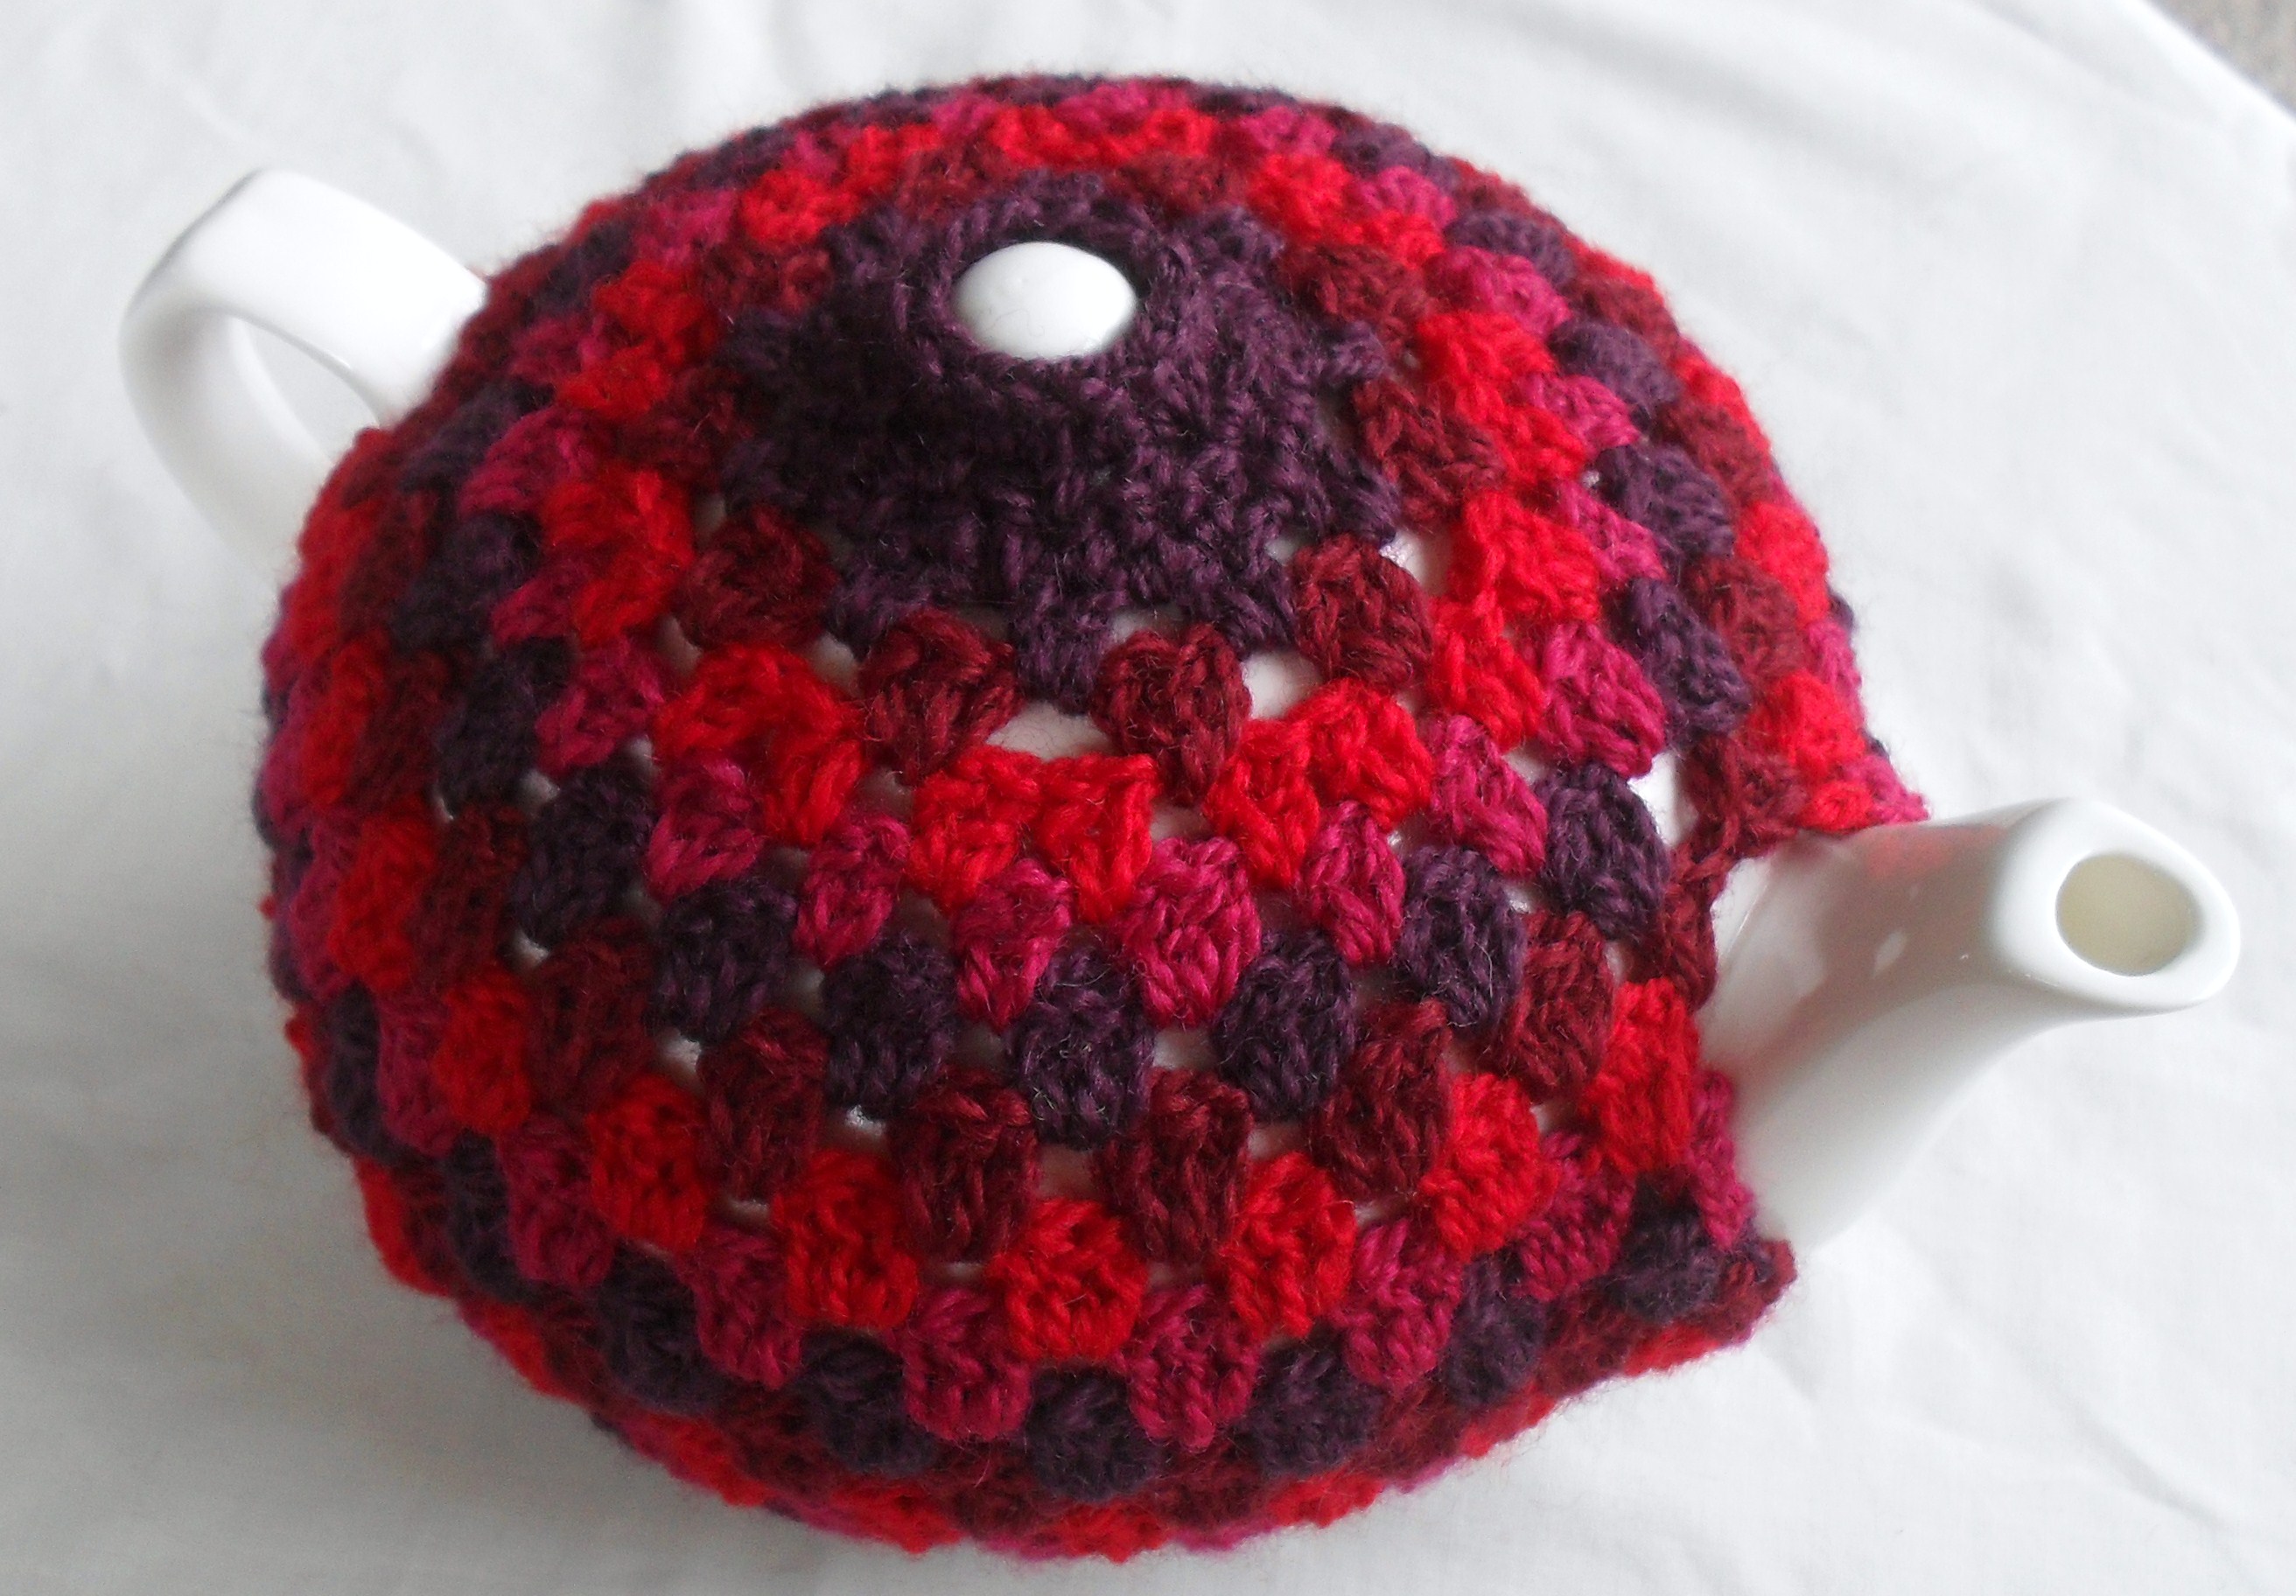
And there we have it! Finished, all we need to do now is the edging! From beginning to end, this took me about two hours including pattern writing and photographing the process, so it’s not a huge task.
OK, so let’s prettify it and make it nice and professional looking! Shall we begin with the very top? I got a couple of comments saying the first one looked like it was wearing a crown, it did a bit! So choose which edging you want to use, for the first, I used a picot edge, and for this one I used ch and slst… so join the top colour with a slst, ch1 and sc into each stitch. Join with a slst at end of round. Ch3, into next 2 stitches make a slst, ch3 into next 2 stitches make a slst… continue around… this is cute! It looks like a frilly flower!
So it’s up to you how you want to do that… remember the carnival edging I gave instructions for? That might look cool and very crown-like!
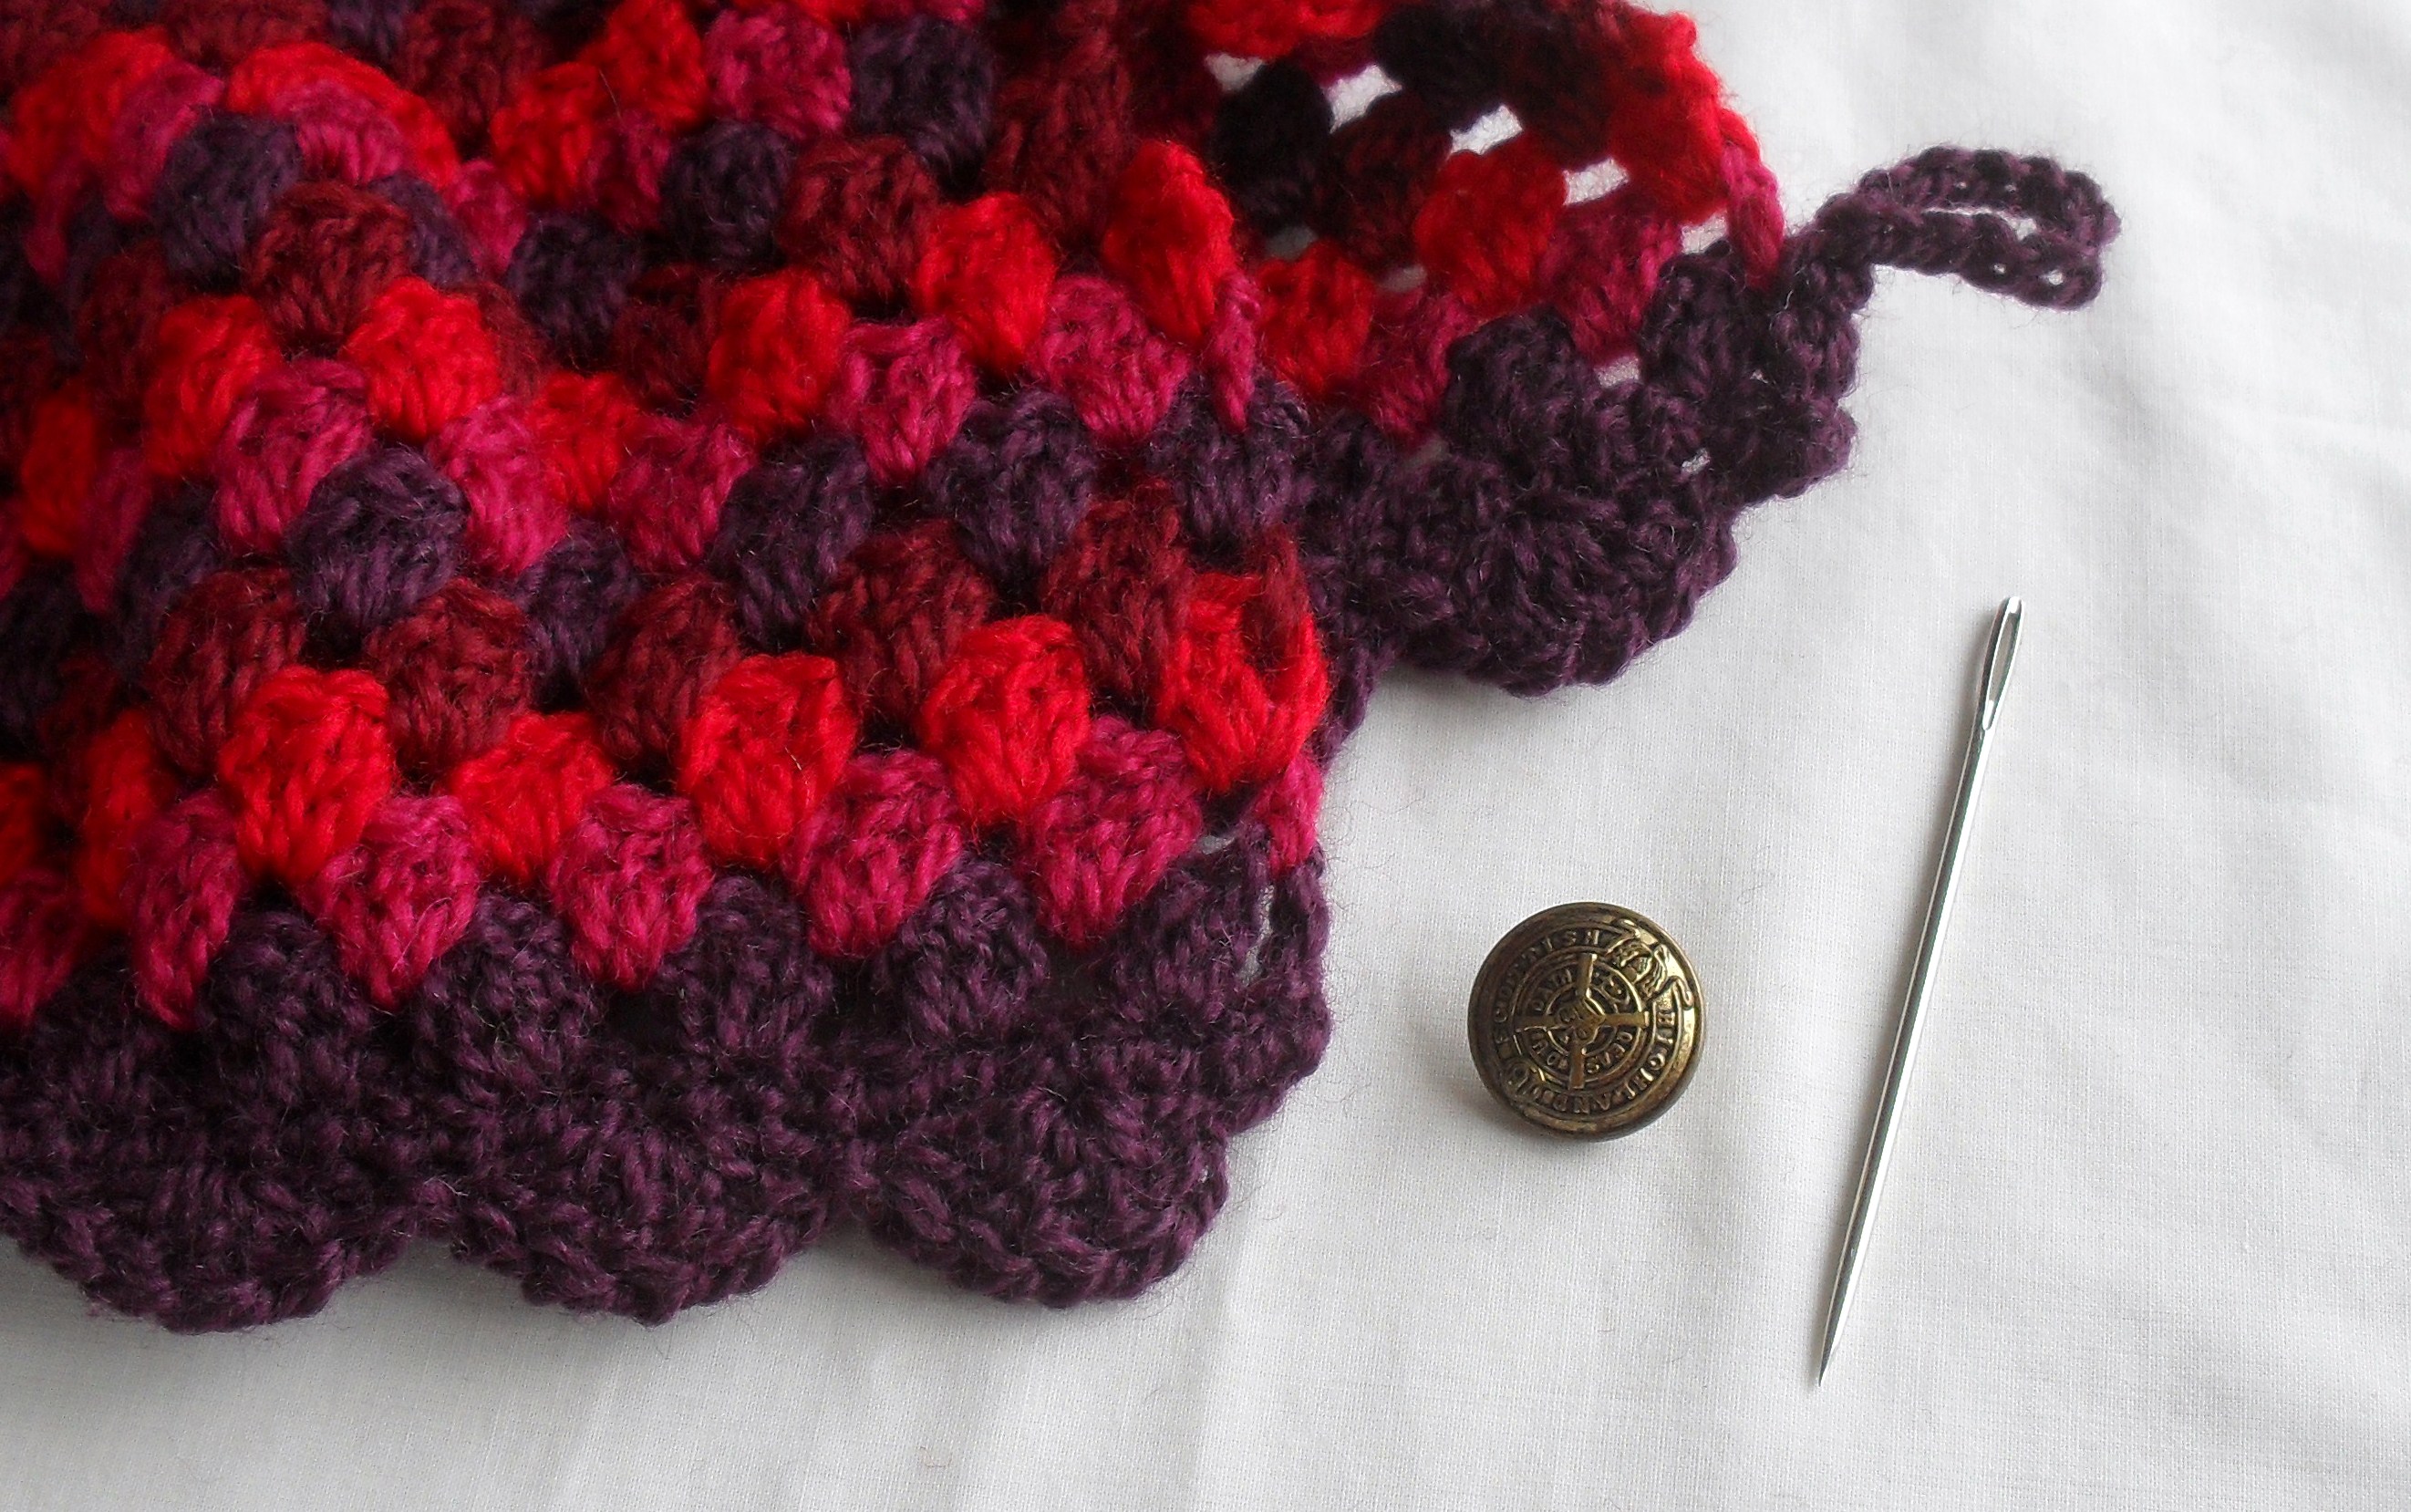
Now for the bottom… For both of the cozies I’ve made, I did a nice big scallop edging, so grab your foundation colour and attach with a slst to one of the ends, skip 2 stitches and make 5dc into the next stitch, skip 2 stitches and make a slst into the next, skip 2 stitches and make 5dc into next stitch and carry on until the very end. Now slst around the corner of the work until you reach the edge of the 3dc cluster in the foundation colour, and make 12 chain loop (or longer depending how big or small your gap is between the two pieces when your tea pot is wearing it’s cozy) to make a button hole. Attach with a slst to same stitch.
Now get yourself a nice button, I found this nice smart looking brass button in my vintage button collection….
And sew it to the other side!
I hope that photo described what I was muddling my way through before!
OK, now the edging around the spout hole and handle edge. I used the same colour as the top edging, joined with a slst then made nice even sc around the edges. As you are edging something that doesn’t have a nice clean edge, you may need to make 2sc into one stitch to make it even. Join at end of round, and to make the 3ch, slst into next 2 stitches sequence as around the top!
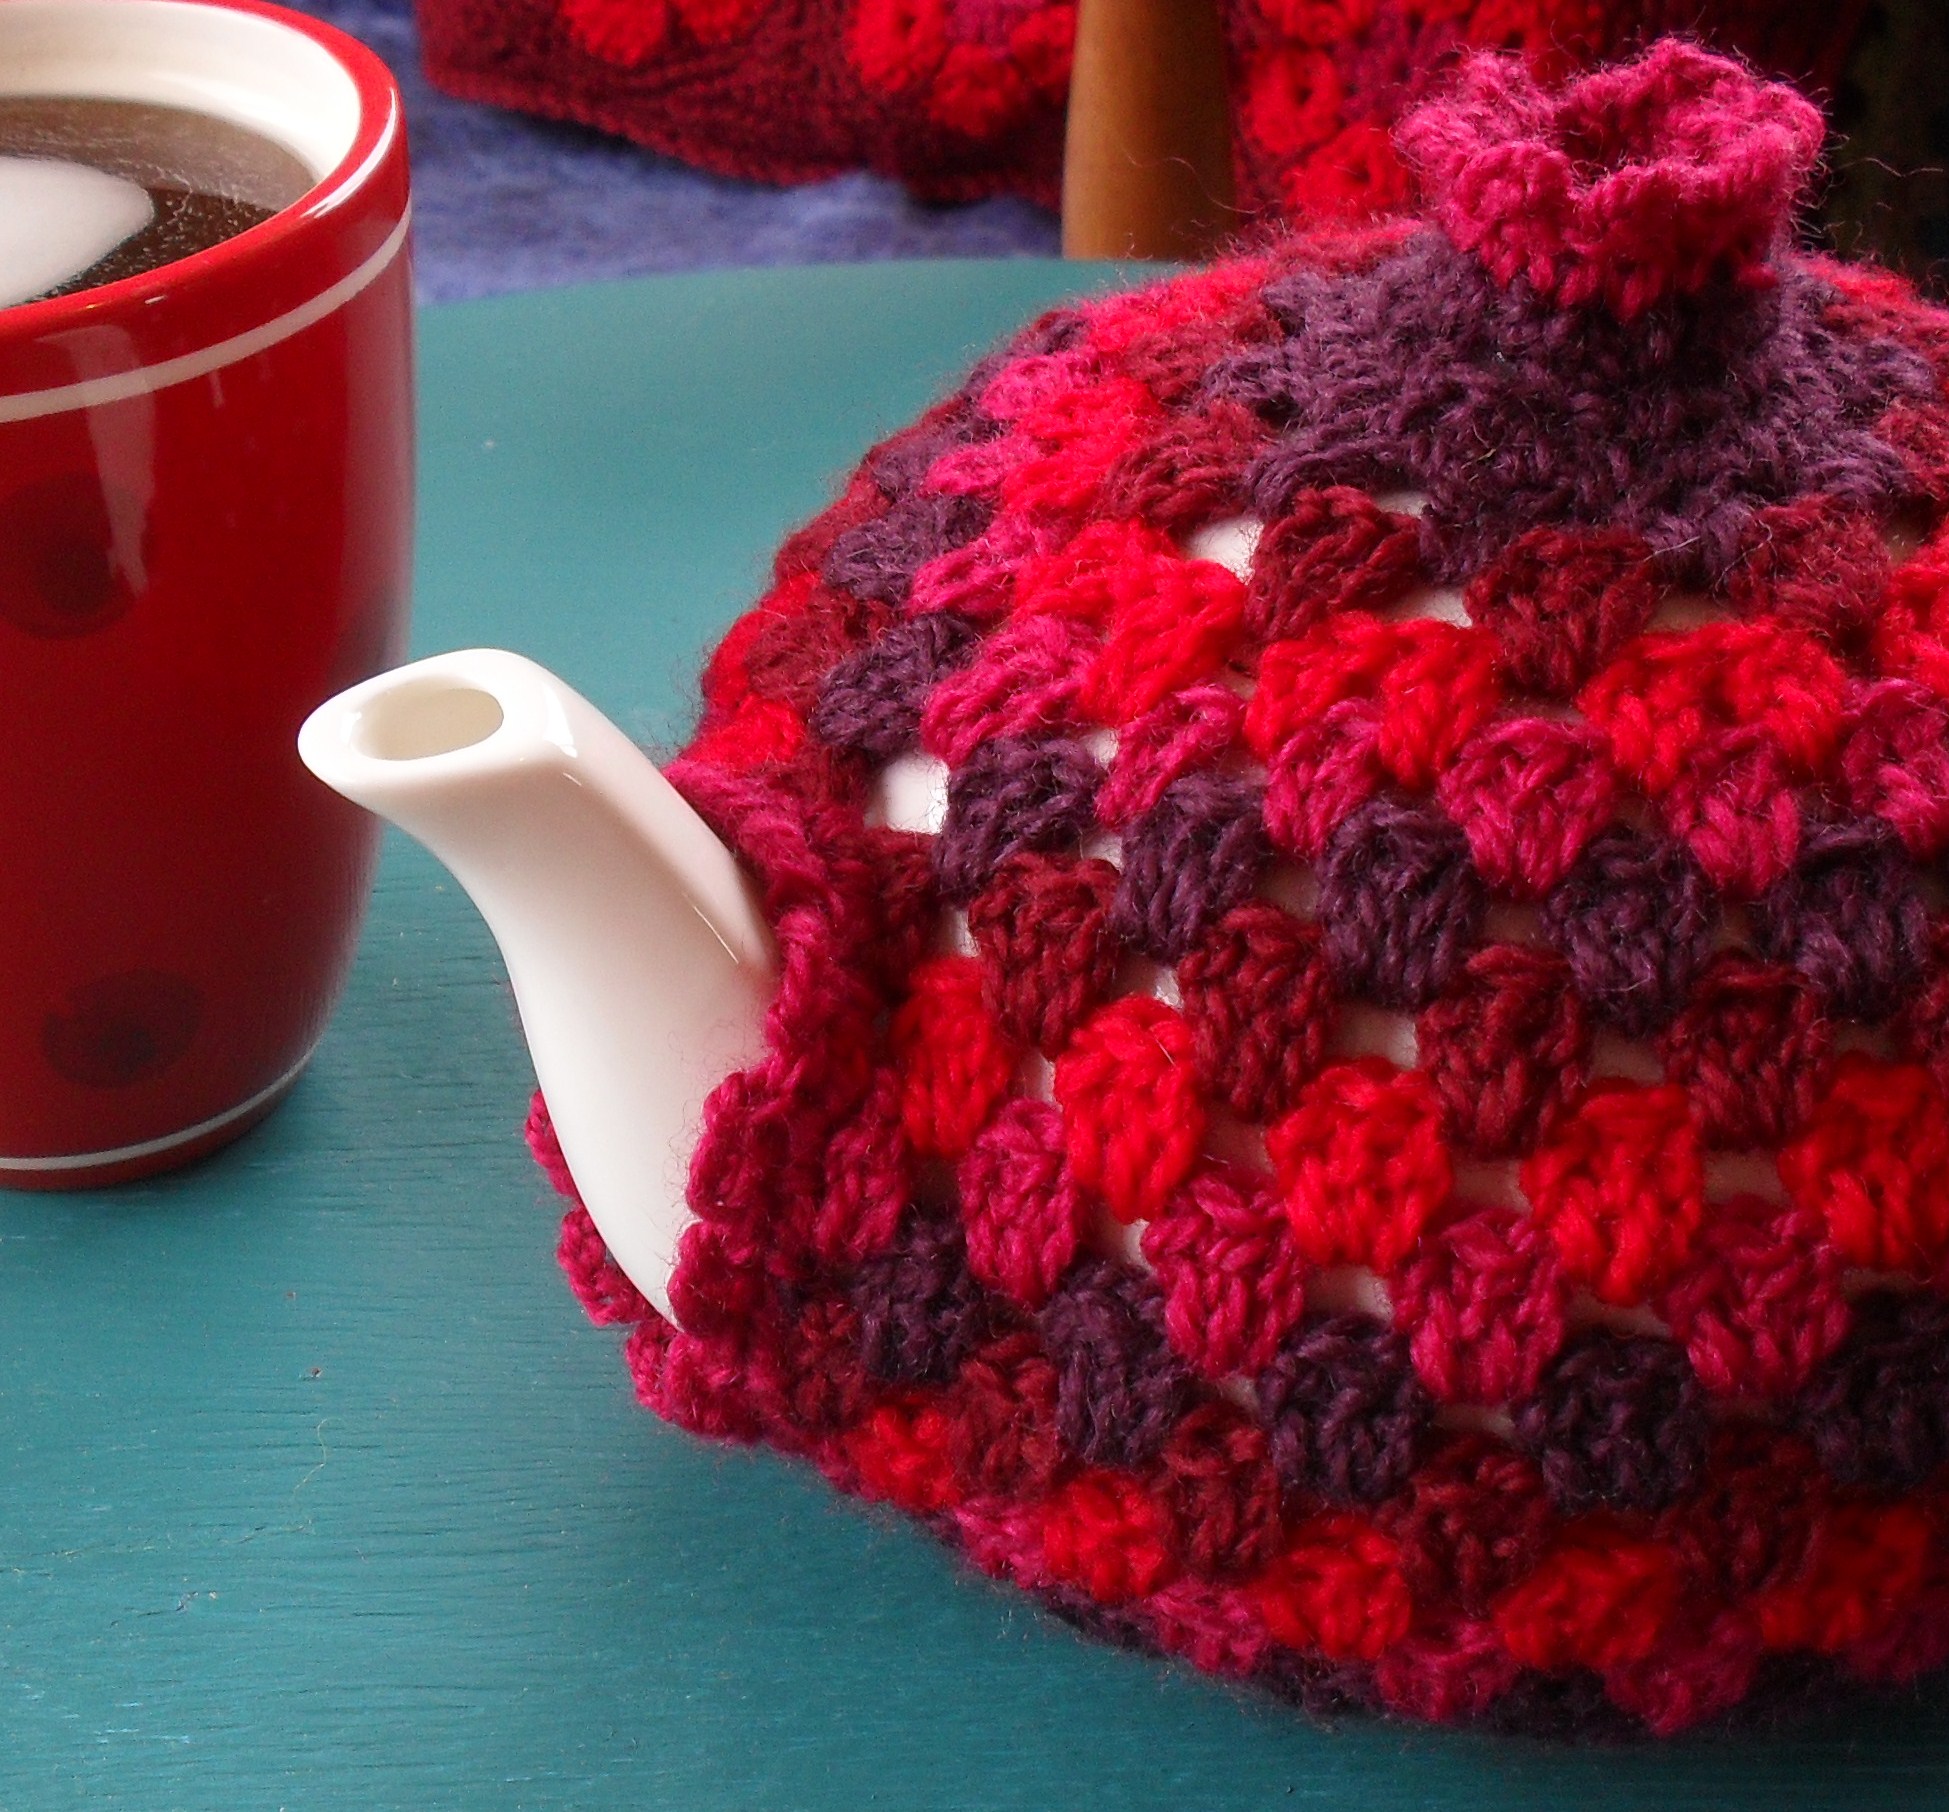
And a big ta-da to you!

No comments:
Post a Comment