Showing posts with label Crochet Kitchen. Show all posts

Saturday, July 16, 2011

Pot Holders

Make one african flower, but don’t make the last edge with dc.

Once you have made the flower, edge it with 1sc into each stitch, EXCEPT the “middle” (the tallest part of the petals) of each petal, make 2sc into this stitch.
When you have completed the round, join with a slst into the 1st sc, then ch3 and 2dc into the same stitch. Ch1 and skip 2 stitches and make 3dc into the next stitch, ch1, skip 2, make 3dc into next stitch and so on and so on until you have completed the round!
In the next round, change colour and join new colour with a slst into a 1ch space from previous round. Into the same space, make 2dc, ch1, 3dc. *Ch1, 3dc into next 1 ch space, ch1, 3dc into next 1ch space, ch1, into the next space 3dc, ch1, 3dc* Repeat ** until you have completed the round, then ch1 and join with a slst to the 3rd ch of original 3ch.
In easier-to-understand language, you want to make a “granny” (3dc cluster) twice, then 2 “grannies” each separated by 1 chain for this round.


For the next TWO rounds, join new colour with a slst into a 1ch space and ch3 (counts as 1dc) 2dc into same space. ch1, 3dc into next space and continue until the end of the round. ch1 and join with a slst to the 3rd ch of original 3ch.


You’ve just finished the front!!!
Now you need to make a back and I did this by making the typical dc circle. Make a magic ring , ch3, 11dc into ring and pull tight, join with a slst to the 3rd ch of original 3ch. ch3, dc into same stitch, 2dc into each stitch for the entire round, join with a slst to the 3rd ch of original 3 ch. ch3, dc into same stitch, dc into next stitch, 2dc into next stitch….. until end of round, join with a slst to the 3rd ch of original 3ch. Continue in this fashion, each round increasing the number of single dc’s between 2dc’s as the circle grows. e.g. next round will be 2dc into one stitch, 1dc into next two stitches…. next round will be 2dc into one stitch, 1 dc into next 3 stitches… until the back is the same size as the front.

Now hook them together with a 4mm hook! I used sc and at the end of the round join with slst to the first sc. Now ch1 and slst into the next stitch, into the next stitch make 1sc, 1hdc, 1sc, slst into the next 2 stitches, then into the next stitch, make 1sc, 1hdc, 1sc…. continue until end of round. Now ch as many stitches as you want to make the hanging loop (I did 6) and slst into the same stitch to join the loop.
And there you have it! Weave in those ends and voila!


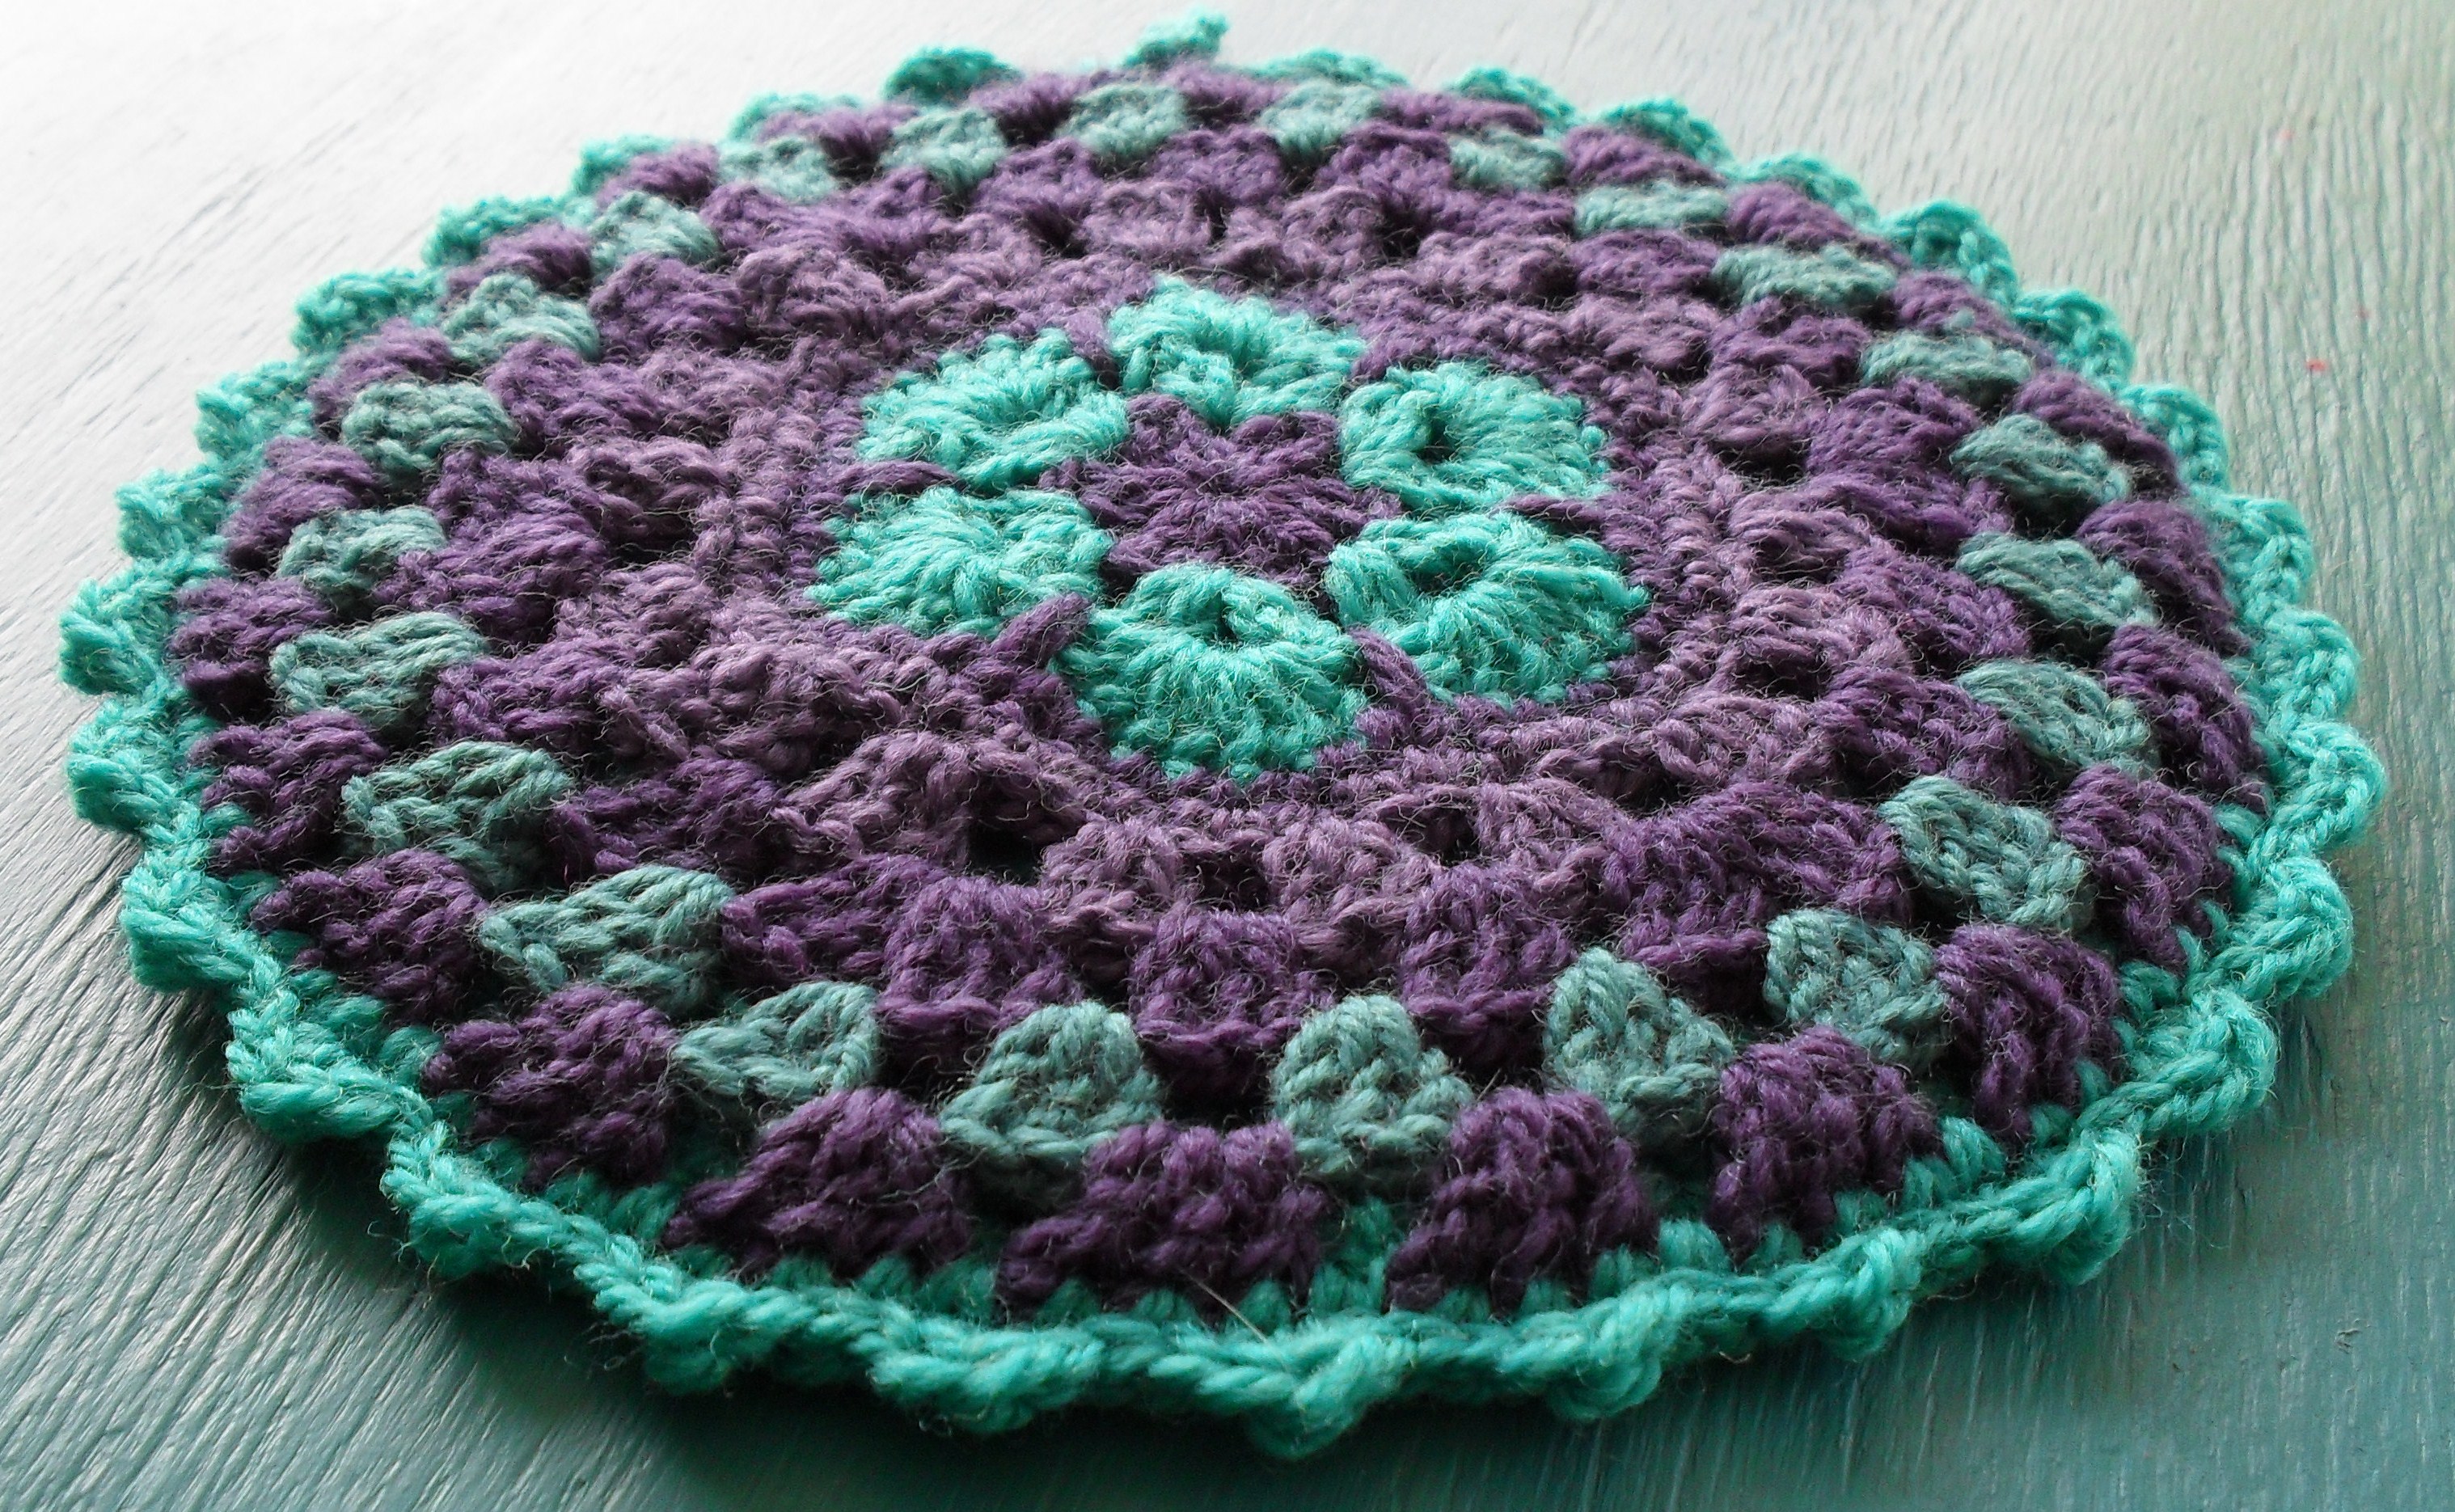
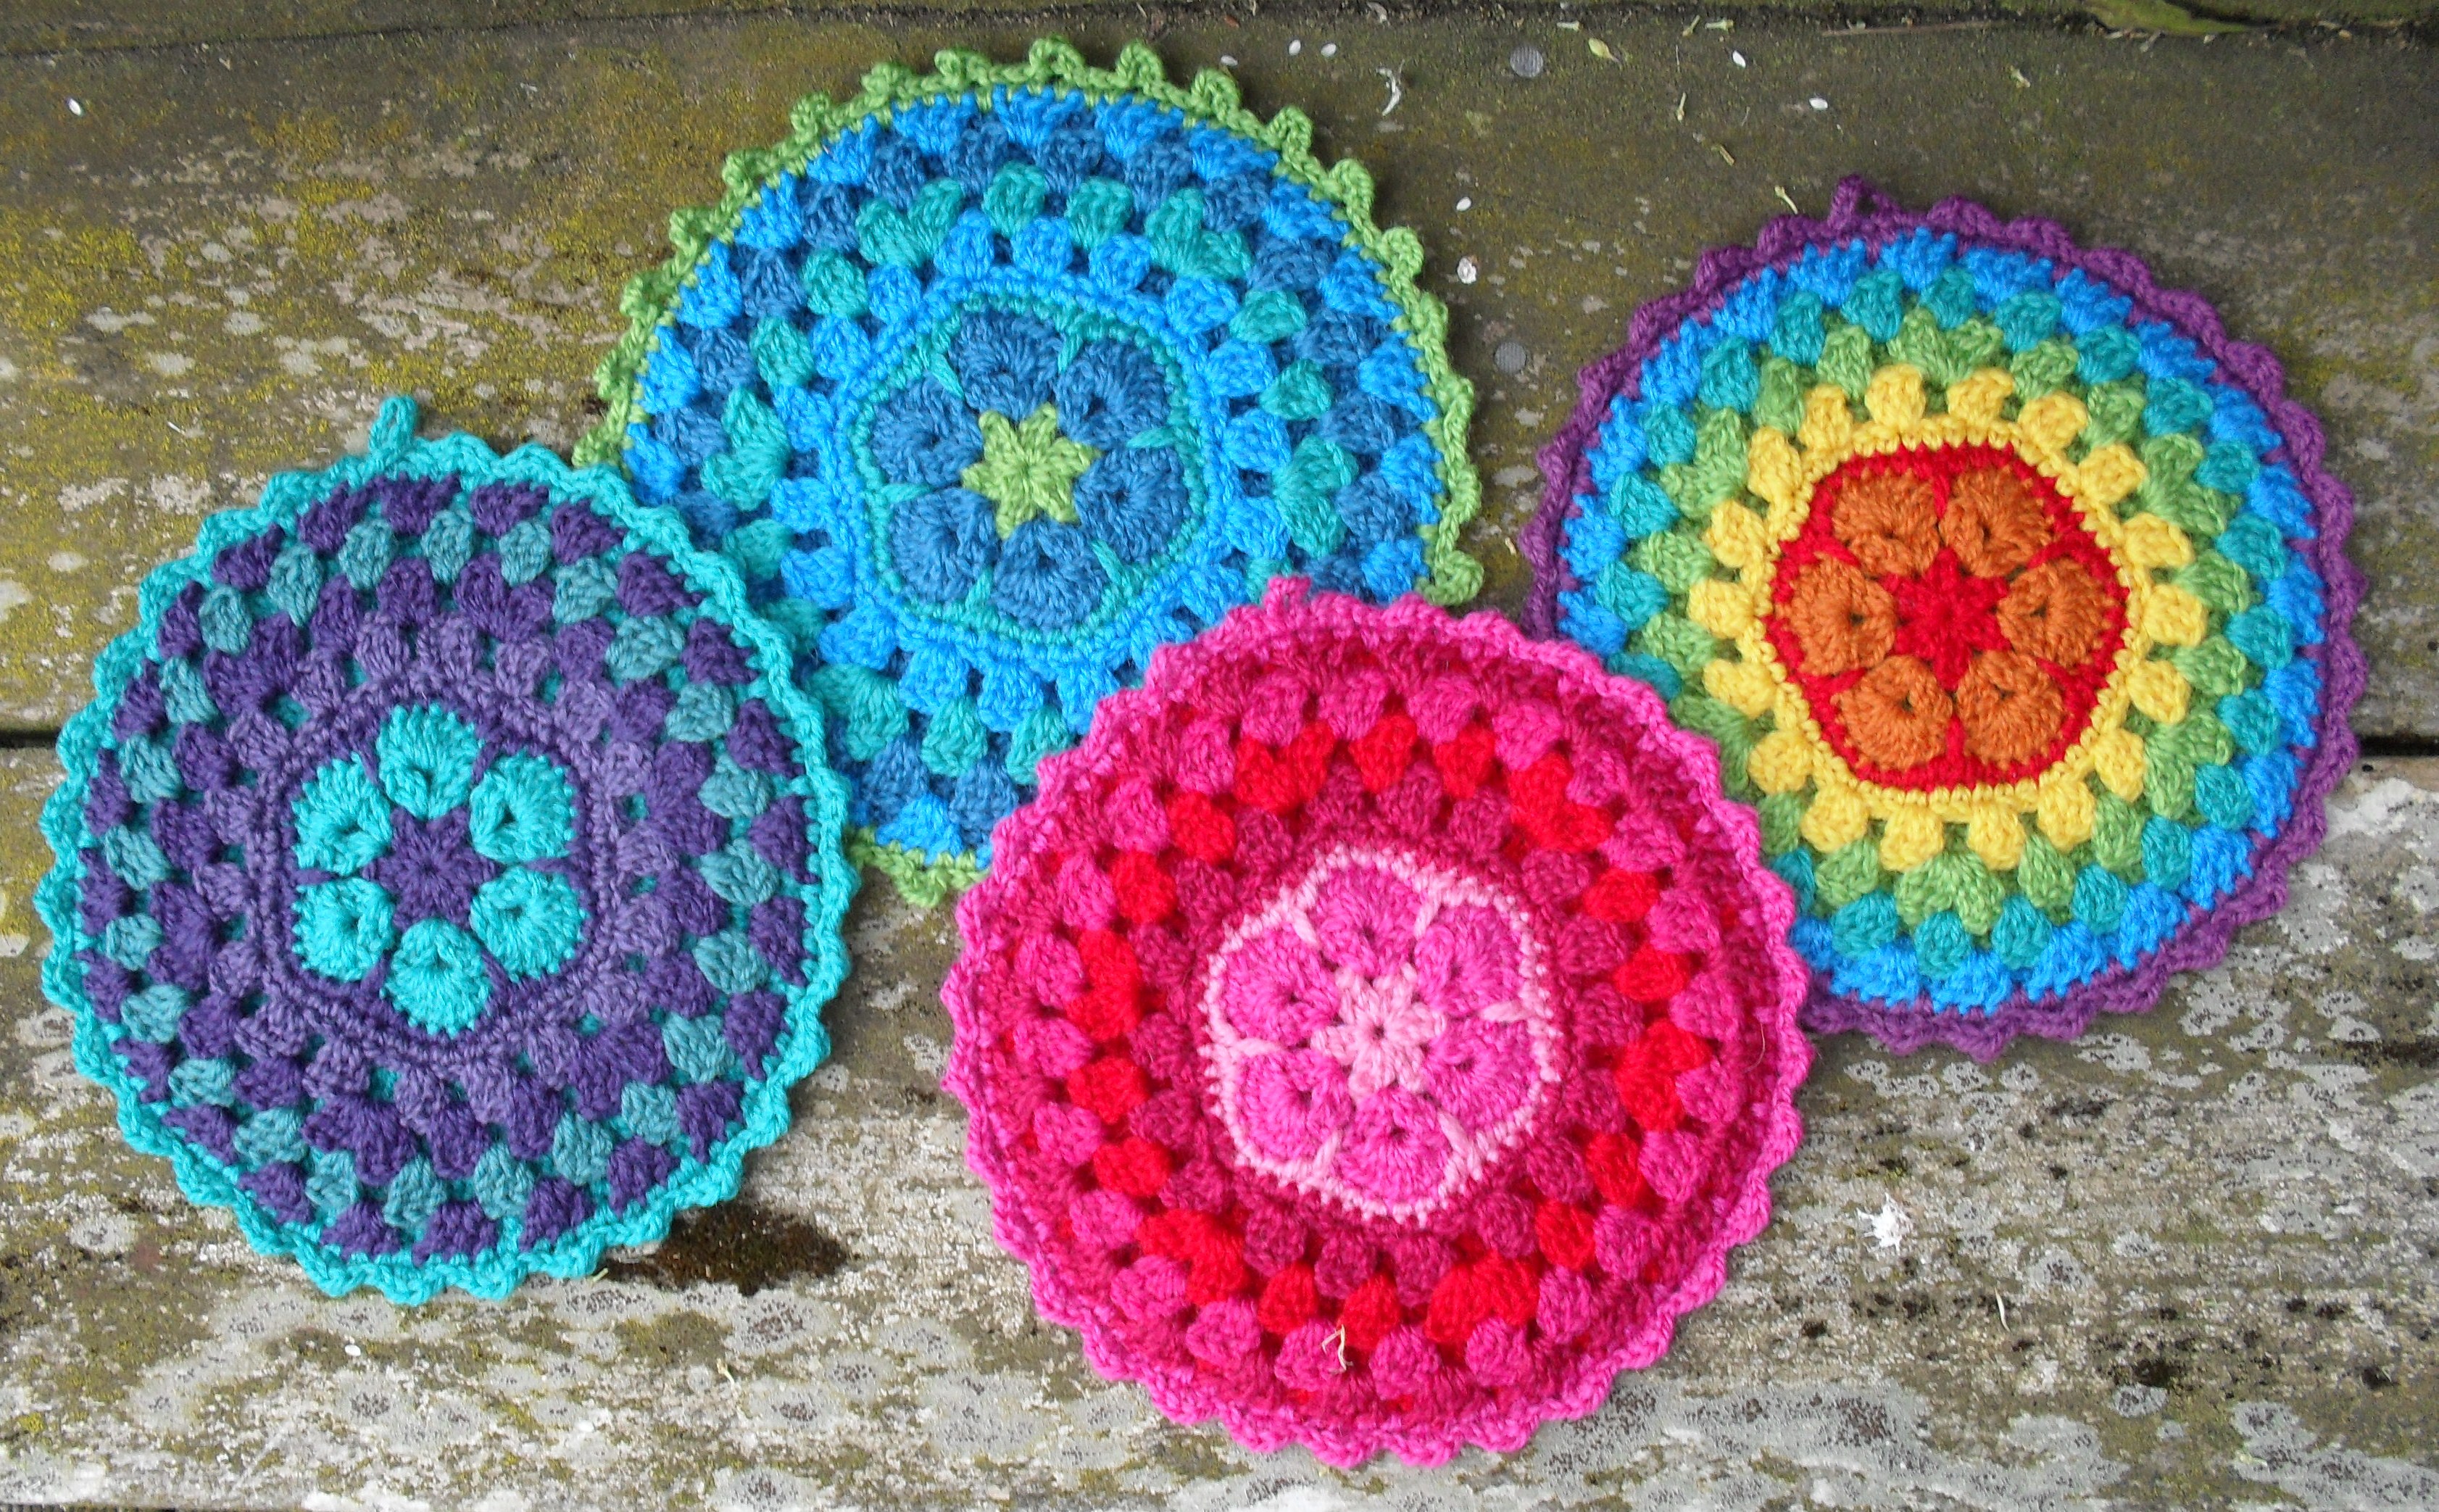
Like these….
And this…..

And of course, a rainbow….


African Flower Hexagon Crochet Tutorial

Estos patrones se publicaron originalmente en una revista sudafricana, y las diseñadoras son Lounette Fourie y Anita Roussouw.
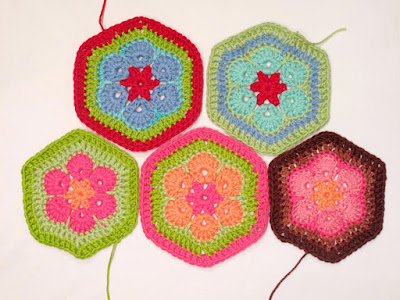
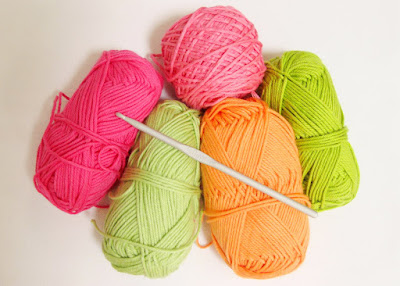


You will need several colours of yarn and a size 5mm crochet hook.

Necesitarás hilos de varios colores y una aguja de crochet de 5mm.


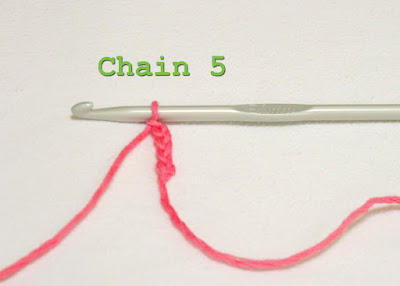
Start by making a slip knot, and make 5 chain stitches.

Empieza haciendo un nudo corredizo y realiza 5 puntos cadena.
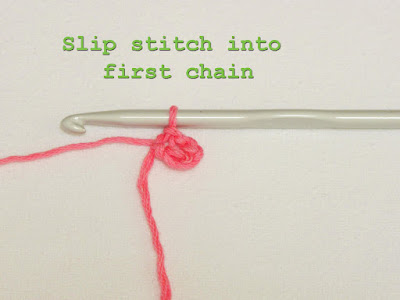
Slip stitch into the first chain, to make a ring. If you are not sure how to do this, please look at this post.
Haz un punto enano en la primera cadena para formar un anillo. Si no estás segura de cómo hacerlo, por favor mira este post.
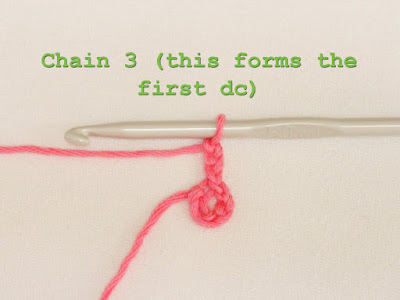
Chain 3 (this will form the first dc).

Cadena 3 (esto formará el primer punto alto o vareta)
.

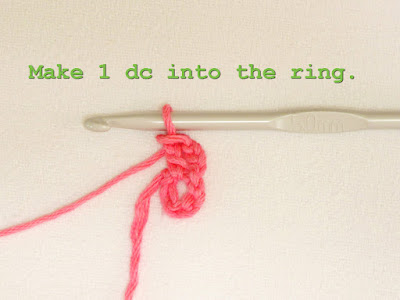
Make a dc into the ring. Your work should look like the pic above.

Haz un punto alto en el anillo. Tu trabajo debe ser similar a la fotografía de arriba.

Chain 1.

Cadena 1
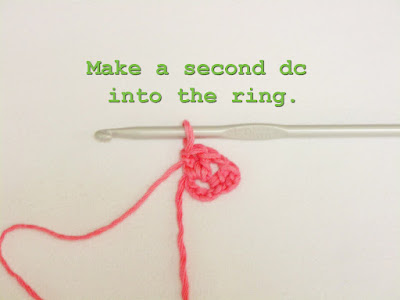
Make 2 dc into the ring. You should now have 4 dc's separated by a chain stitch.

Haz 2 puntos altos en el anillo. Ahora deberías tener 4 puntos altos separados por una cadeneta.
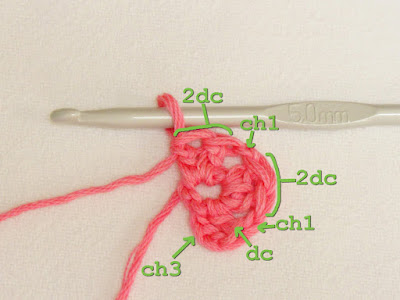
Repeat, until you have six x (2dc, ch,2dc) sets.

Repite el proceso hasta tener seis series de puntos de cruz (2 puntos altos, punto cadena, 2 puntos altos).
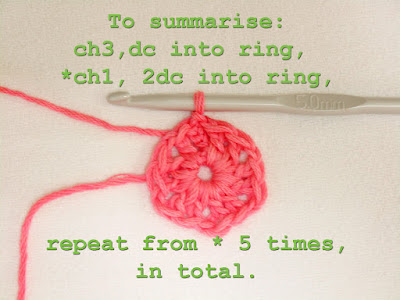
Slip stitch into the third chain of your initial 3chain, made at the beginning of the round.

Haz un punto enano en la tercera cadena de tu cadena 3 inicial, hecha al inicio de la vuelta.

Cut yarn, join a new colour.

Corta el hilo, agrega un color nuevo.

Insert hook into the space just to the right of the 3ch leg from the previous round. Yarn around hook, pull yarn through, ch3.
Introduce la aguja en el espacio que está a la derecha de los 3 puntos cadena de la vuelta anterior. Con el hilo alrededor de la aguja, jálalo a través de los 3 puntos cadena.
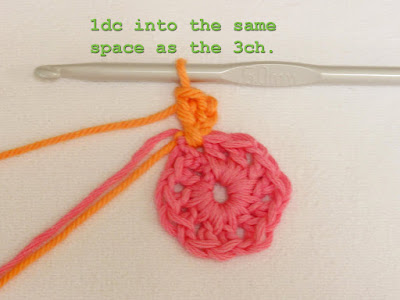
1dc into the same space.

1 punto alto en el mismo espacio.
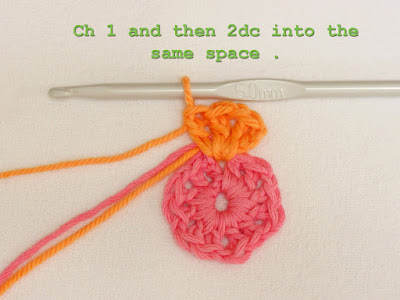
Ch1 and the make 2dc into the same space again. Your work should look like the pic above.

Haz 1 punto cadena y luego realiza 2 puntos altos en el mismo espacio nuevamente. Tu trabajo debe ser similar a la fotografía de arriba.
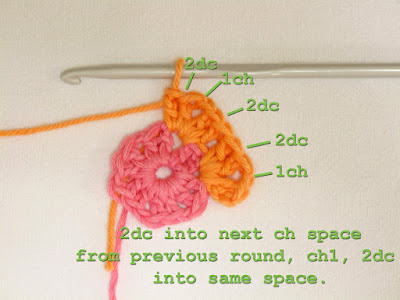
Repeat the previous steps into the next chain space from the previous round, as seen above.

Repite los pasos anteriores en el próximo espacio de la cadena de la vuelta anterior, ver arriba.
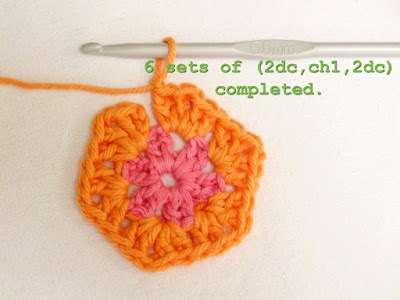
Continue with these repeats until you have six sets of 2dc,ch1,2dc.

Continúa con la repetición de estos pasos hasta tener una serie de 2 puntos altos, 1 punto cadena, 2 puntos altos.

Join to the third chain stitch with a slip stitch, to close the round.

Une al tercer punto cadena con un punto enano para completar el círculo.
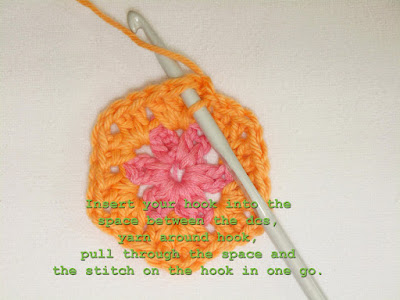
Insert your hook into the space created by the chain stitch between the 2dc 's, as seen above.

Introduce la aguja en el espacio creado por el punto cadena entre los 2 puntos altos, ver arriba.
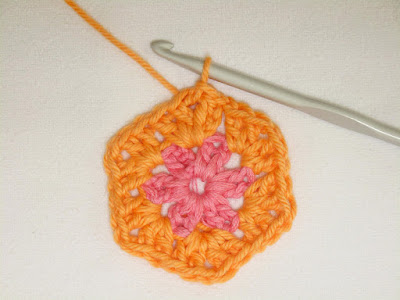
Round joined...

Vuelta completa
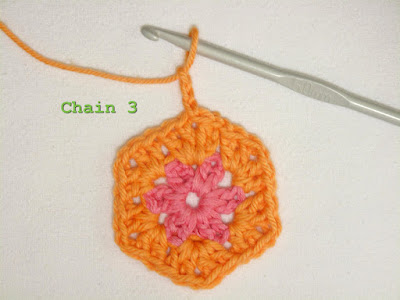
Chain 3. This again is taking the place of the first dc, and you count it as 1 dc stitch.

Cadena 3. Nuevamente, esto toma el lugar del primer punto alto, y lo consideras como 1 punto alto
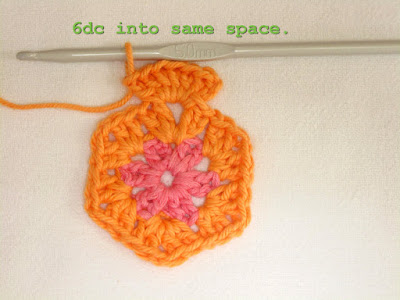
Make 6 further dc into the same space. There should be 7 dc's...

Haz 6 puntos altos adicionales en el mismo espacio. Debe haber 7 puntos altos…
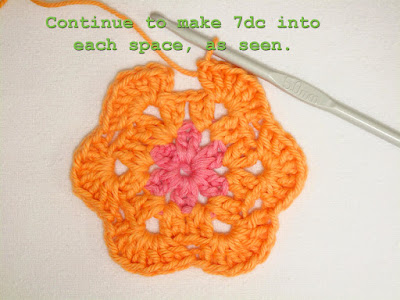
Repeat the same into each space, as above.

Repite el mismo procedimiento en cada espacio, como se muestra arriba.
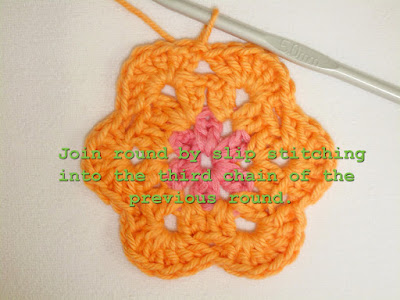
Join round by slip stitch (getting the hang of this :) )

Cierra el círculo con un punto enano (vamos dominando el proceso :) )
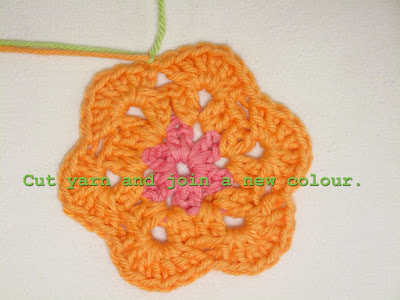

Cut yarn, and join new colour.

Corta el hilo, y agrega un color nuevo
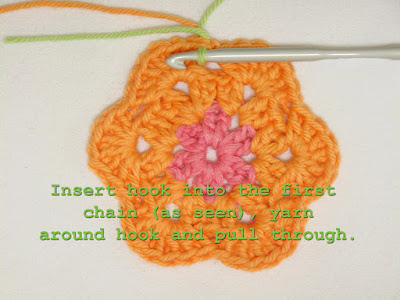

Insert hook into the first chain stitch space, yarn around hook, pull yarn through. Yarn around hook again, pull through the stitch on the hook.

Introduce la aguja en el espacio de la primera cadena de puntos, jala el hilo de la aguja. Con el hilo en la aguja nuevamente, jálalo a través del punto en la aguja.
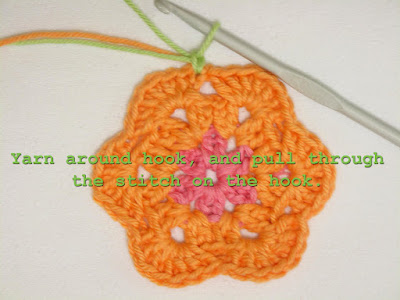
You have made the first sc into the first chain loop.

Haz realizado el primer punto bajo en la primera cadena de hebras.
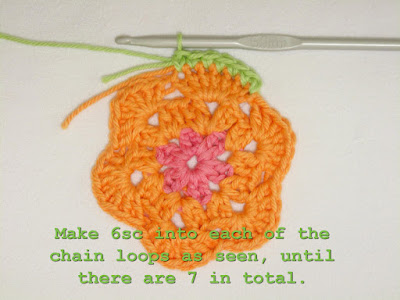
Repeat 6 times more (sc into every successive chain loop, until there are 7 sc in total).

Repite el proceso 6 veces más (punto bajo en cada hebra sucesiva de la cadena, hasta que haya 7 puntos bajos en total).

You will now do a dc , into the 3rd round space as seen in the pic.This will make a very long dc stitch, but will help to shape the flower petal.

Ahora, realiza un punto alto en el espacio de la tercera vuelta, tal como se muestra en la fotografía. Esto producirá un punto alto muy largo, pero ayudará a dar la forma de pétalo de una flor.
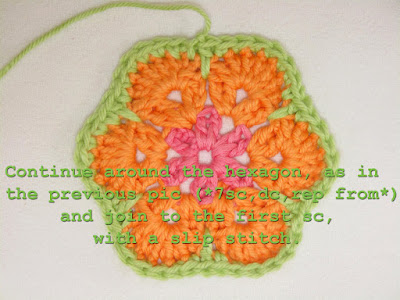

Continue to work you way around the hexagon...7sc, dc, 7sc, dc etc, until you get back to the beginning...as always, join the round by slip stitch into the first sc.

Continúa trabajando alrededor del hexágono…7 puntos bajos, punto bajo, 7 puntos bajos, punto bajo, etc., hasta que vuelvas al inicio… como es habitual, cierra el círculo con un punto enano en el primer punto bajo.
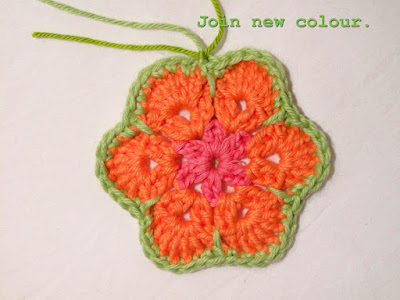
Cut yarn and join a new colour.

Corta el hilo y agrega un color nuevo
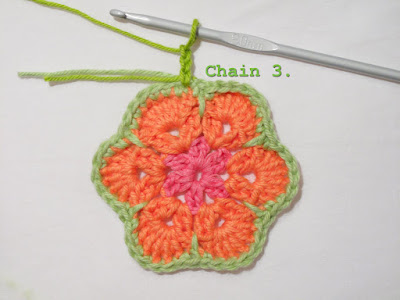
Chain 3.

Cadena 3.
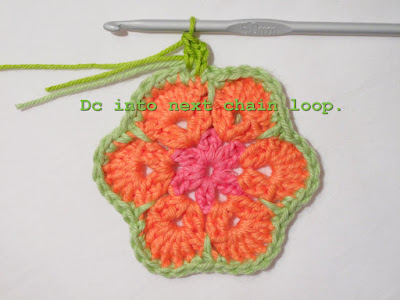
Dc into the next loop of the sc you made in the previous round. Repeat until you have 4dc made.

Haz un punto alto en las hebras del punto bajo que hiciste en la vuelta anterior. Repite el proceso hasta que hayas hecho 4 puntos altos.
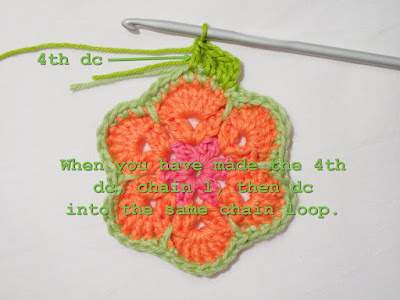

You will now have reached the middle of the top of the flower petal. Ch1, then make another dc into the same space as the previous dc. It is this chain that helps to form the hexagon shape.

En esta instancia, has llegado a la mitad de la parte superior del pétalo de la flor. Haz 1 punto cadena, luego haz otro punto alto en el mismo espacio que el punto alto anterior. Es esta cadena la que ayuda a formar la figura del hexágono.
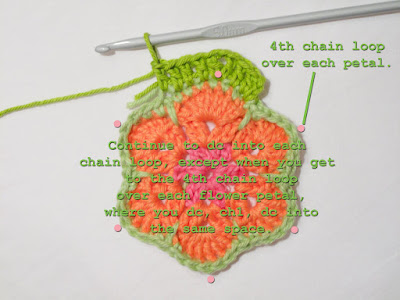

I have marked the middle stitch with a pink dot, so that you can clearly see where the dc,ch,dc has to be made, over each petal. Work your way around the hexagon, working in the above pattern.

He marcado la zona media con un punto rosado, de manera a que puedas ver claramente donde se deben realizar el punto alto, el punto cadena y el punto alto sobre cada pétalo. Continúa trabajando alrededor del hexágono, utilizando el patrón de arriba.
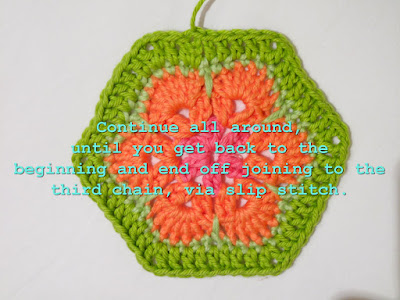

Join the last dc to the 3rd chain of the beginning leg, as in the previous rounds.

Une el último punto alto a la tercera cadena del inicio de la serie, como en las vueltas anteriores.


If you prefer, you can add another round in a different colour. This extra round is worked in exactly the same way as the previous round, again making a dc,ch1,dc, over the middle of the petal...
Hope this makes sense...
 

Tea Cozy

Foundation Row: Ch 72. sc into 2nd chain from hook, sc to end of row. Turn. Ch3, skip the first two stitches and make 3dc into the next stitch. *skip 2 stitches, 3dc into next stitch* repeat ** until end of row, 1dc into last stitch in foundation chain. Fasten off.
Row Two: Fold the piece in half and find the centre point. Join new colour into the space either side of the centre point, between the dc clusters of the first row using slst and ch3 (counts as 1dc) 2dc into the same space, 3dc into each of the next spaces along the row until the end, 1dc into the end space. Fasten off. Repeat on the other side.


The intention, is to make a piece of granny stripe with a gap in the middle which is where the spout will sit!
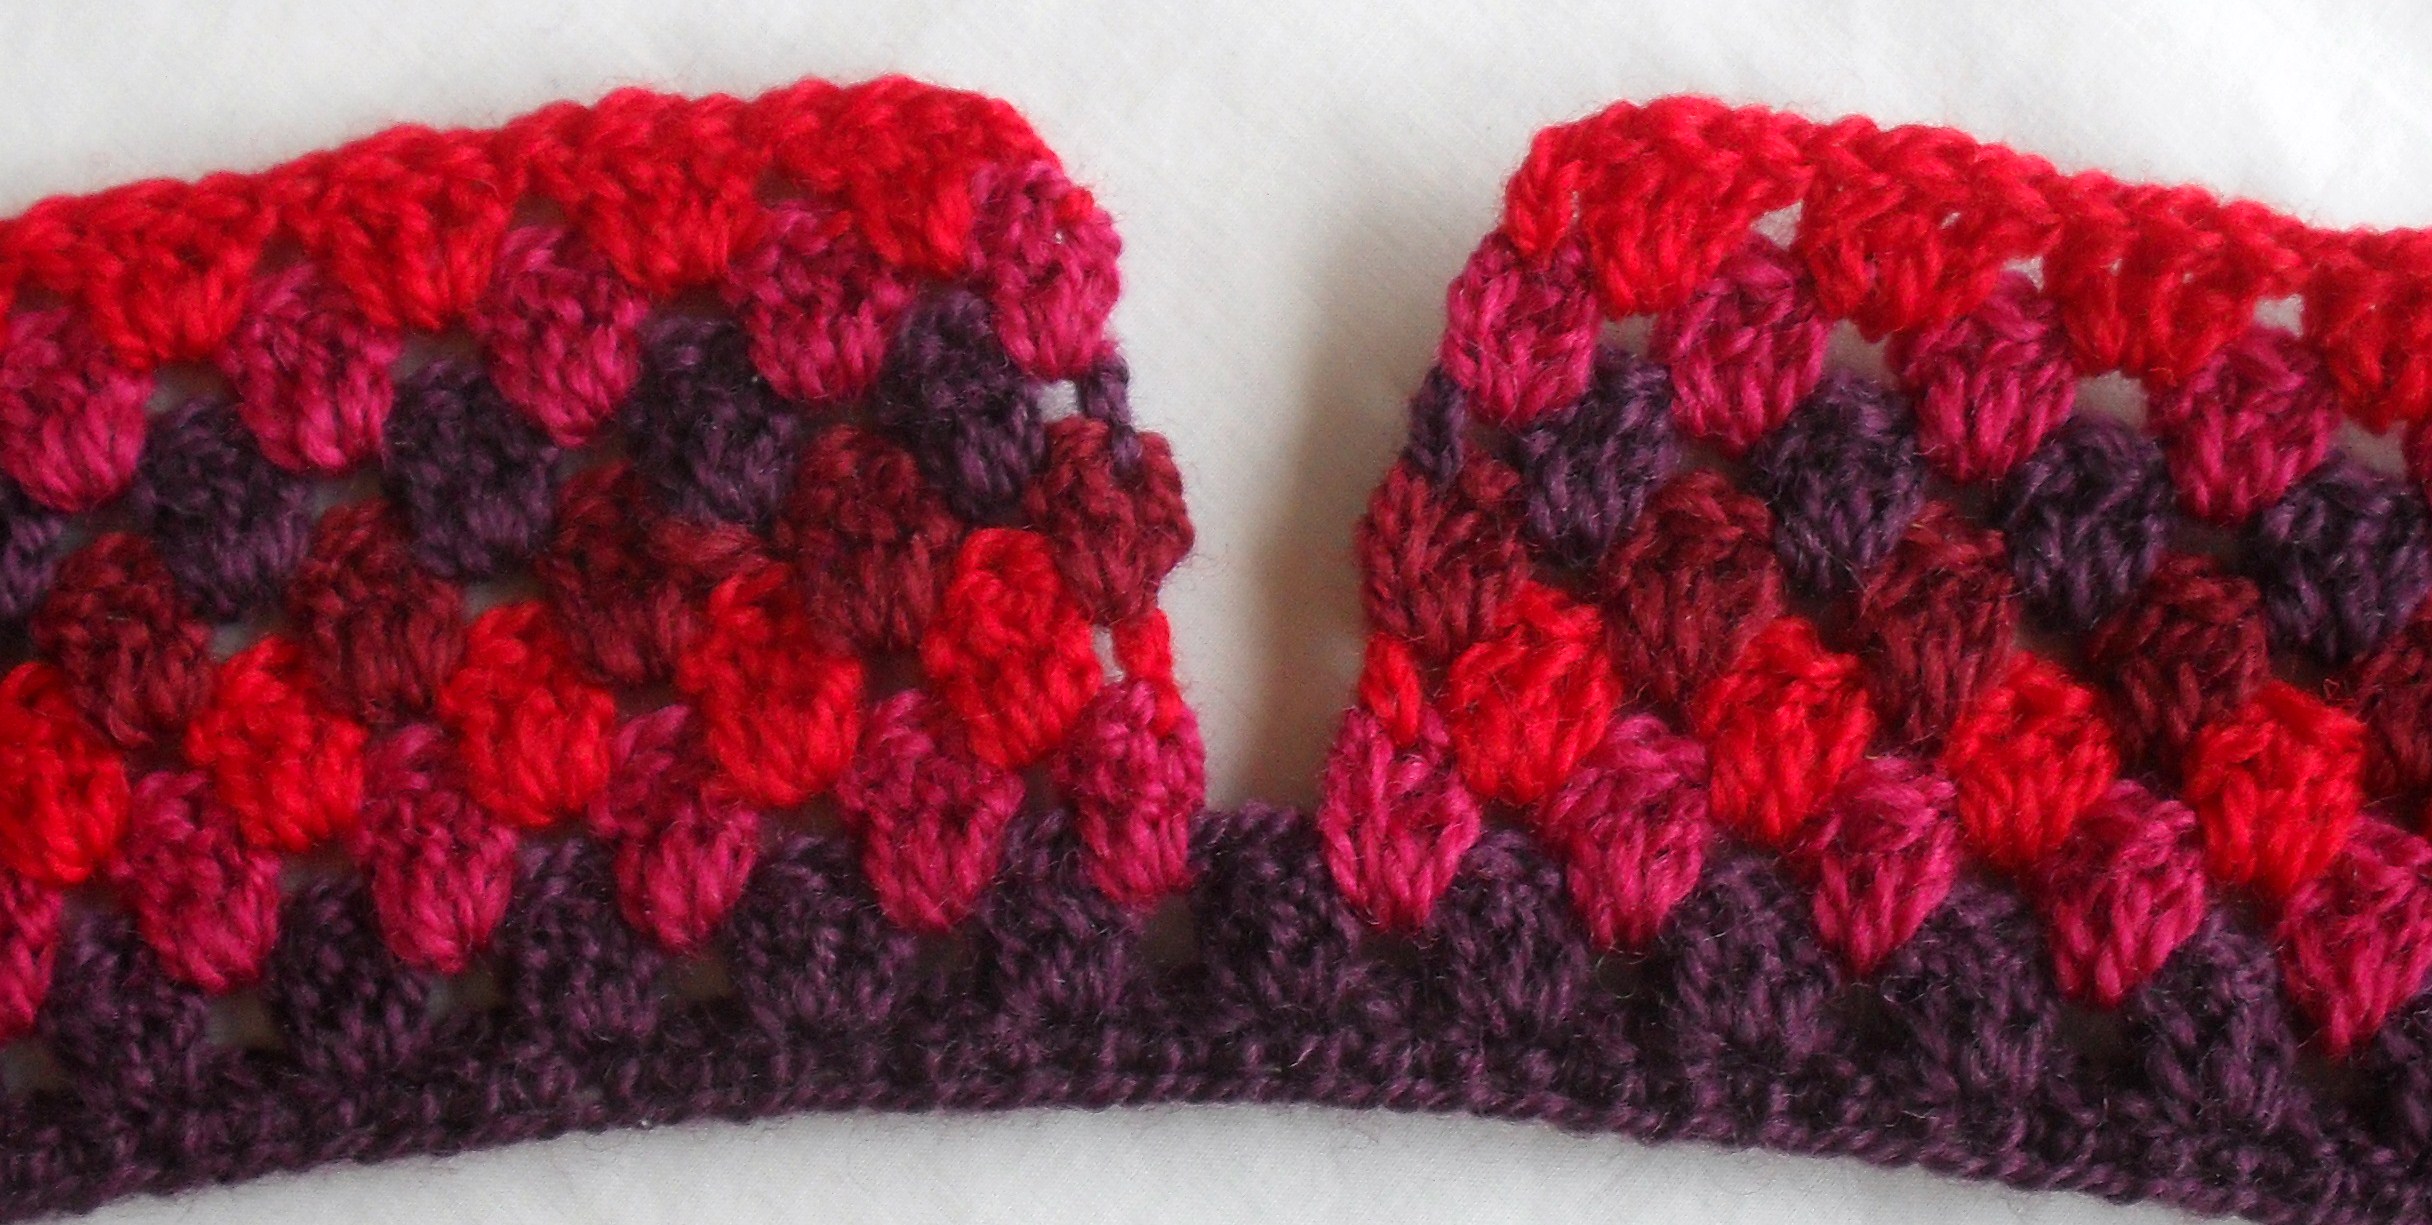
Carry on with these instructions until you have reached the top of the spout and handle.  This tea pot needed seven rows in total, including the foundation row… have a good look at this next picture which shows you these seven rows, you will see that each alternating row begins with a 3dc cluster, and the ones between begin with a chain space. This is important because we want to keep the edges straight instead of veering off into a slope!

So you’re joining the new rows between the dc’s there… it looks a bit unfinished at this stage, but don’t forget we will be edging all of the edges with some pretty, yet charmingly discrete frills! 

Joining the sides: when you have reached the top of the spout and are ready to join the sides to make a circle, join the next colour with a slst in the gap closest to the edge, ch3 (counts as 1dc) and make 2dc into the same space, 3dc into each space until you reach the spout edge. Into the very edge gap, make 2dc, then join the two by making 2dc into the very edge space on the other side. Make sure you make this nice and tight, and don’t have a big saggy stitch in between these two 2dc’s. Carry on around the row making the 3dc clusters until you reach the other edge, join the two edge 3dc clusters with a slst into the 3rd ch of original 3ch and fasten off.
JOINED!

Decreasing: So if you have a tea pot like mine, the decrease will be quite important here, if yours is taller and not so flat on the top, just carry on making the 3dc clusters into each space until you need to decrease. For the next row, join the next colour with a slst and make 3dc clusters right around the row, in each space EXCEPT the spaces where you joined the spout and handle edge, just leave them empty. At end of row, join with a slst.

Next row, join new colour, we are decreasing a lot in this row, so once again, please ensure that you are making these stitches nice and tight and that the spaces between the dc’s are tight and not floppy and loose! OK, so you’ve joined the next colour, ch3 (counts as 1dc) 2dc into same space, into the next space, make 2dc, into the next space 2dc, into the next space 3dc. Repeat sequence of 3dc, 2dc, 2dc until end of row, join with a slst.
Next row, join new colour with a slst, ch3 (counts as 1dc) 1dc into same space, into each space make 2dc until end of round, join with a slst.
Next row, join new colour with a slst, make 3dc cluster into every SECOND space until end of the row, join with a slst.
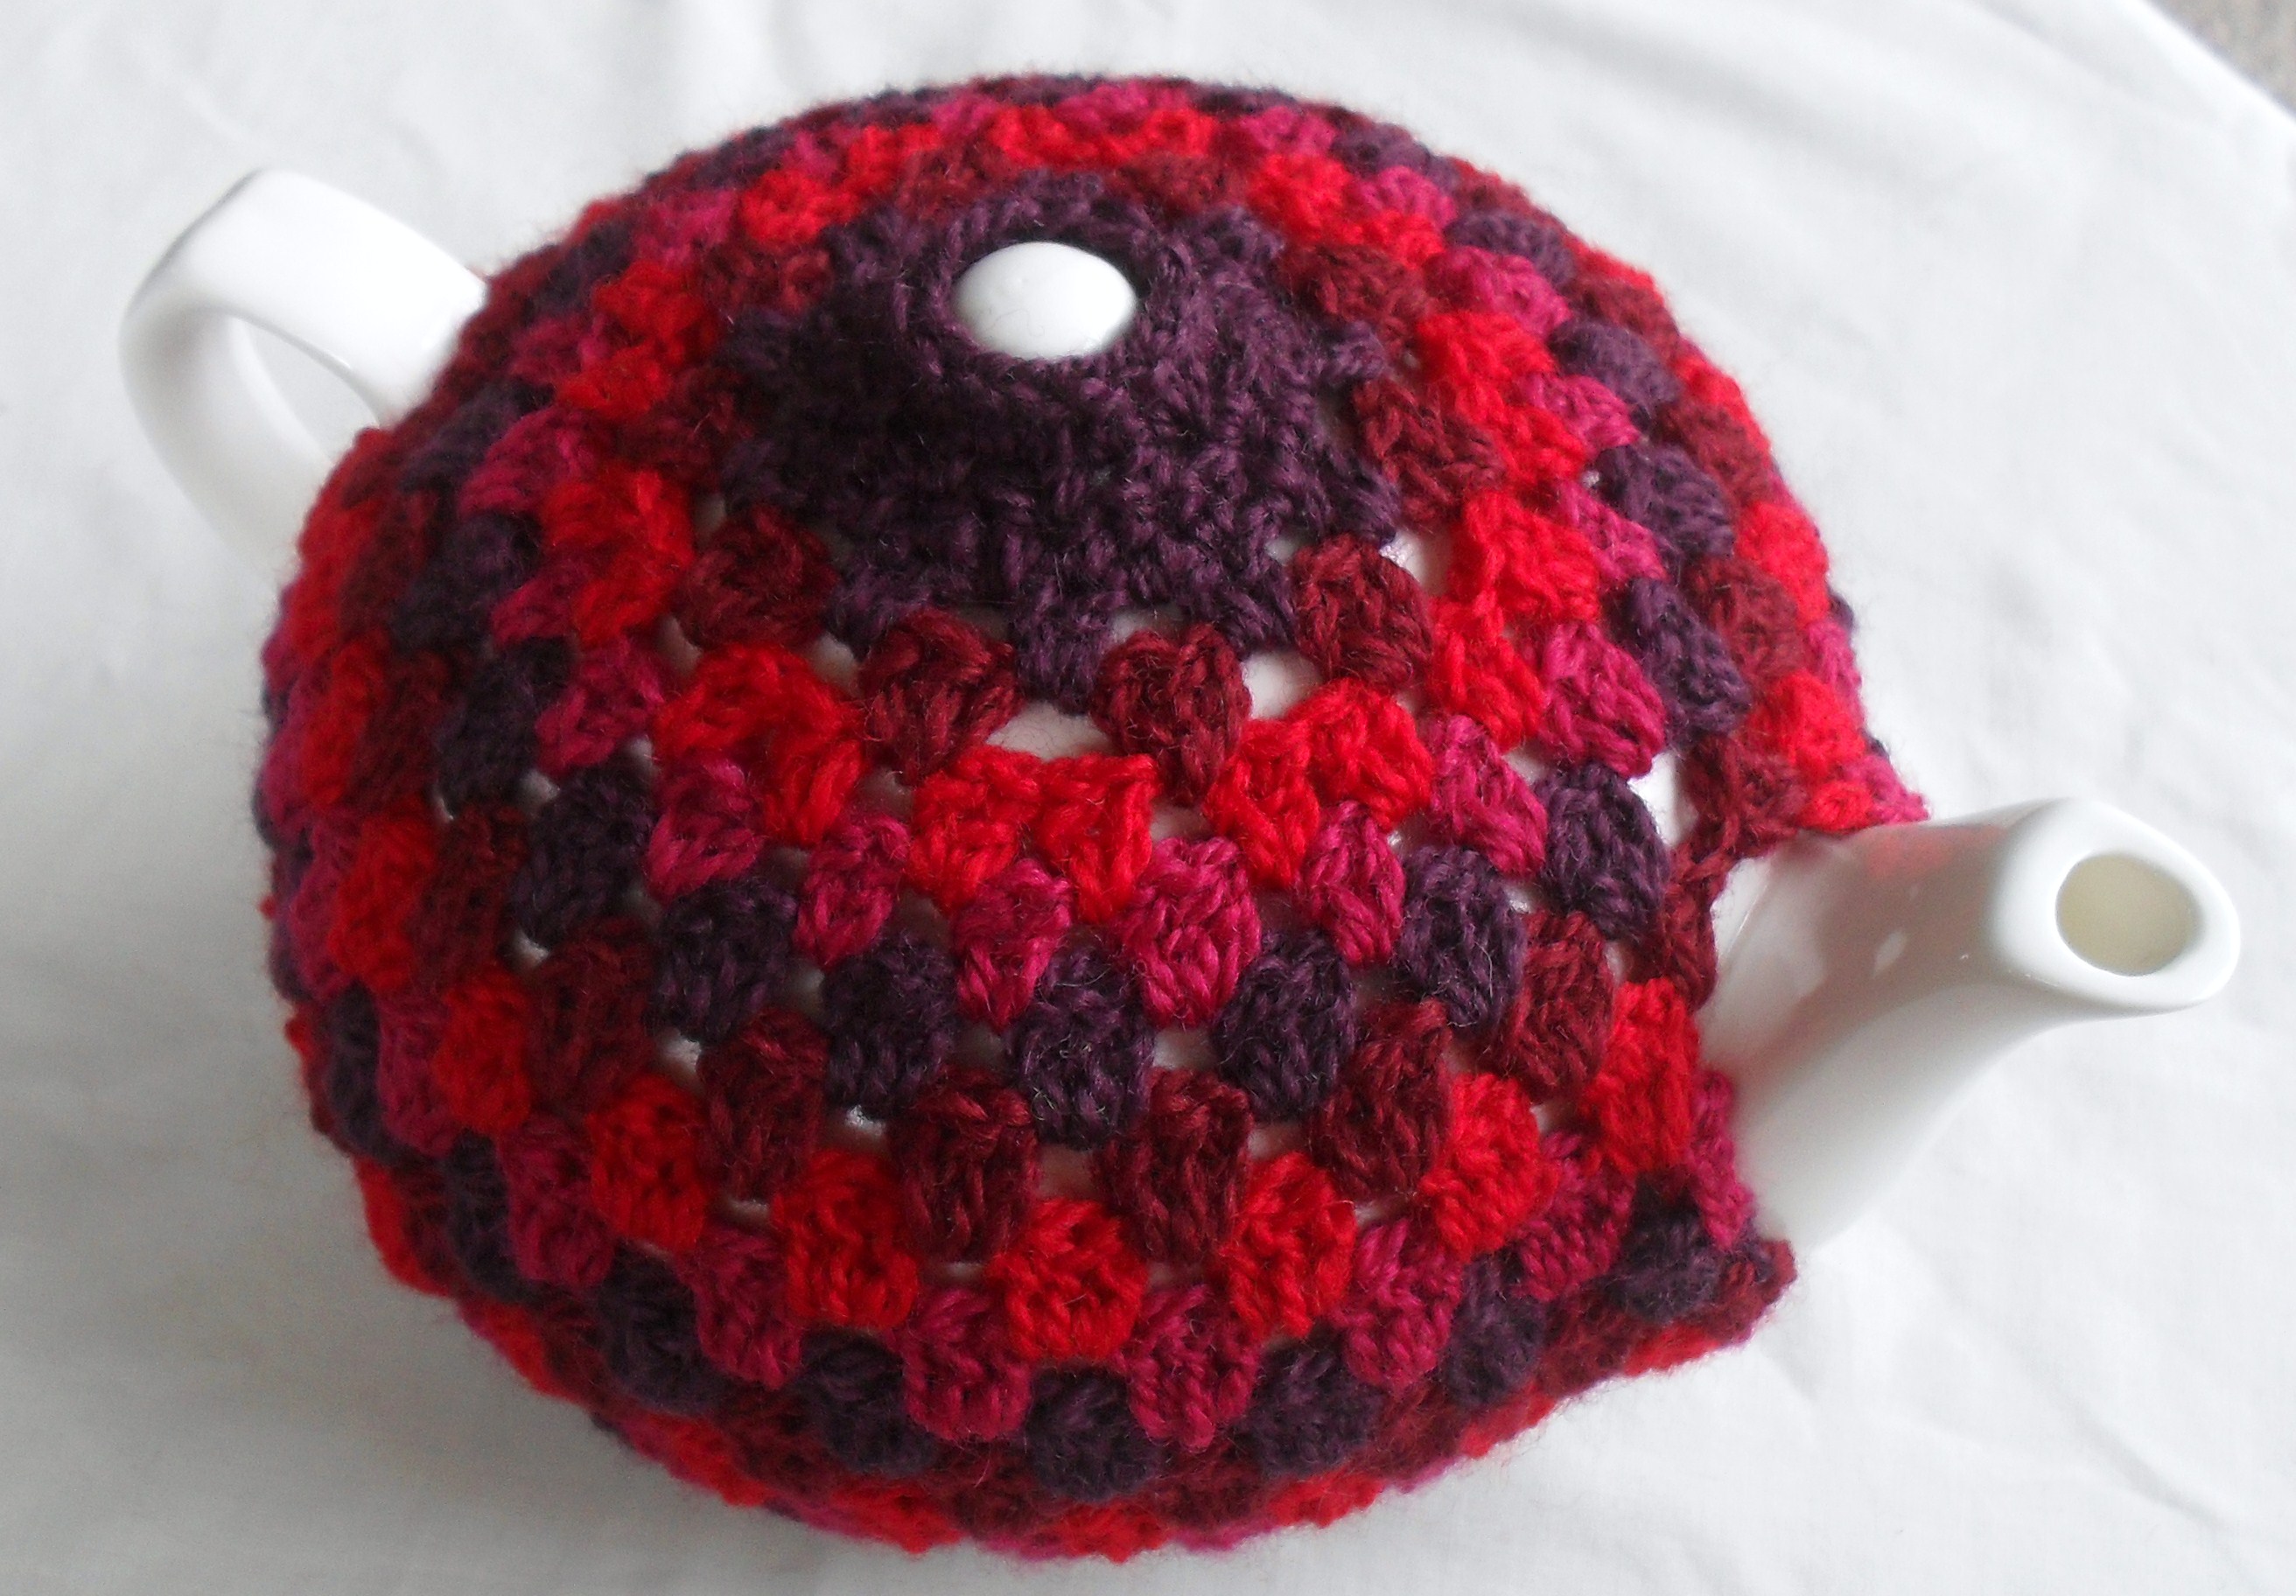
Next row, join new colour with a slst, make 2dc into every space until end of round, join with a slst. Do not fasten off. You are now going to shape the area around the knob, so ch1, 1hdc into each stitch until and of round, join with a slst. Ch1, make 1hdc into every second stitch from previous round, (decreasing here) join with a slst. Ch1, 2hdc into 1st stitch, 1hdc into next, 2 into next, 2 into next, repeat until end of round and join with a slst. Fasten off.

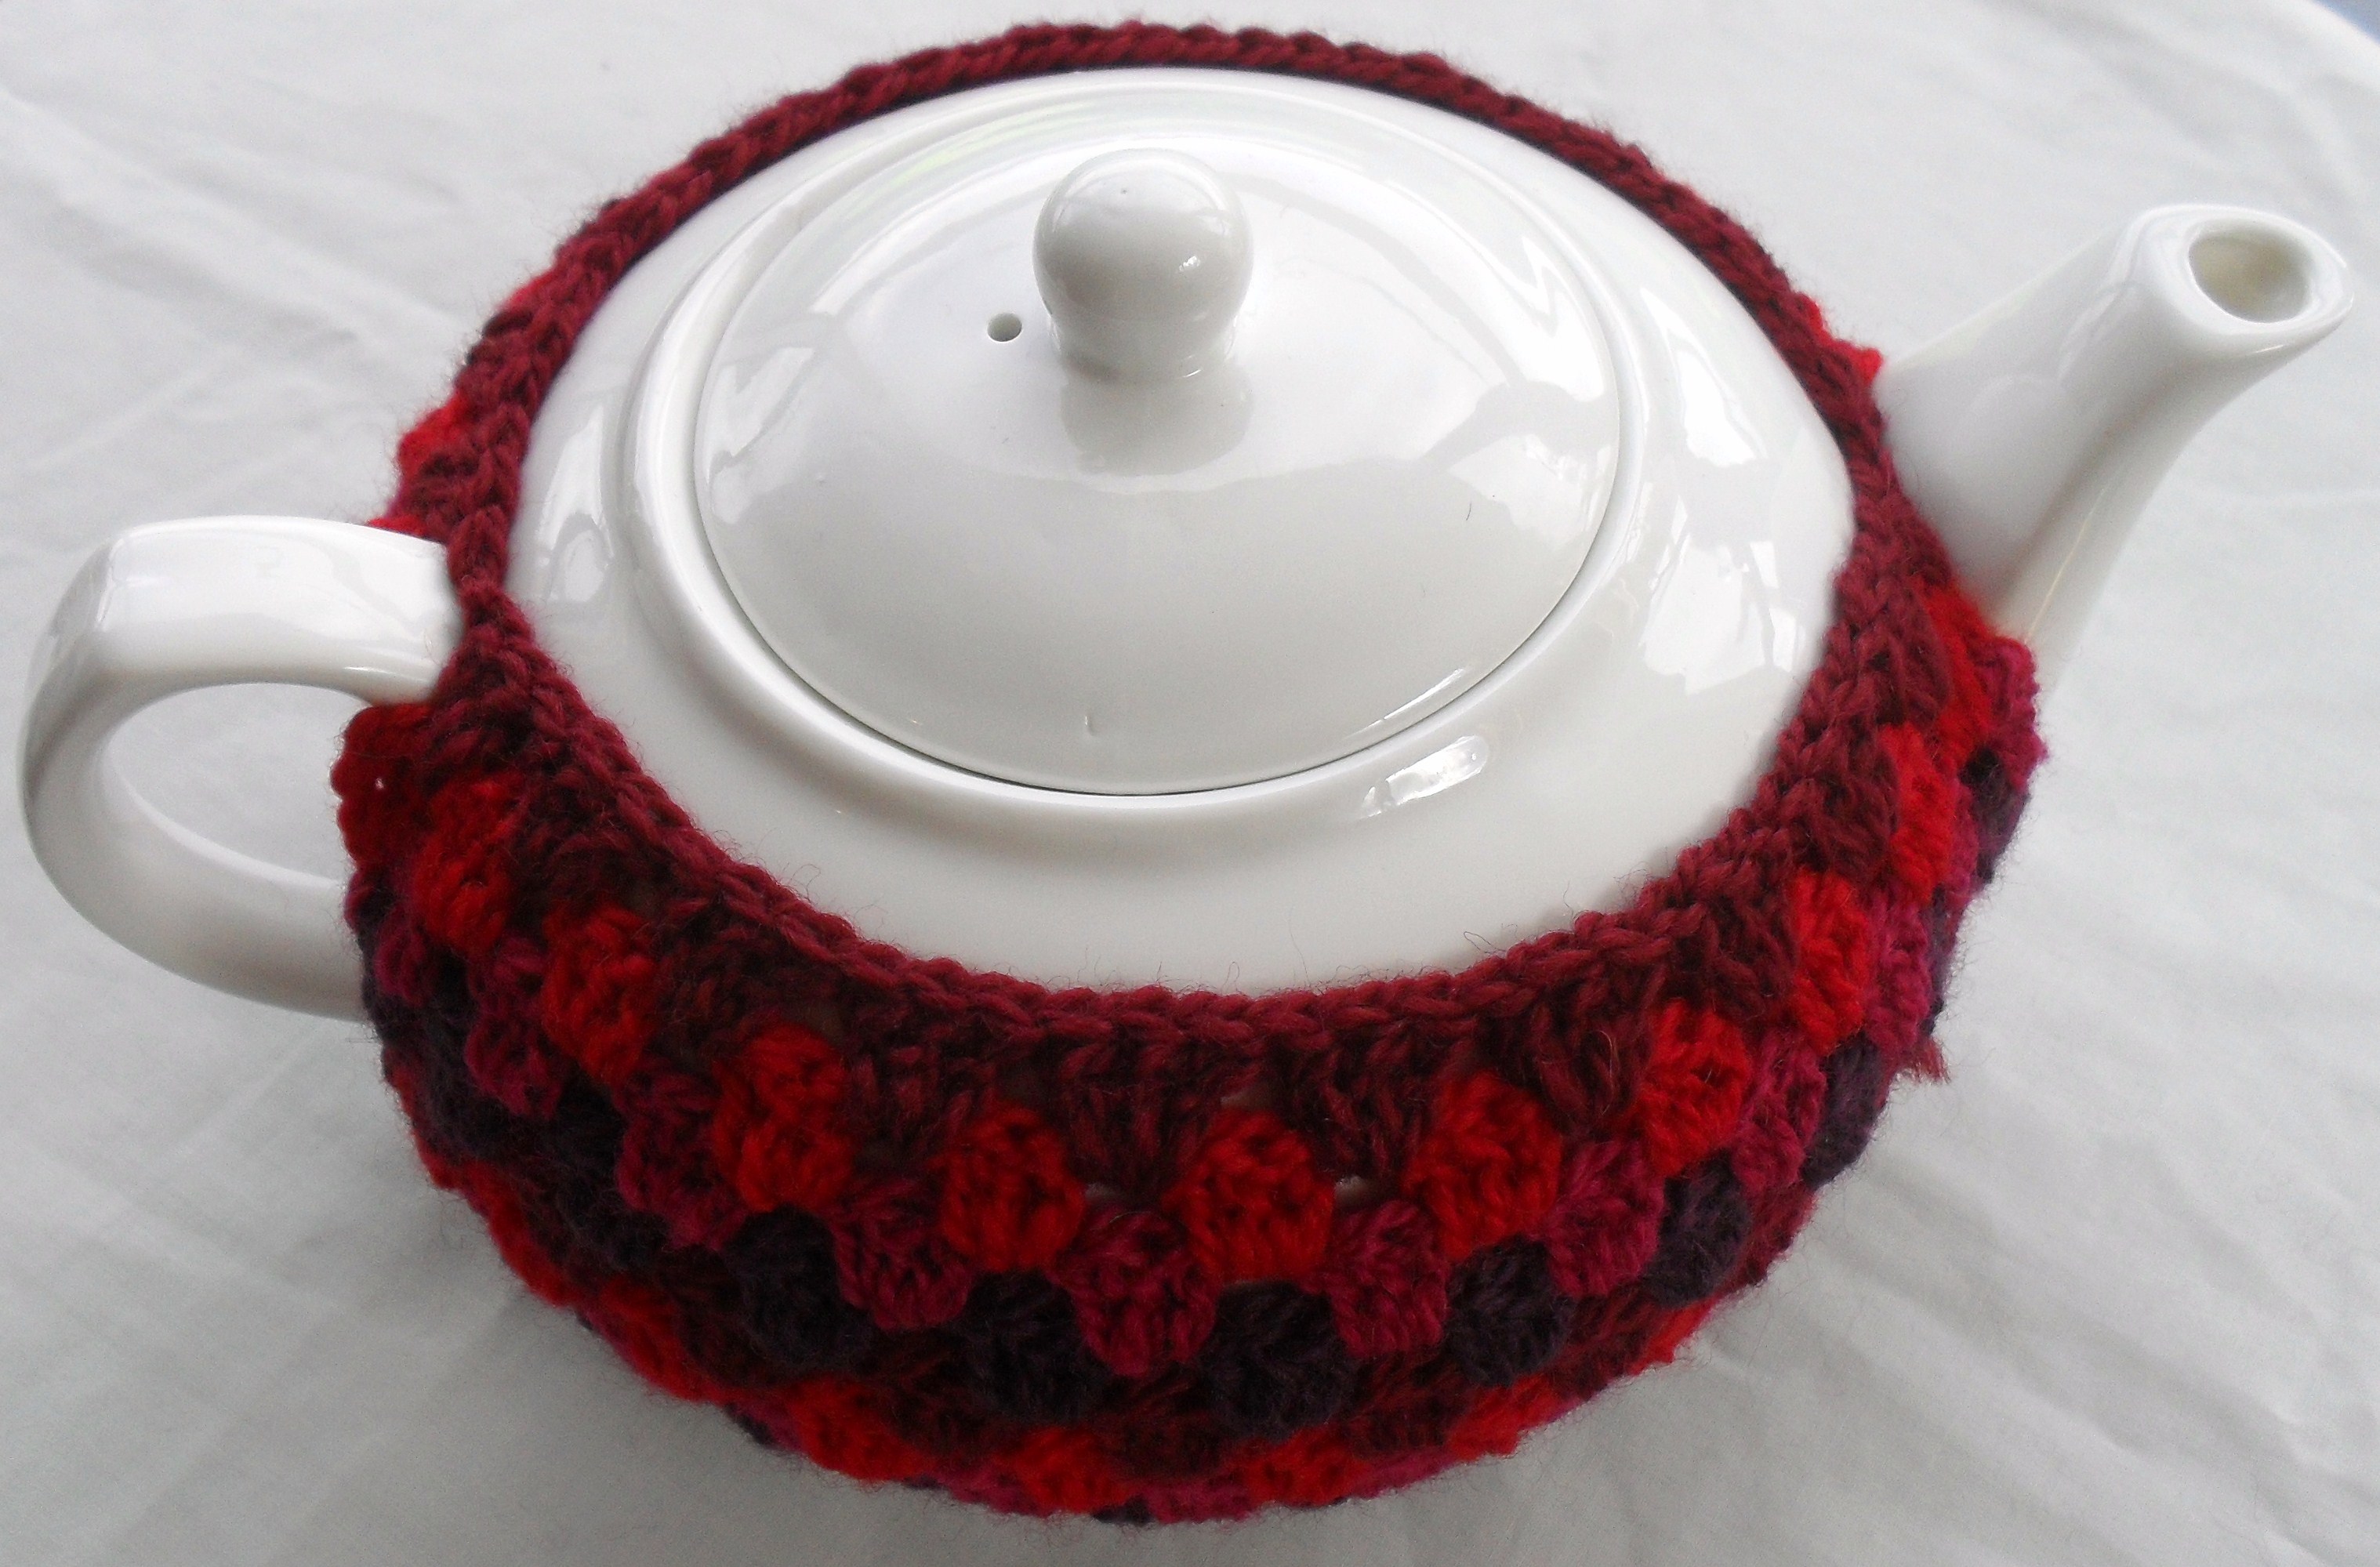
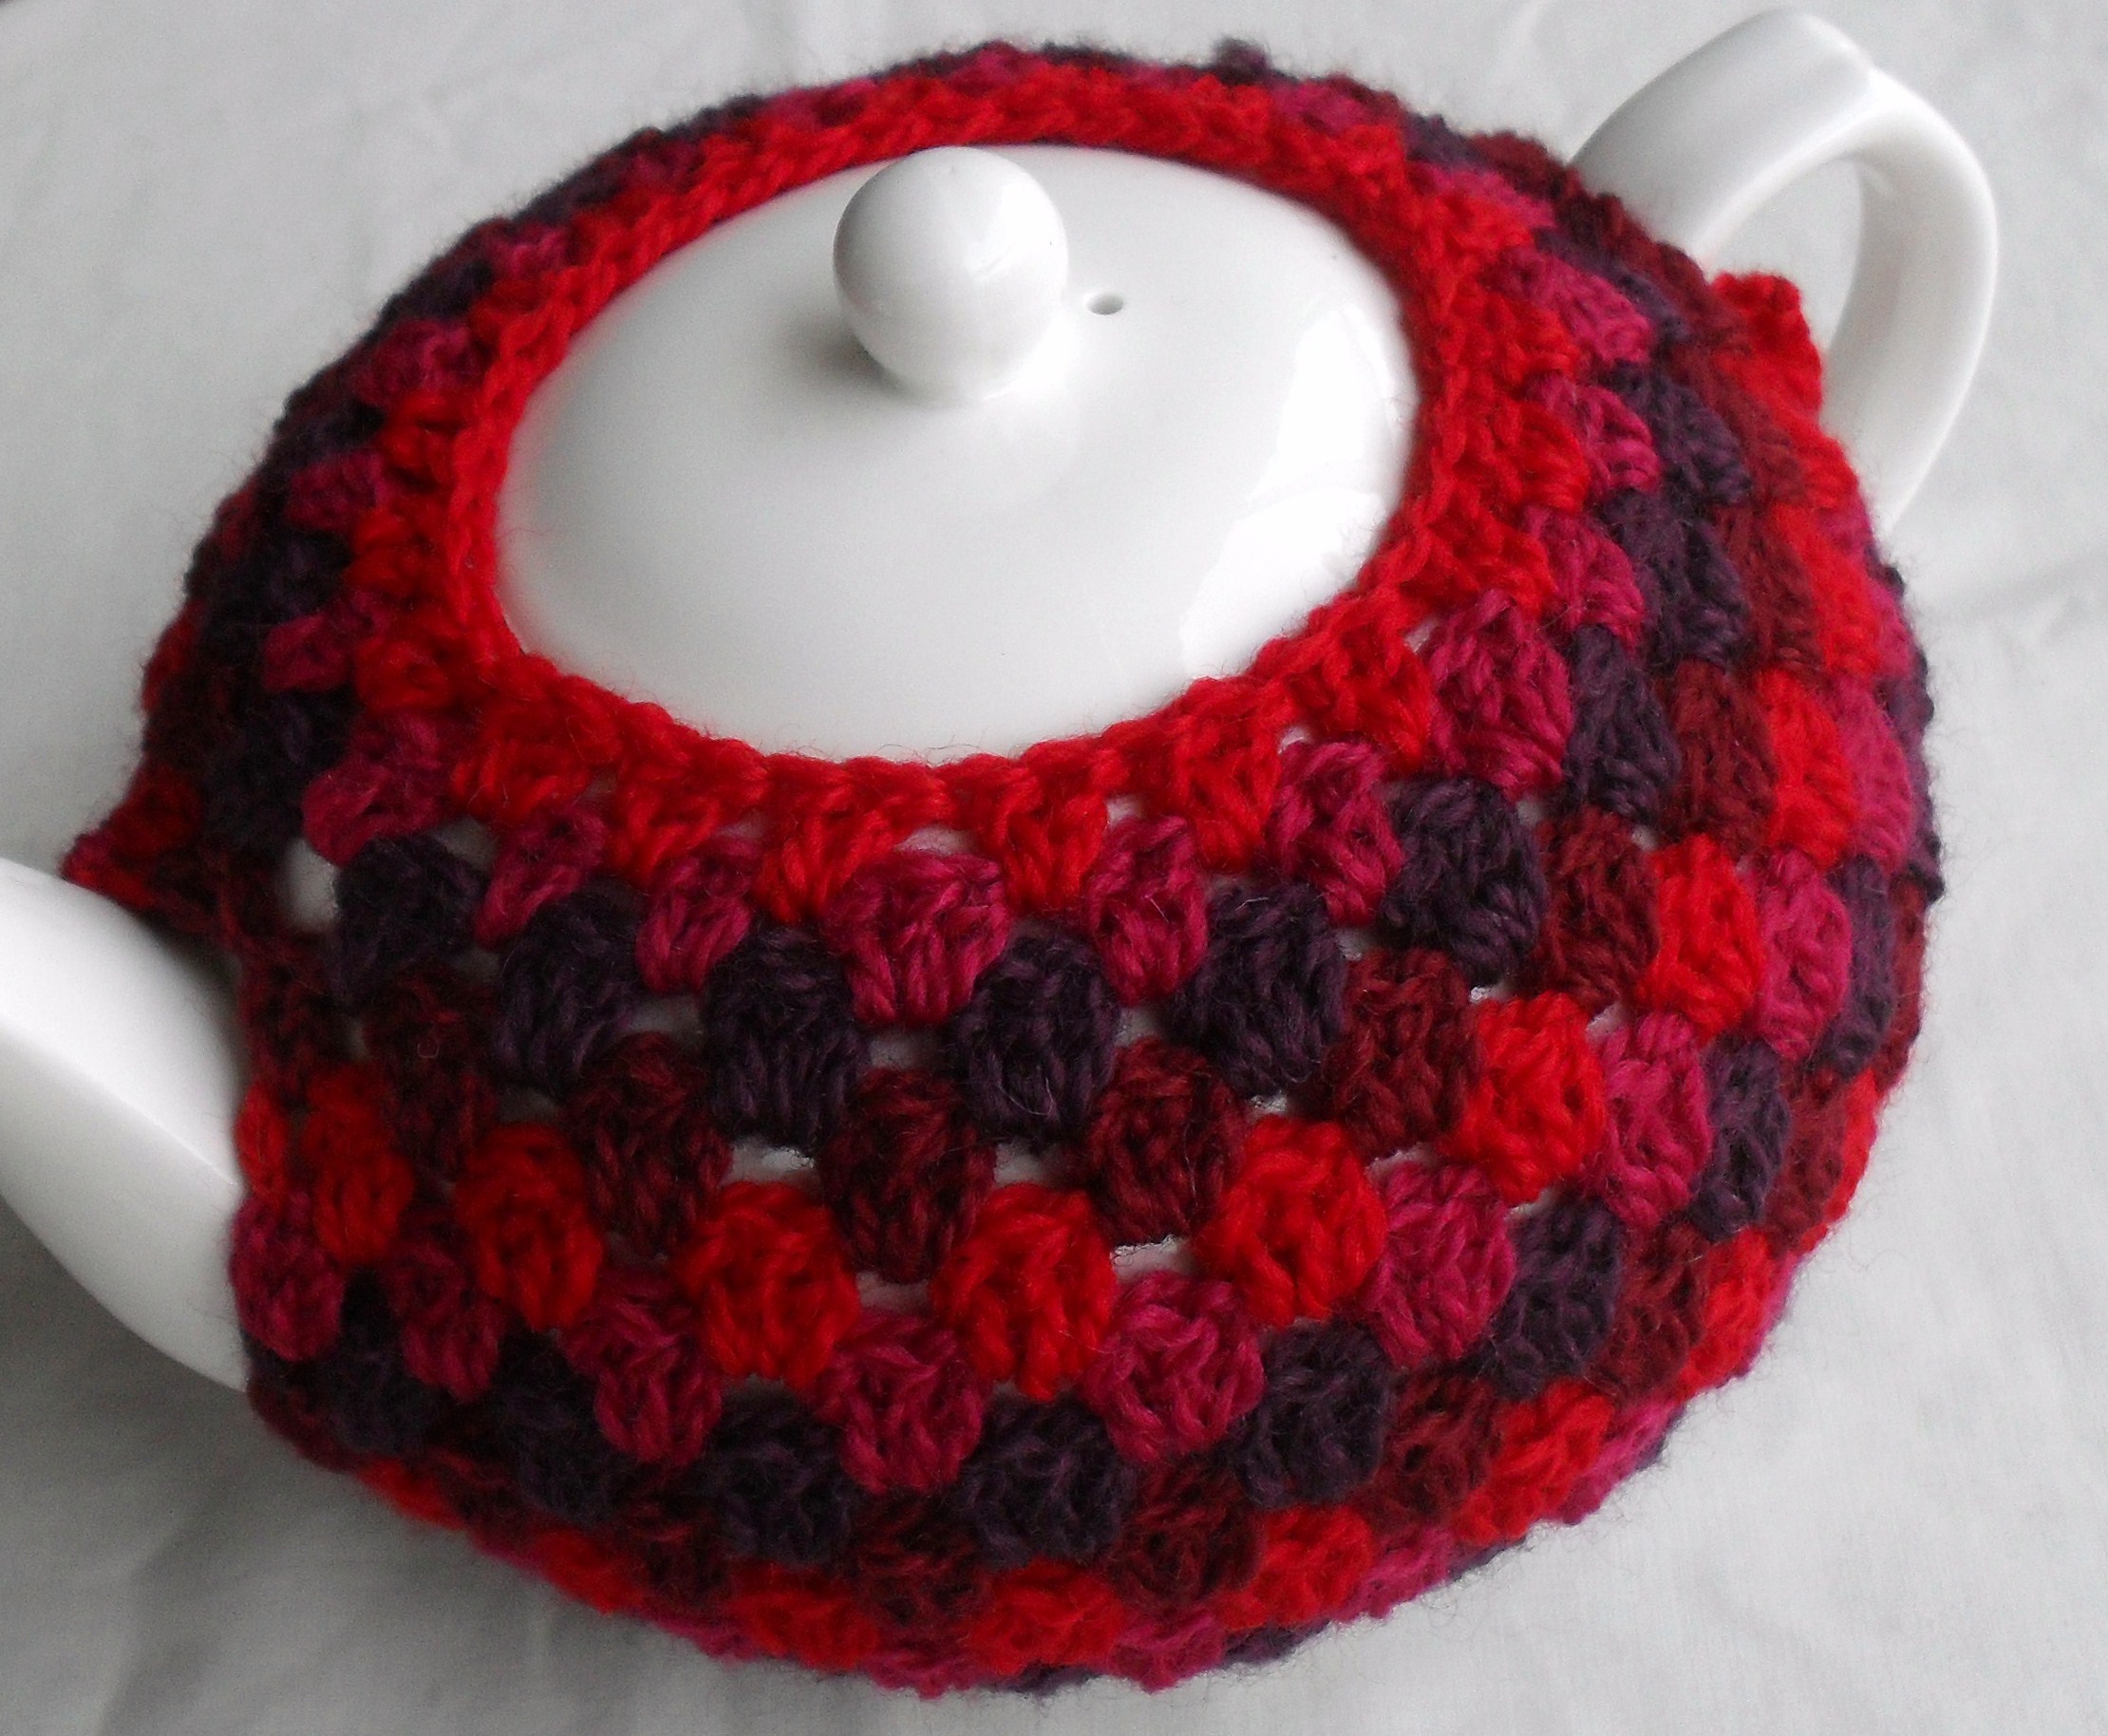
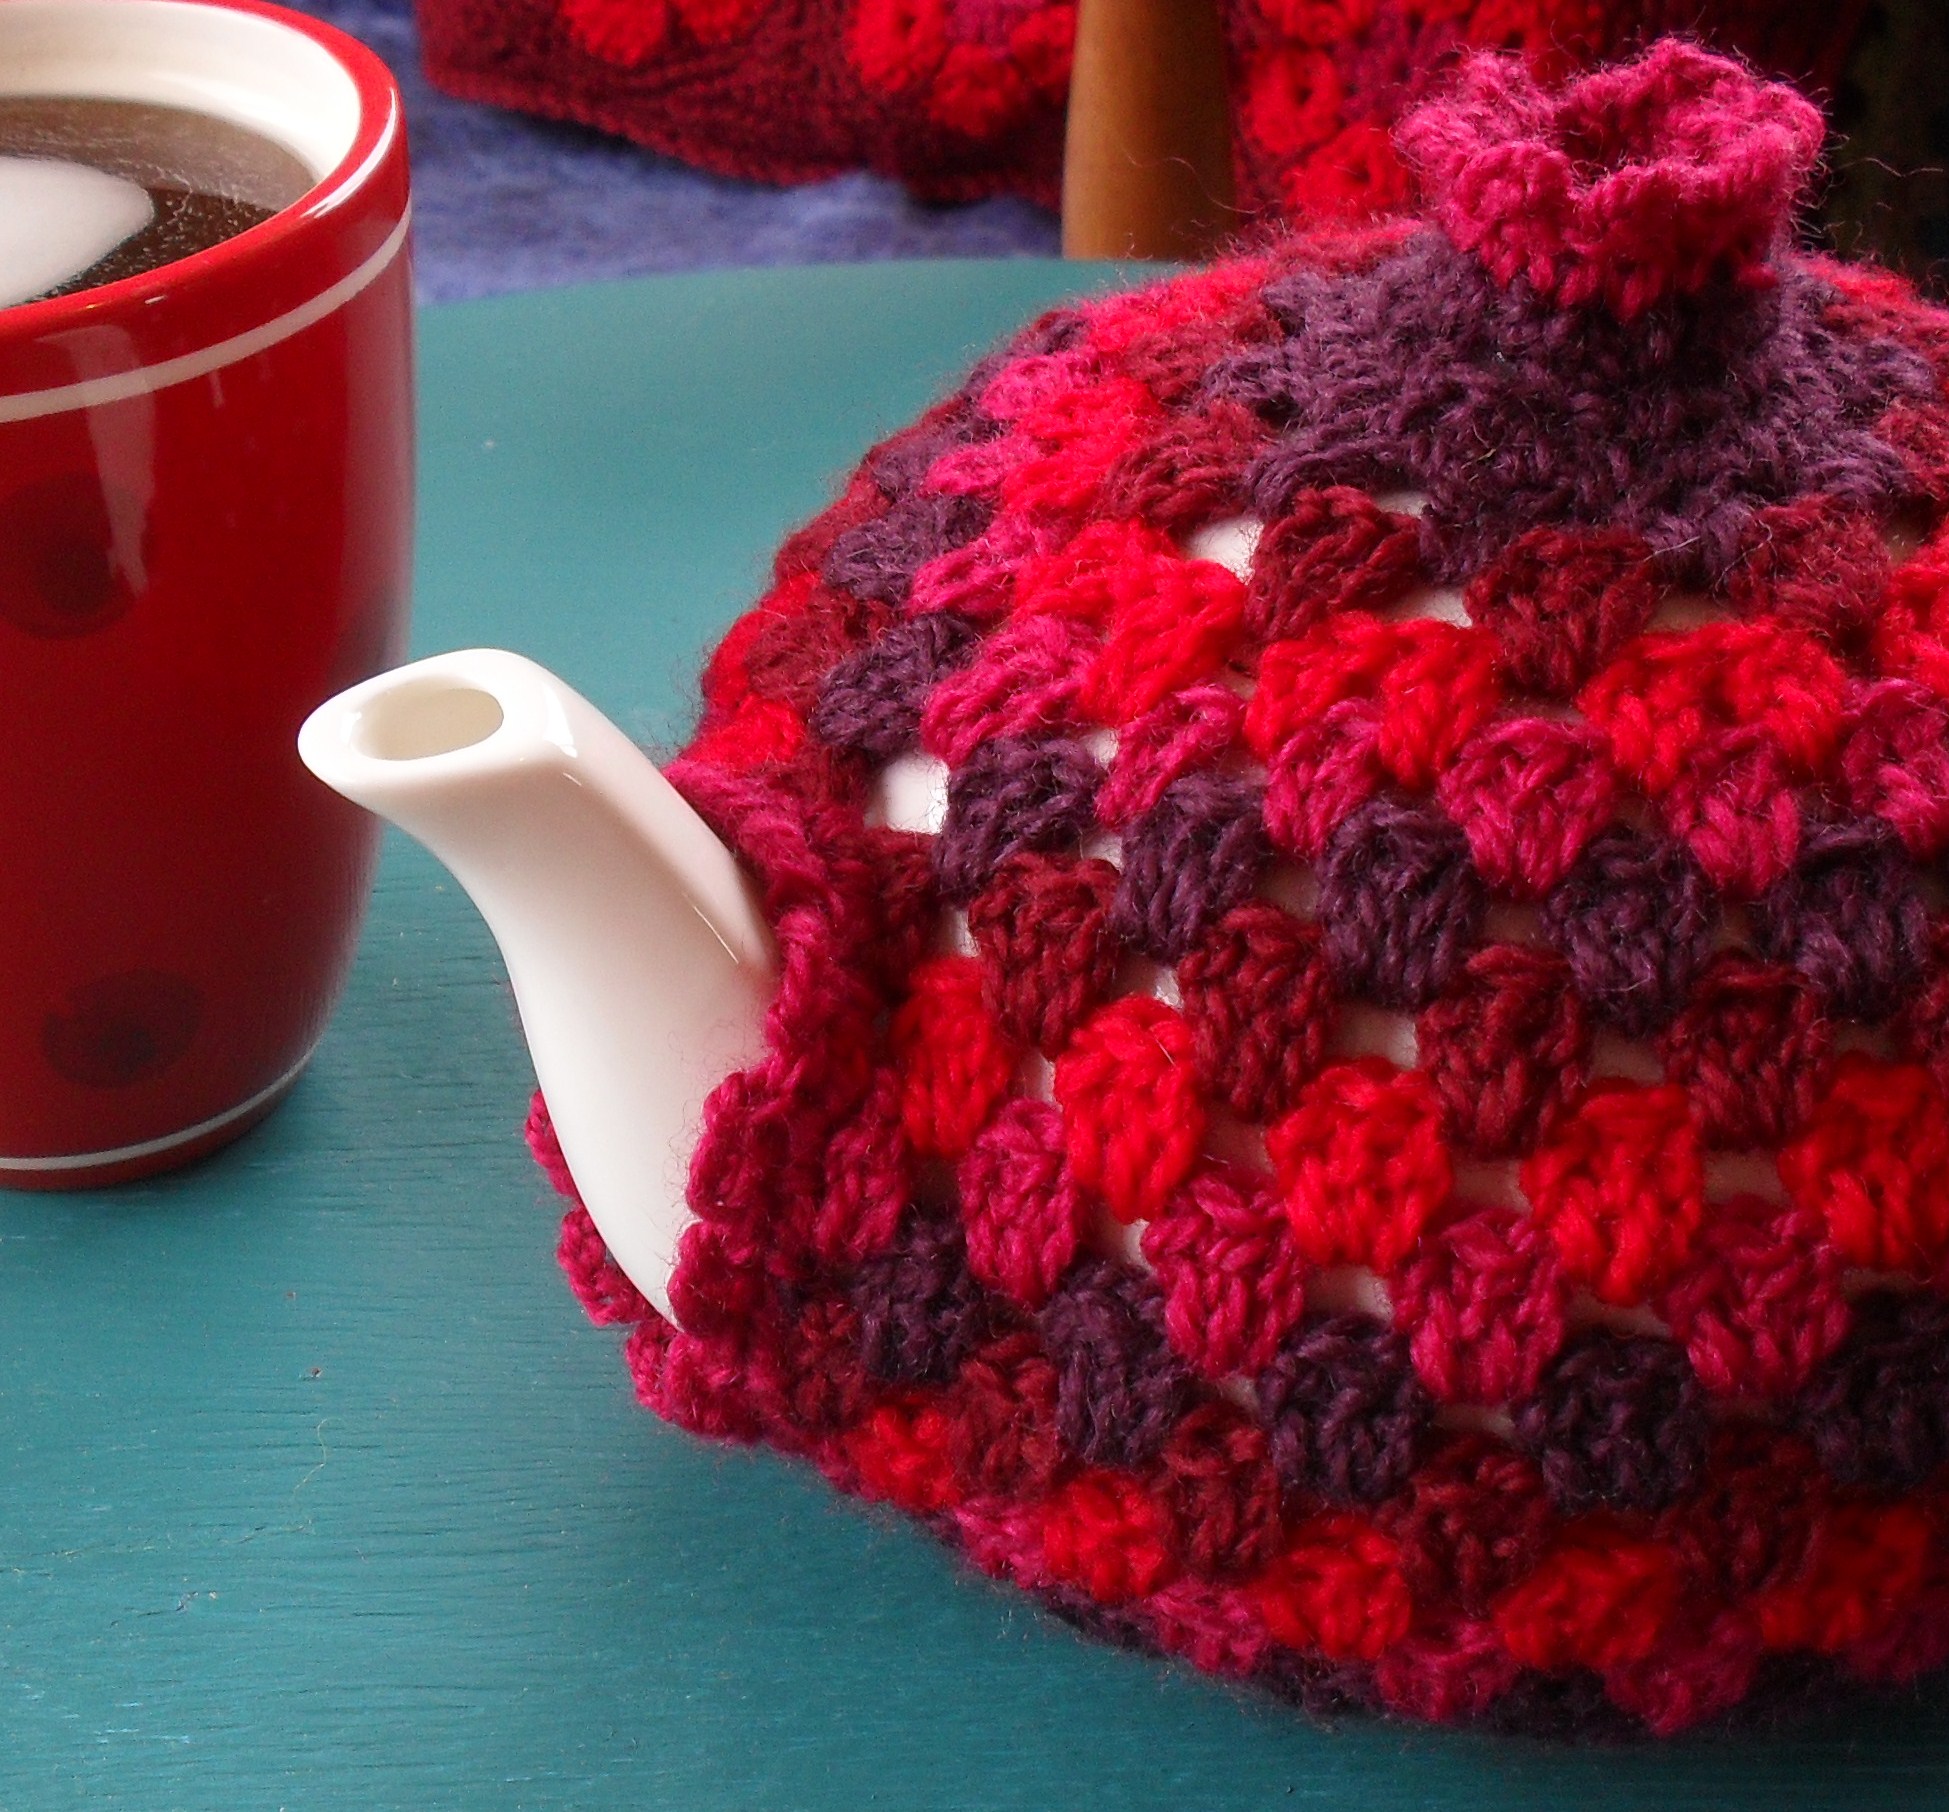
And there we have it! Finished, all we need to do now is the edging! From beginning to end, this took me about two hours including pattern writing and photographing the process, so it’s not a huge task.
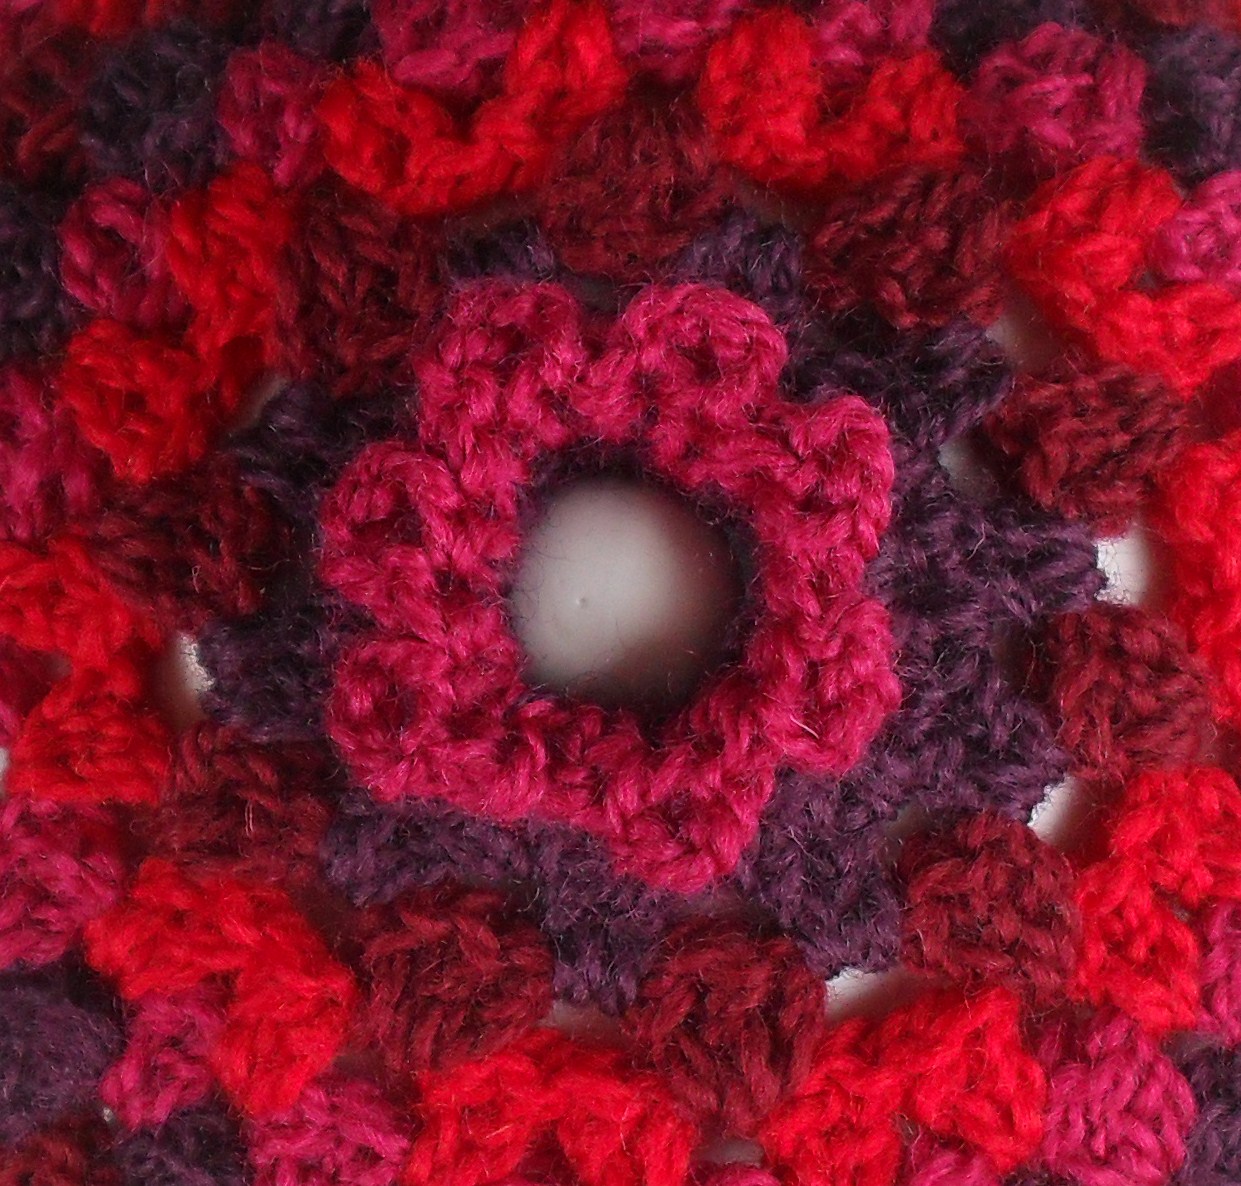
OK, so let’s prettify it and make it nice and professional looking! Shall we begin with the very top? I got a couple of comments saying the first one looked like it was wearing a crown, it did a bit! So choose which edging you want to use, for the first, I used a picot edge, and for this one I used ch and slst… so join the top colour with a slst, ch1 and sc into each stitch. Join with a slst at end of round. Ch3, into next 2 stitches make a slst, ch3 into next 2 stitches make a slst… continue around… this is cute! It looks like a frilly flower!

So it’s up to you how you want to do that… remember the carnival edging I gave instructions for? That might look cool and very crown-like!
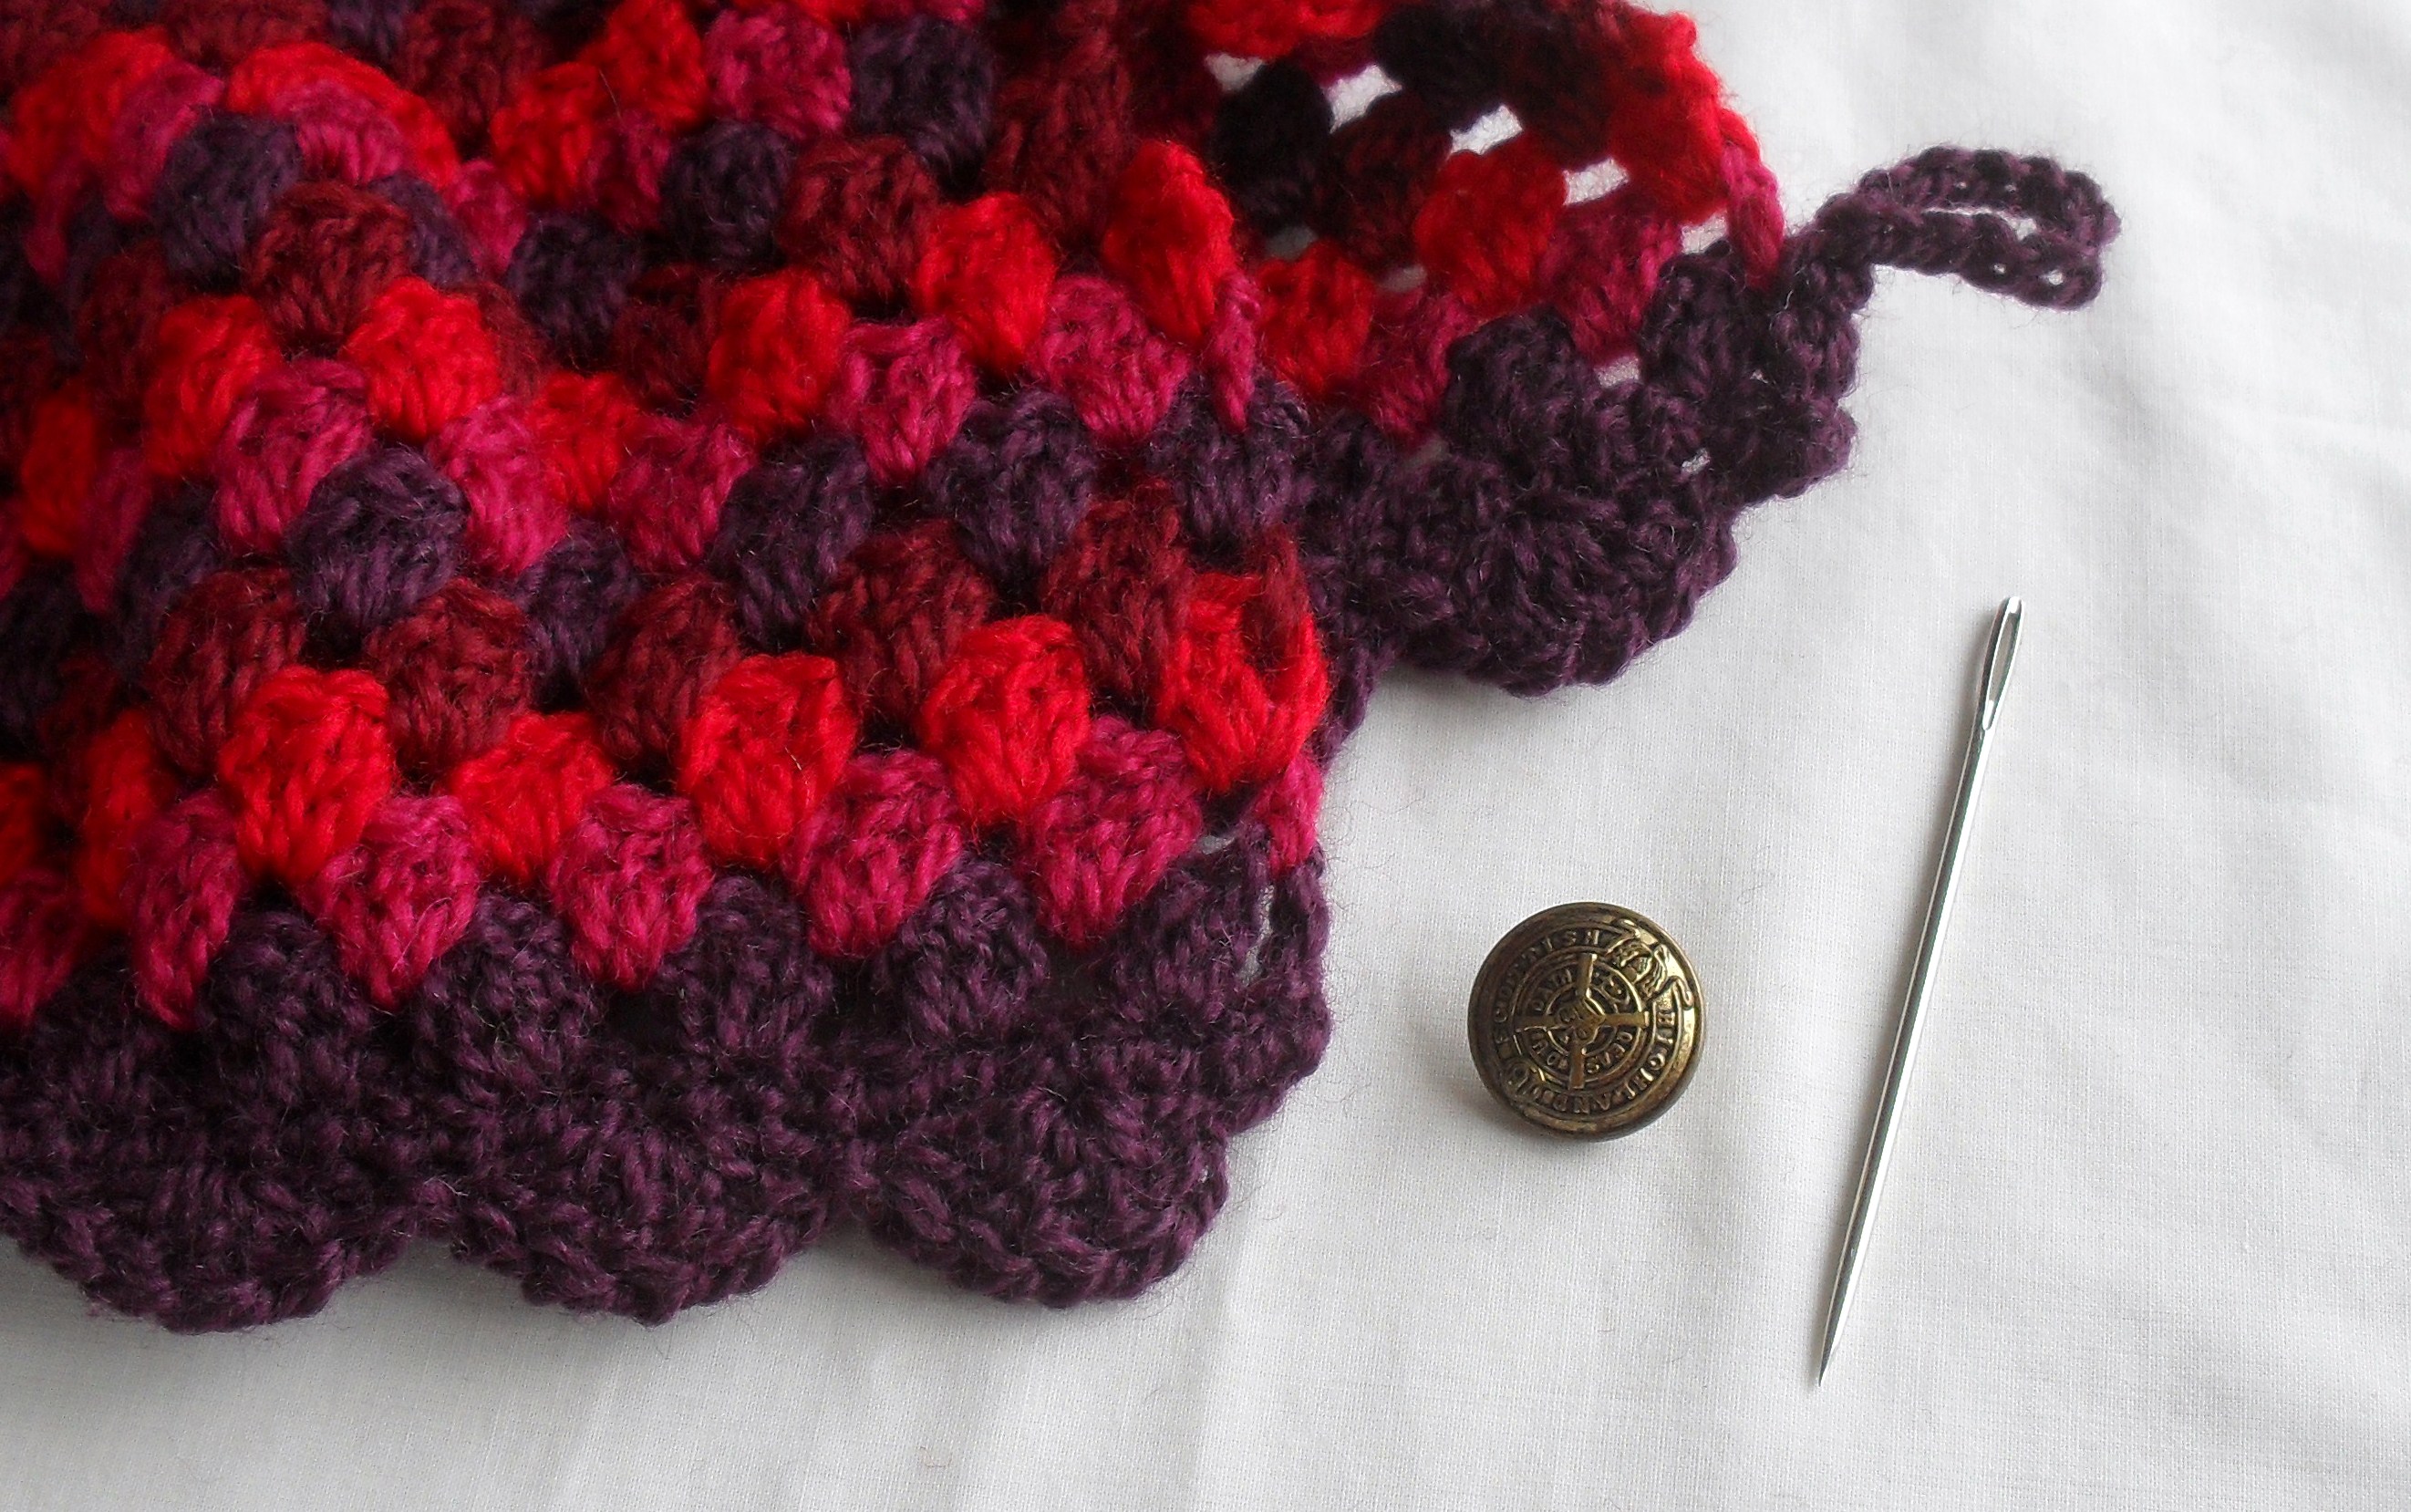
Now for the bottom… For both of the cozies I’ve made, I did a nice big scallop edging, so grab your foundation colour and attach with a slst to one of the ends, skip 2 stitches and make 5dc into the next stitch, skip 2 stitches and make a slst into the next, skip 2 stitches and make 5dc into next stitch and carry on until the very end. Now slst around the corner of the work until you reach the edge of the 3dc cluster in the foundation colour, and make 12 chain loop (or longer depending how big or small your gap is between the two pieces when your tea pot is wearing it’s cozy) to make a button hole. Attach with a slst to same stitch.
Now get yourself a nice button, I found this nice smart looking brass button in my vintage button collection….

And sew it to the other side!
I hope that photo described what I was muddling my way through before!
OK, now the edging around the spout hole and handle edge. I used the same colour as the top edging, joined with a slst then made nice even sc around the edges. As you are edging something that doesn’t have a nice clean edge, you may need to make 2sc into one stitch to make it even. Join at end of round, and to make the 3ch, slst into next 2 stitches sequence as around the top!
And a big ta-da to you!

Translations Crochet (English to Spanish)

CH : Chain/ Cadena o cadeneta
CH SP INCR: (vareta, cadeneta, vareta) en el mismo punto
CHAIN: Cadena
DOUBLE CROCHET: Vareta
HALF DOUBLE CROCHET: Media vareta
HOOK: Aguja de crochet
SINGLE CROCHET: Medio punto
SLIP STITCH: Saltar una cadeneta
TREBBLE CROCHET: Vareta Doble


Translations Spanish English- Knitting

Término/ Sinónimo/Traducción al inglés

Abrigo /xxx/coat

Aumentar/ XXX/ increase

Borla/ xxx/ tassel

Cadena o cadeneta/ xxx/ chain stitch

Chal / Reboso (México) Mañanita (México)/shawl

Chalina/ Bufanda/ scarf

Chullo/ XXX/ Peruvian hat

Chompa/ sueter o jersey (España)/ sweater

Crochet/ ganchillo- gancho para tejer (México)/ crochet, hook

Disminución simple/ surjete simple / decrease - skp (slip,knit,pass)- (slip1, knit1, pass the slipped, stitch over. The same as SKP)

Horquilla / Horquilleta/ Hairpin lace

Jalar / tensar, estirar o amarrar (España) / throw away

Lana / estambre / wool, yarn

Lazada / hebra/ yarn over (wrap the yarn around right needle)

loop / Medida / gauge

Palos o palitos de tejer/ dos agujas-agujas de tejer / knitting needles

Pastilla tejida/ motivo (cuadrado, hexágono o círculo) (Argentina) /

Poncho / capa (México) poncho

Punto / Stitch

Punto raso (crochet)/ slip stitch

Punto bajo (crochet) / medio pilar (Guatemala)- media vareta/ single crochet

Punto alto (crochet) / pilar, vareta o macizo (México) punto monito (México) / half double crochet

Punto alto doble (crochet) / doble pilar (Guatemala) doble vareta / double crochet

Punto alto triple (crochet) /triple vareta /treble crochet

Punto alto en relieve (crochet)/ front post double crochet

Pompón / Borla (México) Mota o motita (México) / pom pom

Punto inglés (dos agujas)/ Brioche stitch

Punto santa clara / Punto musgo (México) / Garter stitch

Ropón / chambrita (México) chaqueta de bebé suetercito (Guatemala) / baby jacket

Tapado / echarpe, poncho o abrigo abrochado por delante (España)

Tejer / calcetar (España) / knit

Telar / telar maya o azteca (México) / loom

Daisypath Anniversary

Daisypath Anniversary tickers