Showing posts with label Quick crochet pattern. Show all posts

Friday, July 1, 2011

Rose Dishcloth and Potholder

Crochet Rose Dishcloth and Potholder Pattern

Materials:
Yarn: Lily® Sugar ’n Cream
(Solids: 70.9 g/2.5 oz/109 m/120 yds) (Ombres: 56.7g/2 oz/86 m/95 yds)

GINGHAM DISHCLOTH
Main Color (MC) (01740 Hot Pink) 1 ball
Contrast A (00046 Rose Pink) 1 ball
Contrast B (01004 Soft Ecru) 1 ball
Contrast C (00144 Strawberry) 1 ball
Contrast D (01712 Hot Green) 1 ball

CROSS STITCH POT HOLDER
Main Color (MC) (01004 Soft Ecru) 1 ball
Contrast A (00046 Rose Pink) 1 ball
Contrast B (01740 Hot Pink) 1 ball
Contrast C (00084 Sage Green) 1 ball
Contrast D (01712 Hot Green) 1 ball
Crochet Hook: Size 4 mm (U.S. G or 6) crochet hook or size needed to obtain gauge

10 ins [25.5 cm] square of flame retardant lining
blunt ended tapestry needle
Pattern with Cross-Stitch Chart [pdf]

Size:
Dishcloth: Approx 10 ins [25.5 cm] square.
Pot Holder: Approx 11 ins [28 cm] square.

Gauge: 15 sc and 16 rows = 4 ins [10 cm].

Instructions:
GINGHAM DISHCLOTH

Note: To change colors, work to last 2 loops on hook of last st. Yoh with new color and complete st. When working with 2 colors within a row, lay unused color along previous row and work over unused color.

With A, ch 37.

1st row: (RS). With A, 1 sc in 2nd ch from hook. 1 sc in each of next 3 ch. *With B, 1 sc in each of next 4 ch. With A, 1 sc in each of next 4 ch. Rep from * to end of ch. 36 sc. Turn.

2nd row: With A, ch 1. 1 sc in each of first 4 sc. *With B, 1 sc in each of next 4 sc. With A, 1 sc in each of next 4 sc. Rep from * to end of row. Turn.

3rd and 4th rows: As 2nd row, joining MC at end of last row.

5th row: With MC, ch 1. 1 sc in each of first 4 sc. *With A, 1 sc in each of next 4 sc. With MC, 1 sc in each of next 4 sc. Rep from * to end of row. Turn.

6th to 8th rows: As 5th row, joining A at end of last row.

9th row: As 2nd row.

Rep 2nd to 9th rows 3 times more, then 2nd to 8th rows once. Fasten off.

Edging: Join MC with sl st in bottom right corner. Ch 1. 3 sc in same sp. Work sc evenly up side of Dish Cloth to next corner. (2 sc. Ch 9 for hanging loop. Sl st back into last sc. 1 sc) all in next corner. Work sc evenly around rem of Dish Cloth, working 3 sc in each corner. Join with sl st to first sc. Fasten off.


Rose

With C, ch 11.
1st row: 3 dc in 4th ch from hook (counts as 4 dc). 4 dc in each ch to end of ch. Fasten off. Coil foundation row into rose shape and sew through all thicknesses to secure.

Leaves (make 2): With D, ch 5.
1st rnd: 1 sc in 2nd ch from hook. 1 hdc in next ch. 1 dc in next ch. 5 dc in last ch. Working into opposite side of ch into rem loops, 1 dc in next ch. 1 hdc in next ch. 1 sc in last ch. Join with sl st to first sc. Fasten off.

Sew Rose and Leaves in position as shown in picture.

CROSS STITCH POT HOLDER

FRONT
With MC, ch 41.
1st row: (RS). 1 sc in 2nd ch from hook. 1 sc in each ch to end of ch. 40 sc. Turn.
2nd row: Ch 1. 1 sc in each sc across. Turn.
Rep 2nd row 39 times more. Fasten off.

BACK
With A, work as for Front.
 Cross Stitch
FINISHING


Using cross st, embroider Chart on Front.

Trim flame retardant lining to fit Back. With lining between pieces and WS facing each other, place Back and Front tog.

Edging: 1st rnd: Working through both thicknesses and with Front facing, join MC with sl st in bottom left corner. Ch 1. 3 sc in same sp. Work 1 rnd of sc evenly around outer edges to join pieces, working 3 sc in each corner. Join B with sl st to first sc. Break MC.

2nd rnd: With B, ch 1. Work 1 sc in each sc around working 3 sc in each corner sc. Join A with sl st to first sc. Break B.

3rd rnd: With A, ch 1. 1 sc in first sc. *Miss next sc. (1 dc. Ch 1. 1 dc) in next sc. Miss next sc. 1 sc in next sc. Rep from * around to last 3 sc. Miss next sc. (1 dc. Ch 1. 1 dc) in next sc. Miss last sc. Join with sl st to first sc.

4th rnd: Ch 5 (counts as dc and ch 2). *1 sc in next ch-1 sp. Ch 2. 1 dc in next sc. Ch 2. Rep from * around working (1 sc. Ch 2. 1 dc. Ch 2. 1 sc) in each corner ch-1 sp. Join with sl st to 3rd ch of ch 5. Fasten off.

Loop: With Back facing, join B with sl st to 2nd rnd of Edging in top right corner. Ch 12. Join with sl st in same sp.

Fasten off.

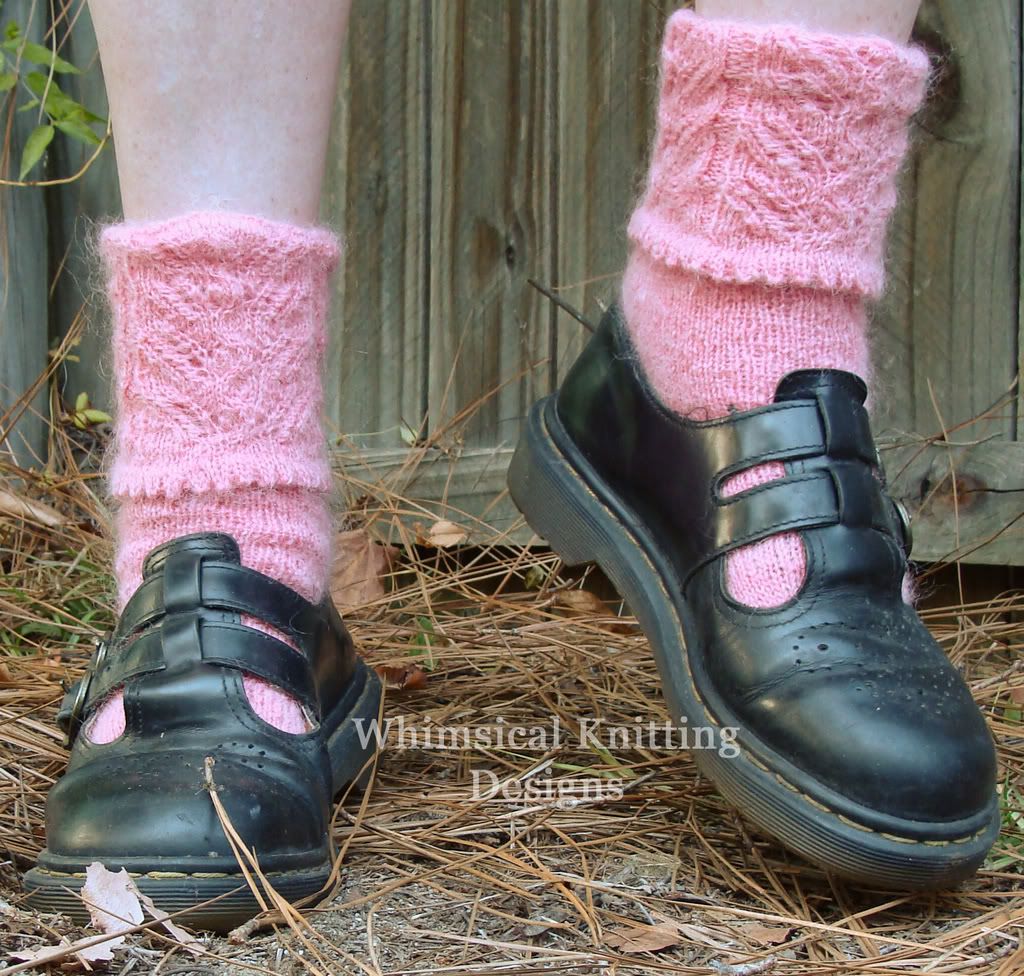
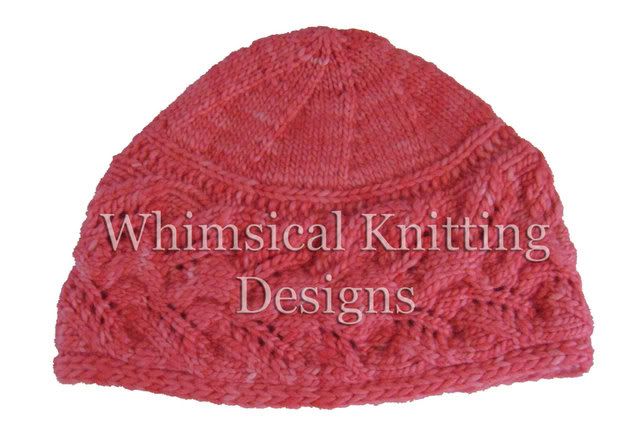
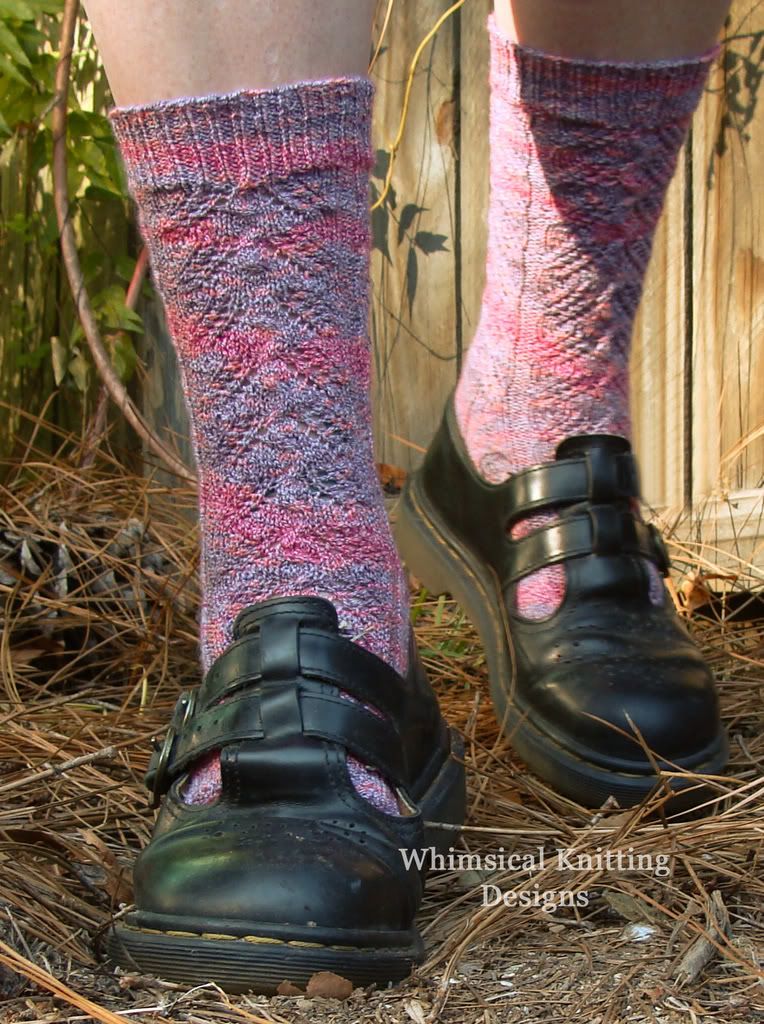
HAT- SOcks- Gloves


Download Patterns clicking here or in the photos
http://freakshare.com/files/dkl4gu8l/ATouchofWhimsySocksVersionTwo.zip.html

Begginers Todays Internet DIscovery: Gloves


Designed by Rebecca Mercier

Stats

Yarn: 1 hank Malabrigo 215 yds. (approx. 1/2 used) or worsted wt. yarn of choice
Needles: size 7 knitting needles and 1 cable needle for cuff; size 7 and 5 dpns,
magic loop or 2 circs for your preferred method of knitting small circumference

knitting in the round

Gauge: 5 sts=1 inch in stockinette stitch
Size: fits 7 in. wrist and hand that is 8 in. in circumference

With size 7 needles cast on 30 sts using provisional cast on.

Wrist Cuff:

Row 1: k1, sl 1 wyif, k1, p2, k5, k2tog, yo, k1, cb4, k1, yo, ssk, k5, p2, k1, sl 1
wyif, k1

Row 2 and all even rows: sl 1 wyif, k1, sl 1 wyif, k2, purl 20, k2, sl 1 wyif, k1, sl
1 wyif

Row 3: k1, sl 1 wyif, k1, p2, k3, k2tog x2, yo, k1, yo, k4, yo, k1, yo, ssk x2, k3,
p2, k1, sl 1 wyif, k1

Row 5: k1, sl 1 wyif, k1, p2, k2, k2tog x2, yo, k1, yo, k6, yo, k1, yo, ssk x2, k2,
p2, k1, sl 1 wyif, k1

Row 7: k1, sl 1 wyif, k1, p2, k1, k2tog x2, yo, k1, yo, k2, cf4, k2, yo, k1, yo, ssk
x2, k1, p2, k1, sl 1 wyif, k1

Row 9: k1, sl 1 wyif, k1, p2, k2tog x2, yo, k1, yo, k10, yo, k1, yo, ssk x2, p2, k1,
sl 1 wyif, k1

Row 11: k1, sl 1 wyif, k1, p2, k2tog, k2, yo, k12, yo, k2, ssk, p2, k1, sl 1 wyif, k1
Row 12: rep row 2

Continue pattern for 7 inches, ending with an even number row. DO NOT BIND OFF, leave the sts live for grafting. Very carefully unzip the provisional cast on
 
 
*Design note* I removed the provisional cast one stitch at a time and put each stitch on a size 7 needle as I unzipped, this way I didn’t lose any stitches as I unzipped the cast on.

Graft the sts from each end of the wrist cuff together using the kitchener stitch. If you prefer, you can use a 3 needle bind off, but this will be more visible than kitchener method. After the ends are grafted together you are ready to pick up sts for the fingerless glove.

Should you prefer wristlets instead of fingerless gloves, this is what you will have:
 

Monday, June 27, 2011

FLOWER

Basic Flower and ....The Basic Flower


Original Design by Fiber Star – Samantha Stopple

Copyright March 2006 : You are free to use these designs for your personal use. You may sell items you make with these. You man NOT hire someone to make these to sell. If you do make these please make note that you used my design. When you print off these patterns please include this copyright information.


For all the flowers I suggest the following:

ww yarn of you choice in 2-3 colors
I liked to use a texture yarn to jazz up the flower
needle to weave in ends

NOTES:

Joining: Where ever it says join you can sl st to join or you can do an invisible join
Finishing off: Weave in ends or colors if you want.

You do need to know how to add new colors.

The Basic Flower:

You can work the flowers in a single color or change colors at each round.

Round 1:
Ch8 sl st join to make ring; Ch1
15 sc in ring, sl st to join

Round 2 options:
Small flower:
Ch6 skip 2st sc in next st around to make 5 petals (5 – 6ch loops) sl st to join;ch1; [(1sc, 1hdc, 2dc,ch1,2dc, 1hdc, 1sc) in the loop, ch1] around for each petal; join, fasten off

Medium flower:
Ch8 skip 2st sc in next st around to make 5 petals (5 – 8ch loops), sl st to join; ch1; [(2sc, 1hdc, 3dc,ch1, 3dc, 1hdc, 2sc ), ch1]; join
Here's what a medium flower looks like changing colors. I used Caron Simply Soft Orchid for the petals and a Mod Dea fancy purple for the center.

Large flower:

Ch10, skip 2sc, sc in the nxt st around for four petals sl st to join in the beg of the first Ch10; (3sc, 2hdc, 2dc, 1 tr, 2dc, 2hdc, 3sc) join

Round 3:

You can add more color:
Create a two-colored flower by doing an additional row around the petals in a different color:

Here’s an idea for the medium flower:

[(3sc, 2dc,3tr(in ch1), 2dc, 3sc) sc around ch1] for each petal, join, fasten off

Here's a flower I made adding an additonal row of color:

Basic Flower

Using Caron Simply Soft Orchid to make Rounds 1& 2 then I used Mod Dea purple fancy yarn for round 3 to make a two colored flower I added a center effect using Mod Dea again doing option B.


Center effect for the flower:

To create that pollen center effect in the flower, I suggest using a color with some texture to mimic the textured look many flowers have from stamens/pollen or a different color.


A: sc in each sc of the ring

B: sc ch1 around

C: sc ch2 around

Maybe introduce a picot stitch too! Or if you do a larger flower maybe you could repeat the smaller flower instructions from Round 2 around for a three-dimensional affect.

Sunday, June 26, 2011

scarf- bUFANDA: todays internet discovery

chainmaille 02Stitches used (US English):


- chain stitch
- slip stitch


Row 1 – base row
chain 7
slip stitch into 7th chain from hook to form a loop.
*chain 11 (4+7) slip stitch into 7th chain from hook* – second loop formed
Repeat from * to * until your base row has desired length (I made 95 loops to get a length of about 2 meters)

turn work

Row 2
chain 10 (3+7)
slip stitch into 7th chain from hook to form next loop
chain 2
slip stitch into top of last loop of previous row *chain 9 (2+7)  slip stitch into 7th chain from hook- chain 2 - slip stitch into top of next free loop of previous row* -
repeat from * to * until you reach the end of the row

turn work

Repeat row 2 until scarf has desired width or you almost run out of yarn – remember there is a last row! (I made 13 repeats)

Last Row
since the top of our row is made of loops, we need a finishing row.
For this, after turning the work chain 4 - Slip stitch into top of last loop of previous row *chain 4 - slip stitch into top of next free loop of previous row*- repeat from * to * to the end of the row.

Fasten off, weave in ends.

Enjoy!
chainmaille 01

Afghan Scarf

Basic Hexagon
With color of choice, ch4, join with sl st to form ring.

dsc_0222

Rnd 1: Ch 3 (counts as 1st dc), dc in ring, ch 1, *2 dc in ring, ch 1; rep from * 4 times more, sl st in top of beg ch-3 to join. End off color.

Rnd 2: Attach color of choice in any ch-1 sp. Ch 3 (counts as 1st dc), dc in same sp, ch 2, 2 dc in same sp, ch 1, *2 dc in next ch-1 sp, ch 2, 2 dc in same sp, ch 1; rep from * 4 times more, sl st in top of beg ch-3 to join. End off color.

Rnd 3 (first motif only): Attach color of choice in any ch-1 sp. Ch 1, 1 sc in same sp, *sc in next 2 dc, 3 sc in next ch-2 sp, sc in next 2 dc, sc in next ch-1 sp; rep from * around, ending last rep sc in next 2 dc, 3 sc in next ch-2 sp, sc in next 2 dc. Sl st in beg sc to join. End off color. Weave in all ends.

Rnd 3 (joining round for all subsequent motifs): Attach color of choice in any ch-1 sp. Ch 1, sc in same sp, *sc in next 2 dc, 2 sc in next ch-2 sp, sl st in 2nd of 3- sc corner group of first motif, one more sc in same ch-2 sp of current motif, sc in next 2 dc, sc in next ch-1 sp, sl st in corresponding sc of first motif; rep from * for as many sides as need to be joined, then refer to rnd 3 of the first motif to complete round for the un-joined sides. End off, weave in ends.

by Tracy St. John

Saturday, June 25, 2011

Crochet Flower: Internet discovery of the day

Make a quick flower with just a little bit of yarn...


  • You can use ANY weight yarn, just make sure to crochet with the correct size hook for the yarn
  • if the beginning chain is too small or too big for your wrist, adjust accordingly and the pattern will still work up great.
Abbreviations:

ch = chain
beg = beginning
sc = single crochet
sl st = slip stitch
join = join with sl st
* = repeat between *'s

INSTRUCTIONS
(do not turn work while following these instructions)

with crochet hook F, ch 8, join to beg to form a ring, ch 1
round 1: work 17 sc around ring, join to beg (18 sts)
round 2: *ch 8, join to third sc* around (making 6 petals), join to beg


round 3: in each petal, *skip first ch, work 1 sl st in each of next 5 chains, join between petals with sl st*, join to beg

round 4: *ch 11, join to a loop behind between petals, ch 11, join between petals* around, join to beg (pick any loop in the back of work to join the ch 11) --->


You're done ! !

Tuesday, May 17, 2011

TODAYS INTERNET DICOVERY: Beautiful and fast to knit hat!!!

Puff Striped Slouch Hat


by Ashley Kaye

For this project I used an “K” hook and worsted weight yarn, Caron One Pound.
Gauge: After round 3, I measured about 3 1/2” in diameter. Round 8 was about 8 1/2” in diameter.

Pattern does not require very much yarn, less than one skein. Great stash buster!

Stitches:
Hdc = half double crochet
PS = puff stitch: *yo insert hook in next stitch, yo and pull up loop* repeat 3 times. Yo pull through all
loops on hook
Hdcdec = half double crochet decrease (*yo insert hook in next stitch, yo draw up loop* repeat. Yo draw through all loops on hook.

MC = main color (for mine it was brown)
PC = puff color (mine was beige)

Begin with a magic loop.

Round 1: Using PC * puff stitch in loop, hdc* repeat 5 more times. Join at top of puff stitch. Fasten off

Round 2: Join MC where PC was fastened off. Ch2 (counts as hdc in this row and throughout) 2 hdc
in each stitch around. Join at top of ch2

Round 3: ch2, hdc in same stitch. * 1 hdc in next hdc stitch, 2 hdc in next hdc stitch* repeat all the
way around and join at top of ch2

Round 4: ch2, hdc in same stitch. * 1 hdc in the next 2 hdc stitches, 2 hdc in the next hdc stitch*
repeat around and join at top of ch2. Fasten off.

Round 5: Join PC. Ch2 PS in the same stitch, *ch1, skip next hdc stitch, PS in next hdc stitch* repeat
around and join to the top of PS. Fasten off.

Round 6: Join MC at top of PS. Ch2, hdc in same stitch *hdc in ch1 space, 2 hdc in top of PS* repeat
around and join to top of ch2.

Round 7: ch2, hdc in same stitch *hdc in the next 5 hdc, 2 hdc in the next stitch* repeat around and
join to top of ch2.

Round 8: ch2, 1hdc in each hdc stitch around, join to top of ch2.

Round 9: repeat round 5.

Round 10: join MC, ch2. *1hdc in top of puff stitch, 1 hdc in ch1 space* repeat around, join to top of
ch2.

Round 11: repeat round 8

Round 12: ch2, hdc in next 3 stitches, * hdcdec over next two stitches, hdc in next 4 stitches* repeat
around and join to top of ch2

Round 13: repeat round 5

Round 14: repeat round 10

Round 15: ch2, hdc in next 4 stitches *hdcdec over next two stitches, hdc in next 5 stitches* repeat
around and join to top of ch2.

Round 16: repeat round 12

Round 17: repeat round 5

Round 18: repeat round 10

Round 19 & 20: repeat round 8. Fasten off.


Enjoy your new hat!! Feel free to make it for gifts or for sale. All I ask is that you reference me as the pattern designer.


Wednesday, May 11, 2011

Todays Internet Discovery: Coffee Cozies

Materials


• Size E (3.5mm) crochet hook

• Size F (4.0mm) crochet hook

Directions

With smaller hook (size E), Chain 25.

Round 1: Ch 2 (counts as first hdc now and throughout), hdc in each st around (25 st). Join to first hdc with sl st.

Round 2: Ch 2. *Ch 1, skip 1 st, 2 hdc in next st* Repeat around until beginning. Ch 1, 1 hdc in same last st. Join to first hdc with sl st.

Round 3: Ch 2. 1 hdc in first ch-1 space. *2 hdc in next ch-1* Repeat around until beginning. Join to first hdc with sl st. (Note: Do NOT ch-1 between each hdc cluster.)

Round 4: Ch 2, hdc in each st across (25 st).

Round 5: Repeat Round 2

Round 6: Repeat Round 3

Round 7: Ch 2, hdc in each st across (25 st).

Fasten off. Weave in ends.


Choose different colors for each round or alternate a striping pattern. Below is the color scheme for the two coffee cozies pictures:

Crochet Coffee Cozy 1

• Round 1: Bright Coral

• Round 2: Gray

• Round 3: Purple

• Round 4: Bright Coral

• Round 5: Purple

• Round 6: Gray

• Round 7: Bright Coral

.

.

Crochet Coffee Cozy 2

• Round 1: Olive Green

• Round 2: Grass Green

• Round 3: Grass Green

• Round 4: Olive Green

• Round 5: Grass Green

• Round 6: Grass Green

• Round 7: Olive Green

Experiment with your own colors to create your very own crochet coffee cozies to match your style. They’re reusable, easy to wash, and a greener alternative to paper covers. Happy crocheting!


Thanks JJCROCHET for this wonderful Pattern!!!
http://www.facebook.com/jjcrochet?sk=app_4949752878
http://jjcrochet.com/blog/category/free-pattern-friday/

Saturday, January 1, 2011

Hexagon- Chapter 1- Todays Internet discovery

Hexagon How-to


You need to concentrate to do them!


16 different colours.
4mm hook, and the size of the finished hexagon as you can see above is roughly hand-sized. Each straight side measures 6cm, and about 11cm across between the points.

First off chain 4 and join to form a ring. The hole in the centre of the ring will be smallish, but this is where you need to work from for the first round. Tweak it a bit with your fingers to open it out a little.

Chain 3, then work 11 double crochet stitches (US) or treble crochet stitches (UK) into the ring. Join with a slip stitch to the 3rd stitch of the initial chain 3 and fasten off.


You should now have a little whirly wheel circle with 12 stitches/spokes altogether.
Join in a new colour for round 2 :: knot the two yarns together, remember like I showed you for the Granny Squares? Remember you can crochet the ends in as you go with the hex's too, to save you darning ends in at the end.

Pull the new colour yarn through to the front, through one of the dc/tr stitches :: you are working out of the stitches in this round, not the spaces in between the spokes.

For this round, you're going to be making what I think is known as a Bobble Stitch. It's basically where you work two incomplete dc/tr's into the same stitch, joining them at the end by pulling the yarn through all loops.


I shall describe it to you :: yarn over, insert hook through next stitch, yarn over, hook back through stitch (3 loops on hook), yarn over and pull through 2 loops (2 loops on hook). Then yarn over and insert hook through SAME STITCH, yarn over, hook back through stitch (4 loops on hook), yarn over and pull through 2 loops (3 loops on hook), yarn over and pull through all 3 loops.


So this is the pattern for round 2::

Chain 2, then 1 US dc/UK tr in same stitch. Chain 1.

Work a bobble stitch into next stitch as described above, then chain 1 to space.

Repeat 10 more times until you get back to the beginning and have 12 "bobbles" in total. Join round with a slip stitch into the 2nd stitch of the initial chain 2.


round 3 :: Nice and easy now, you're doing dc/tr clusters just like you do for granny squares. You are working out of the SPACES now, the spaces between the bobble stitch clusters of your previous row.

Join a new colour, pull loop through a space between 2 bobble clusters to start.

Chain 3 (counts as 1 dc/tr), work US dc/UK tr twice into same space, then chain 1.

Work US dc/UK tr three times into next space, chain 1.

Repeat 10 more times until you get back to the beginning and have 12 "clusters" in total. Join round with a slip stitch into the 3rd stitch of the initial chain 3 and fasten off.


Round 4 :: the chain-loop round ::
Join in a new colour and pull loop through a space between the dc/tr clusters of the previous row.
Chain 3, then make a slip stitch into the next space between your dc/tr clusters :: this anchors the chain loop.

Continue making little chain-3's, slip stitching them in place in the gap between the dc/tr clusters of the previous round. Join the last chain-3 with slip stitch into the first chain stitch you made. Do not fasten off as you will use the same colour for round 5.


Round 5 is the final round that forms the hexagon shape. I'm going to tell you how to crochet this as a single hexagon before we talk about the joining-as-you-go method.

We are using the same colour as the last round, and you will be working the stitches under the chain-3 loops you created. So to begin, make a slip stitch under the nearest chain-3 loop.

Chain 3 (counts as one dc/tr), then US dc / UK tr twice. Chain 2 (this is the corner spacing), then in the SAME chain-3 loop, US dc / UK tr three times. This is your first corner, it should look like a double cluster of 6 dc/tr's with a pointy corner bit in the middle.

Into the next chain-3 loop, work US dc / UK tr three times. This is a single cluster and makes a straight side.

Into the next chain-3 loop, work US dc / UK Tr three times, chain 2, then US dc / UK Tr three times. This is your second corner.

Continue working your way round making your clusters of 3 dc's /tr's, alternating between making a double cluster corner group (with chain 2 spacing) and a straight side single cluster. You should be ending the round on a straight-side group of three dc's/Tr's. Join the round with a slip stitch and fasten off.

See?????? It's not so hard?????? You've made your first hexagon!!!

Now if you're happy to make lots of single hexagons and join them all by stitching, then that's absolutely fine. But joining them as you go is fairly easy, although a little fiddly.


You will be working anti-clockwise, starting with a corner, as shown above.

To begin, you make a single cluster as before (chain 3, then dc/tr twice). Then instead of chaining 2 to make your corner spacing, chain ONE, then replace your second chain space with a slip stitch into the corner space of the ajoining hexagon.

Then working into the SAME chain-3 loop, dc/tr three times to finish your corner cluster.


Now you need to slip stitch into the next space of the ajoining hexagon to secure (see above). Basically, you have to insert hook into the space, hook the yarn from the back and pull it through to the front :: first through the space, then through the loop on the hook. It takes a bit of practice, it can be fiddly. But persevere.


You continue to work your way round, forming the hex shape in the same way as described above, but making sure that after each cluster you slip stitch into the relevant space on the ajoining hexagon which makes the attachment. When you get to a corner where you would normally chain 2, you make 2 slip stitches instead (in picture above, one slip stitch is made into the corner of the bright blue hex, and the next slip stitch into the corner of the sage green hex). This is quite hard to explain in words :: please do look over Alex's tutorial, she has some great photos to illustrate. But keep in mind that her pattern is different to mine, she uses more stitches so try not to get confused.


Thanks to: the crator of this pattern!!!!

Wednesday, November 17, 2010

Granny´s Squares chapter 4: Kids hat - Todays Internet DIcovery

Todays Internet Discovery is more GRANNY SQUARE PROYECTS!!!!


They are really great! Quick and easy, as well as colorful! como no! It takes just a couple of minutes for knitting each square!

Child's Granny Square Crocheted Hat Pattern
contributed by SpinaYarn.com

Use bright colors from your leftover yarn stash to crochet a warm and cheerful granny square hat for kids.
Gauge square = 3½ inches on a G hook.(4.5mm)

START - Center Motif: Make 1. Using Color1, ch 5, join with slip st to first st to form a ring.

Round 1: Ch 3, working in center of ring, 2 dc, ch1, (3 dc, ch 1) 5 times, join with a slip st to top of ch 3. Fasten off first color.

Round 2: Join 2nd color in any ch 1 space, ch 3, 2 dc, ch 1, 3 dc in same space, * 3 dc, ch 1, 3 dc in next ch 1 space, repeat from * 4 more times, join with sl st to top of ch 3 - 6 corners. Fasten off 2nd color.

Round 3: Join 3rd color in any ch 1 space, ch 3, 2 dc, ch 1, 3 dc in same space *3 dc in each space to corner space, 3 dc, ch 1, 3 dc, in corner ch 1 space, repeat from * ending with 3 dc, ch 1, 3 dc, in same space, join with sl st to top of ch 3. Fasten off 3rd color.

Round 4: Join 4th color and work in same manner as Rd 3, having 2 groups of 3 dc between corners. Fasten off 4th color.

Round 5: Join Main color in any st and work 1 sc in each st around motif, working 2 sc in each ch 1 corner space Fasten off.

Motif: Make 6. Using color 1, ch 5, join with slip st to first st to form a ring.

Round 1: Ch 3, working in center of ring, 2 dc, *Ch 1, 3 dc, repeat from * twice more, ch 1, join with a sl to top of ch 3. Fasten off first color.

Round 2: Join 2nd color in a ch space, ch 3, 2 dc, ch 1, 3 dc, in same space * 3 dc, ch 1, 3 dc, in next space, repeat from * twice more. Join with a sl st to top of ch 3. Fasten off 2nd color.

Round 3: Join 3rd color in any ch 1 corner space, ch 3, 2 dc, ch 1, 3 dc, in same space, * 3 dc in next space, 3 dc, ch 1, 3 dc in next ch 1 corner space, repeat from *, ending 3 dc in next space, join with a sl st to top of ch 3. Fasten off 3rd color.

Round 4: Join 4th color and work in same manner as Round 3, having 1 more group of 3 dc between corners. Fasten off.

Round 5: Join Main color in any st and work 1 sc in each st around motif working 2 sc in each ch 1 corner space, join with a sl st. Fasten off.

To Join: Using main color holding 2 motifs with wrong sides touching and working through sts of both motifs, 1 sl st in each st across one side of motif. Fasten off. Join remaining motifs in same manner last motif to first motif to form a ring. Holding center motif with right side facing you and using MC join to ring in same manner.

Edging: Round 1: With right side facing you and using MC, work 1 sc in each st around, join with a sl st. Fasten off. Round 2: Join 2nd color and work 1 sc in each st around, join. Rounds 3,4,5 and 6 Work in same manner as Round 2 using 3rd, 4th, 5th, and MC colors in order given. Fasten off. Using MC make a pompom and sew to top.

Sunday, November 14, 2010

Todays Internet Discovery: a Monkey

Crochet Little Monkey
SKILL LEVEL: Easy +

SIZE: One Size
About 9 in. (23 cm) tall

STITCH EXPLANATION: sc2tog (sc 2 sts together) Insert hook into st and draw up a loop. Insert hook into next st and draw up a loop. Yarn over, draw through all 3 loops on hook - 1 st decreased.

NOTES:

1. Monkey is crocheted with a small hook to create a dense fabric, suitable for a stuffed toy.

2. All pieces are worked in continuous rnds of sc with RS facing throughout. Do not join and do not turn. Place marker for beg of rnd; move marker up after each rnd is completed.

3. To change color, work last st of old color to last yarn over. Yarn over with new color and draw through all loops on hook to complete st.

HEAD/BODY

Beg at top of head, with A, ch 2.

Rnd 1 (RS): Work 6 sc in first ch.

Place marker for beg of rnd; move marker up as each rnd is completed.

Rnd 2: Work 2 sc in each sc around - 12 sc at the end of this rnd.

Rnd 3: *2 sc in next st, sc in next st; rep from * around - 18 sc at the end of this rnd.

Rnd 4: *2 sc in next st, sc in next 2 sts; rep from * around - 24 sts at the end of this rnd.

Rnd 5: *2 sc in next st, sc in next 3 sts; rep from * around - 30 sts at the end of this rnd.

Rnds 6-13: Sc in each sc around.

Rnd 14: *Sc2tog, sc in next 3 sts; rep from * around - 24 sts at the end of this rnd.

Rnd 15: *Sc2tog, sc in next 2 sts; rep from * around - 18 sts at the end of this rnd.

Change to B.

Shape Body

Rnd 16: With B, *2 sc in next st, sc in next 2 sts; rep from * around - 24 sts at the end of this rnd.

Rnd 17: *2 sc in next st, sc in next 3 sts; rep from * around - 30 sts at the end of this rnd.

Rnds 18-33: Sc in each sc around.

Rnd 34: *Sc2tog, sc in next 3 sts; rep from * around - 24 sts at the end of this rnd.

Begin stuffing piece firmly.

Continue to stuff until piece is complete.

Rnd 35: *Sc2tog, sc in next 2 sts; rep from * around - 18 sts at the end of this rnd.

Rnd 36: *Sc2tog, sc in the next st; rep from * around - 12 sts at the end of this rnd.

Rnd 37: *Sc2tog; rep from * around - 6 sts at the end of this rnd.

Fasten off.


MUZZLE

With B, ch 2.

Rnd 1 (RS): Work 8 sc in first ch.

Place marker for beg of rnd; move marker up as each rnd is completed.

Rnd 2: Work 2 sc in each sc around - 16 sts at the end of this rnd.

Rnds 3 and 4: Sc in each sc around.

Rnd 5: *Sc2tog, sc the next 4 sts, sc2tog; rep from * once more - 12 sts at the end of this rnd.

Fasten off.


EARS (make 2)

With A, ch 2.

Rnd 1 (RS): Work 6 sc in first ch.

Place marker for beg of rnd; move marker up as each rnd is completed.

Rnd 2: Work 2 sc in each sc around - 12 sts at the end of this rnd.

Fasten off.


LEGS (make 2)

With A, ch 2.

Rnd 1 (RS): Work 5 sc in first ch.

Place marker for beg of rnd; move marker up as each rnd is completed.

Rnd 2: Work 2 sc in each sc around - 10 sts at the end of this rnd.

Begin stuffing piece firmly.

Continue to stuff until piece is complete.

Rnds 3-16: Sc in each sc around.

Fasten off.


ARMS (make 2)

Work same as Legs.


TAIL

With A, ch 2.

Rnd 1 (RS): Work 8 sc in first ch.

Place marker for beg of rnd; move marker up as each rnd is completed.

Begin stuffing piece firmly.

Continue to add stuffing as you work.

Rnds 2-20: Sc in each sc around.

Fasten off.


FINISHING

Sew Ears to Head. With A, embroider a straight st mouth across Muzzle. Stuff Muzzle and sew to Head. With black yarn, embroider French knot eyes on Head above Muzzle. Sew Arms, Legs, and Tail to Body. Weave in ends.

ABBREVIATIONS / REFERENCES

Click for explanation and illustration

beg = begin(s)(ning) ch(s) = chain(s)

rep = repeat(s)(ing) rnd(s) = round(s)

RS = right side sc = single crochet

st(s) = stitch(es) WS = wrong side

Learn to Crochet Instructions: http://learnToCrochet.LionBrand.com

Translations Crochet (English to Spanish)

CH : Chain/ Cadena o cadeneta
CH SP INCR: (vareta, cadeneta, vareta) en el mismo punto
CHAIN: Cadena
DOUBLE CROCHET: Vareta
HALF DOUBLE CROCHET: Media vareta
HOOK: Aguja de crochet
SINGLE CROCHET: Medio punto
SLIP STITCH: Saltar una cadeneta
TREBBLE CROCHET: Vareta Doble


Translations Spanish English- Knitting

Término/ Sinónimo/Traducción al inglés

Abrigo /xxx/coat

Aumentar/ XXX/ increase

Borla/ xxx/ tassel

Cadena o cadeneta/ xxx/ chain stitch

Chal / Reboso (México) Mañanita (México)/shawl

Chalina/ Bufanda/ scarf

Chullo/ XXX/ Peruvian hat

Chompa/ sueter o jersey (España)/ sweater

Crochet/ ganchillo- gancho para tejer (México)/ crochet, hook

Disminución simple/ surjete simple / decrease - skp (slip,knit,pass)- (slip1, knit1, pass the slipped, stitch over. The same as SKP)

Horquilla / Horquilleta/ Hairpin lace

Jalar / tensar, estirar o amarrar (España) / throw away

Lana / estambre / wool, yarn

Lazada / hebra/ yarn over (wrap the yarn around right needle)

loop / Medida / gauge

Palos o palitos de tejer/ dos agujas-agujas de tejer / knitting needles

Pastilla tejida/ motivo (cuadrado, hexágono o círculo) (Argentina) /

Poncho / capa (México) poncho

Punto / Stitch

Punto raso (crochet)/ slip stitch

Punto bajo (crochet) / medio pilar (Guatemala)- media vareta/ single crochet

Punto alto (crochet) / pilar, vareta o macizo (México) punto monito (México) / half double crochet

Punto alto doble (crochet) / doble pilar (Guatemala) doble vareta / double crochet

Punto alto triple (crochet) /triple vareta /treble crochet

Punto alto en relieve (crochet)/ front post double crochet

Pompón / Borla (México) Mota o motita (México) / pom pom

Punto inglés (dos agujas)/ Brioche stitch

Punto santa clara / Punto musgo (México) / Garter stitch

Ropón / chambrita (México) chaqueta de bebé suetercito (Guatemala) / baby jacket

Tapado / echarpe, poncho o abrigo abrochado por delante (España)

Tejer / calcetar (España) / knit

Telar / telar maya o azteca (México) / loom

Daisypath Anniversary

Daisypath Anniversary tickers