Showing posts with label winter. Show all posts

Saturday, July 28, 2012

Child´s Crochet Poncho


Skill Level: Intermediate


Designed by Glenda Winkleman.

Note: Directions are for size small (12-18 months). Changes for sizes medium (2-4 years) and large (6-8 years) are in parentheses.

Crochet Hook: 5.5mm [US I-9].

Yarn needle.

GAUGE: Rnds 1-2 = 2 ½" across. CHECK YOUR GAUGE. Use any size hook to obtain the gauge.

SPECIAL ABBREVIATION:

Fpdc (front post double crochet): Yarn over, insert hook from the front to the back to the front around the post of the stitch indicated and draw up a loop. [yarn over and draw yarn through 2 loops] twice.

SQUARE (Make 36): With CB, ch 5; join with a sl st in first ch to form a ring.

Rnd 1: Ch 2 (counts as the first hdc), 2 hdc in ring, [ch 2, 3 hdc in ring] 3 times, ch 2; join with a sl st in top of ch-2. Fasten off.
Rnd 2: Attach CA in any ch-2 sp; ch 3 (counts as the first dc), (dc, ch 2, 2 dc) all in some ch-2 sp, skip next hdc, 2 fpdc in next hdc, skip next hdc, * (2 dc, ch 2, 2 dc) in next corner ch-2 sp, skip next hdc, 2 fpdc in next hdc, skip next hdc; rep from * around; join with a sl st in top of ch- 3.

Size Small ONLY: Fasten off.

Sizes Medium and Large-Rnd 3: Ch 1, sc in same st as joining, sc in next dc, * (sc, ch 2, sc) all in corner ch-2 sp, sc in next 5 sts; rep from * twice more; (sc, ch 2, sc) all in corner sp, sc in last 5 sts; join with a sl st to first sc.

Size Medium ONLY: Fasten off.

Size Large-Rnd 4: Ch 1, sc in each sc around and work (sc, ch 2, sc) all in each corner ch-2 sp; join with a sl st to first sc. Fasten off.

FINISHING: Sew squares together through back lps using CA, matching stitch for stitch and following diagram.

Lower Border-Rnd 1: With right side facing, attach CB in ch-2 sp at front point; ch 1, ** (sc, ch 2, sc) all in corner, ch 1, skip next st, * sc in next st or seam, ch 1, skip next st or seam; rep from * to ch-2 sp at next point; rep from ** once more; join with a sl st to first sc. Fasten off CB.
Rnd 2: Attach CA in ch-2 sp, ch 1, ** (sc, ch 2, sc) all in ch-2 sp, ch 1, skip next sc, * sc in next ch-1 sp, ch 1, skip next sc; rep from * to next ch-2 sp; rep from ** once more; join.
Rnd 3: Ch 1, sc in each sc and each ch-1 sp around, and work 3 sc in each ch-2 sp; join. Fasten off.

Neck Border-Rnd 1: With right side facing, attach CB in first sc to left of center "V" at neck; ch 1, sc in some sc as joining, ch 1, skip next st, * sc in next st or seam, ch 1, skip next st or seam; rep from * around; join with a sl st to first sc. Fasten off.
Rnd 2: Attach CA in same sc as joining; ch 1, sc in each sc and each ch-1 sp around; join with a sl st in first sc. Fasten off.

ABBREVIATIONS: CA = Color A; CB = Color B; ch = chain; dc = double crochet; hdc = half double crochet; lp(s) = loop (s); mm = millimeters; pat = pattern; rep = repeat; rnd (s) = round(s); sc = single crochet; sl = slip; sp(s) = space (s); st(s) = stitch (es); * = repeat whatever follows the * as indicated; [ ] = work directions in brackets the number of times specified.


Pattern © by Coats & Clark Inc. Reproduced with permission from Coats & Clark Inc. PurpleKittyYarns.com is not endorsed by Coats & Clark Inc. It is not permissible to contract production of projects made from designs published by Coats & Clark to a third party for sale or distribution.

Monday, April 9, 2012

Medias Japonesas 2 Agujas


 Diseñadas por la maravillosa tejedora japonesa Kirja Kongsbat éstas medias se tejen con 2 agujas comunes y todo en punto Santa Clara. Siendo, además de increíblemente fáciles de tejer, toda una novedad para tejer medias.


Como siempre las cosas nuevas me fascinan, y tengo que decirles que éstas medias quedan FANTASTICAS, no tienen nada que envidiarles a las medias de agujas circulares.

Las recomiendo para todas las tejedoras que estén recién empezando a tejer porque son MUY FACILES de realizar.

Materiales.


Agujas normales Nro 3.

Lana de los colores que deseen para combinar en las hileras (tiene que ser lana finita). Pongo una foto de la que usé yo para que se hagan una idea.


Muestra

La medida del patrón esta calculada para la siguiente proporción de puntos:

25 puntos = 10cm.

La medida para un talle 37 es la siguiente:

30 cm desde la punta de los dedos hasta la parte de adelante del puño.

20 cm desde la punta de los dedos hasta la base del talón.

20 cm desde la base del talón hasta la parte de atrás del puño.


Instrucciones

Estas medias se tejen horizontalmente (de lado a lado) tejiendo todo de una vez la puntera y el talón. Nos queda al terminar una tira larga que cosemos por los lados como muestra abajo el dibujo. Los aumentos y disminuciones que hacemos a lo largo de las hileras son los que le dan la forma al talón y la puntera.

Patrón de la media (hacer 2)


Coloquen 67 + 34 + 42 = 143 puntos en la aguja y coloquen 2 ganchitos para marcar la separacion de los puntos de cada sección. (pueden atar una lanita de otro color a la aguja entre los puntos si no tienen ganchitos. la idea de esta lanita es que nos indique cuando termina una de las partes y comienza la siguiente asi no nos volvemos locas contando puntos todo el tiempo)

Se teje siempre al derecho en todas las hileras realizando los aumentos y disminuciones en todas las hileras del derecho (para saber cuando estan del lado del derecho, miren la lanita que queda colgando en un extremo... cuando la tienen al principio están del lado del derecho).

Aumentos


Ref.:

D = punto al derecho

1aum = 1 aumento (se hace tejiendo el punto una vez al derecho y antes de pasarlo a la otra aguja volvemos a insertar la aguja para tomarlo por detrás y tejerlo una vez mas al derecho. lo pasamos finalmente a la otra aguja. Tener 2 puntos donde antes habia 1 solo. lindo no?... vean el tutorial si no quedó claro)

2pj = tejer dos puntos juntos al derecho


Hilera 1 (lado del derecho) 41D + 1aum + (pasamos el ganchito a la otra aguja) + 1aum + 32D + 1aum + (pasamos el ganchito a la otra aguja) + 1aum + 66D.

(nos quedan 43+36+68 = 147 puntos)

Hilera 2 (lado del reves) todos los puntos al derecho

Hilera 3 42D + 1aum + (pasamos el ganchito a la otra aguja) + 1aum + 34D + 1aum + (pasamos el ganchito a la otra aguja) + 1aum + 67D.

(nos quedan 44+38+69 = 151 puntos)

Hilera 4 todos los puntos al derecho

Hilera 5 43D + 1aum + (pasamos el ganchito a la otra aguja) + 1aum + 36D + 1aum + (pasamos el ganchito a la otra aguja) + 1aum + 68D.

(nos quedan 45+40+70 = 155 puntos)

Hilera 6 todos los puntos al derecho

Hilera 7 44D + 1aum + (pasamos el ganchito a la otra aguja) + 1aum + 38D + 1aum + (pasamos el ganchito a la otra aguja) + 1aum + 69D.

(nos quedan 46+42+71 = 159 puntos)

Hilera 8 todos los puntos al derecho

Hilera 9 45D + 1aum + (pasamos el ganchito a la otra aguja) + 1aum + 40D + 1aum + (pasamos el ganchito a la otra aguja) + 1aum + 70D.

(nos quedan 47+44+72 = 163 puntos)

Hilera 10 todos los puntos al derecho

Hilera 11 46D + 1aum + (pasamos el ganchito a la otra aguja) + 1aum + 42D + 1aum + (pasamos el ganchito a la otra aguja) + 1aum + 71D.

(nos quedan 48+46+73 = 167 puntos)

Hilera 12 todos los puntos al derecho

Hilera 13 47D + 1aum + (pasamos el ganchito a la otra aguja) + 1aum + 44D + 1aum + (pasamos el ganchito a la otra aguja) + 1aum + 72D.

(nos quedan 49+48+74 = 171 puntos)

Hilera 14 todos los puntos al derecho

Hilera 15 48D + 1aum + (pasamos el ganchito a la otra aguja) + 1aum + 46D + 1aum + (pasamos el ganchito a la otra aguja) + 1aum + 73D.

(nos quedan 50+50+75= 175 puntos)

Hilera 16 todos los puntos al derecho


Parte central

Tejer ahora todas las vueltas al derecho para la franja central de la media... mas o menos en mi caso fueron 4 cm. pero fijense ustedes en su pie si necesitan mas o menos ancho.


Disminuciones y cierre

Una vez que completaron la franja central de la media empezamos con las disminuciones, con una hilera al derecho. (basicamente es repetir lo mismo que hicimos al principio pero haciendo puntos juntos en donde antes haciamos aumentos.)


Hilera 1 (lado del derecho) 48D + 2pj + (pasamos el ganchito a la otra aguja) + 2pj + 46D + 2pj + (pasamos el ganchito a la otra aguja) + 2pj + 73D.

(nos quedan 49+48+74= 171 puntos)

Hilera 2 (lado del reves) todos los puntos al derecho

Hilera 3 47D + 2pj + (pasamos el ganchito a la otra aguja) + 2pj + 44D + 2pj + (pasamos el ganchito a la otra aguja) + 2pj + 72D.

(nos quedan 48+46+73= 167 puntos)

Hilera 4 todos los puntos al derecho

Hilera 5 46D + 2pj + (pasamos el ganchito a la otra aguja) + 2pj + 42D + 2pj + (pasamos el ganchito a la otra aguja) + 2pj + 71D.

(nos quedan 47+44+72= 163 puntos)

Hilera 6 todos los puntos al derecho

Hilera 7 45D + 2pj + (pasamos el ganchito a la otra aguja) + 2pj + 40D + 2pj + (pasamos el ganchito a la otra aguja) + 2pj + 70D.

(nos quedan 46+42+71= 159 puntos)

Hilera 8 todos los puntos al derecho

Hilera 9 44D + 2pj + (pasamos el ganchito a la otra aguja) + 2pj + 38D + 2pj + (pasamos el ganchito a la otra aguja) + 2pj + 69D.

(nos quedan 45+40+70= 155 puntos)

Hilera 10 todos los puntos al derecho

Hilera 11 43D + 2pj + (pasamos el ganchito a la otra aguja) + 2pj + 36D + 2pj + (pasamos el ganchito a la otra aguja) + 2pj + 68D.

(nos quedan 44+38+69= 151 puntos)

Hilera 12 todos los puntos al derecho

Hilera 13 42D + 2pj + (pasamos el ganchito a la otra aguja) + 2pj + 34D + 2pj + (pasamos el ganchito a la otra aguja) + 2pj + 67D.

(nos quedan 43+36+68= 147 puntos)

Hilera 14 todos los puntos al derecho

Hilera 15 41D + 2pj + (pasamos el ganchito a la otra aguja) + 2pj + 32D + 2pj + (pasamos el ganchito a la otra aguja) + 2pj + 66D.

(nos quedan 42+34+67= 143 puntos)

Hilera 16 todos los puntos al derecho


Terminacion

Coser por ambos lados haciendo coincidir los extremos.

Una vez que terminaron su primer media, no abandonen! Hay que hacer la segunda media. Existe algo llamado "Sindrome de la segunda media" que es abandonar una pobre mediecita sin su par porque no empiezan nunca la segunda. Animos! hay que completar el par.

Friday, July 1, 2011

SAcon rayado- Stripped sweater- Beautiful

Long Crochet Assymetry Jacket

Materials: (Small (Medium, Large, X-Large, XX-Large, XXX-Large)

Yarn: Caron International's Simply Soft (100% acrylic; 6 oz/170 g, 315 yds/288 m skein):

#9750 Chocolate (A), 12 (12, 12, 18, 18, 18) oz/340(340,340,509,509,509)g

#9723 Raspberry (B), 6 (6, 12,12, 12, 12) oz/170(170, 340,340,340,340)g

#9703 Bone (C), 6 (6, 12, 12, 12, 12) oz/170(170, 340,340,340,340)g

#9707 Dk. Sage (D), 6 (6, 12, 12, 12, 12) oz/170(170, 340,340,340,340)g

#9742 Grey Heather (E), 6(6, 12, 12, 12, 12)oz/170(170, 340,340,340,340)g

One size US J-10 (6 mm) crochet hook or size to obtain gauge

Split ring stitch markers or scraps of yarn

Yarn needle

FINISHED MEASUREMENTS Small (Medium, Large, X-Large, XX-Large, XXX-Large)


Back Width (measured at underarm) 19 (21, 23, 24 1/2, 26 1/2, 28)"/48.5 (53.5, 58.5, 62, 67.5, 71) cm
Bust (estimate = 2 times back width) 38 (42, 46, 49, 53, 56)"/96.5 (106.5, 117, 124.5, 134.5, 142) cm
Length 30 (31, 32, 33, 34, 34 1/2)"/76 (78.5, 81.5, 84, 86.5, 87.5)cm including collar (6"/15 cm)
Note: When worn, the fronts rotate around and down forming long points. There is a lot of stretch and overlap in the fronts.

GAUGE

In foundation single crochet, using US J-10 (6 mm) hook, 12 sts = 4"/10 cm
In mesh pattern, using US J-10 (6 mm) hook, 13 sts and 14 rows = 4"/10 cm

STITCHES USED
Chain (ch)
Single crochet (sc)
Slip stitch (slip st)

SPECIAL TERMS
Fsc: Foundation single crochet (This technique creates a foundation chain and a row of single crochet stitches in one) –
Step 1: Place a slip knot on hook, ch 2, insert hook in 2nd ch from hook and draw up a loop; yarn over and draw through one loop on hook (the "chain"); yarn over and draw through 2 loops on hook (the "single crochet").
Step 2: The following stitch is worked under the forward 2 loops of the stem of the previous stitch (into the "chain"). Insert hook into the face of the "chain" and under the nub at the back of the "chain", draw up a loop, yarn over and draw through one loop on hook (the "chain"), yarn over and draw through 2 loops on hook (the "single crochet"). Repeat for the length of foundation.
sc2tog: Single crochet 2 together – Insert hook in next stitch, yarn over and pull up a loop, (two loops on hook), insert hook in next stitch, yarn over and pull up a loop, yarn over and draw through all three loops on hook.

NOTES
1. Gauge is measured with garment slightly stretched; it is a "hung" gauge that results with the weight of the completed garment.

2. To change color at the end of a row: Work last sc of row to last yarn over, yarn over with new color and draw through all loops on hook to complete stitch. Pick up new color from underneath old color as you ch 1 to begin next row, wrapping the carried strand for neatness. You will be working with only three colors at any time. Carry one unused strand up each side as you work, cutting and joining colors according to separate sequences.

3. To change color at the end of a right side round: Work last ch 1 in old color, drop old color to wrong side of work, insert hook in first sc, yarn over with new color and draw through all loops on hook to complete joining slip st, turn. To change color at the end of a wrong side round: Work last ch 1 in old color, turn, drop old color to wrong side of work, reach back and insert hook in first sc, yarn over with new color and draw through all loops on hook to complete joining slip st. Pick up new color from underneath carried strands as you ch 1 to begin next round, wrapping for neatness. Remember to keep all carried strands on the wrong side of the piece (inside sleeve).

COLOR SEQUENCE

Note: This is a long sequence, but it is made up of three-row color repeats. A is the main color, used every third row. The other colors are used either three or five times, and then swapped out.

Work 1 row of each color as indicated: [A, B, C] 3 times, [A, B, D] 2 times, [A, E, D] 3 times, [A, C, B] 3 times, [A, C, E] 2 times, [A, D, E] 3 times

CARDI
Note: Work begins with a long scarf that becomes the shawl collar. The shoulders are then "grown" by increasing at two corners centered at the back while continuing to work the long fronts. The body is then formed by joining the piece at the underarms and leaving armholes open for sleeves. The body is worked even to desired length.

Collar
Note: The foundation will be slightly more relaxed than remainder of the collar, so the edge can expand as it rolls over for a shawl collar.

With A, Fsc 183 (189, 195, 201, 207, 213) to measure approx 61 (63, 65, 67, 69, 71)"/155 (160, 165, 170, 175.5, 180.5)cm, change to B.
Row 1: With B, ch 1, sc in first sc, [ch 1, skip next Fsc, sc in next Fsc] across, turn; change to C—92 (95, 98, 101, 104, 107) sc.
Rows 2–20: With new color, [ch 1, sc in next ch-1 space] across, end with ch 1, sc in last sc, turn; change to next color in Color Sequence.

Shoulders
Note: Shoulders are now "grown" by making two corner increases equally spaced from center of back neck. Mark the ch-1 space at center of each corner, move markers up as work progresses.

Row 21: With new color, [ch 1, sc in next ch-1 space] 42 (43, 44, 45, 46, 47) times, ch 1, (sc, ch 1, sc) in next ch-1 space (corner made), place marker in last ch-1 made, [ch 1, sc in next ch-1 space] 5 (6, 7, 8, 9, 10) times, ch 1, (sc, ch 1, sc) in next ch-1 space (corner made), place marker in last ch-1 made, [ch 1, sc in next ch-1 space] 42 (43, 44, 45, 46, 47) times, end with ch 1, sc in last sc, turn; change to next color in Color Sequence—94 (97, 100, 103, 106, 109) sc.

Rows 22–44 (46, 48, 50, 52, 54) (pattern increase): With new color, *[ch 1, sc in next ch-1 space] to next marked corner ch-1 space, ch 1, (sc, ch 1, sc) in corner ch-1 space; rep from * once more; [ch 1, sc in next ch-1 space] across, end with ch 1, sc in last sc, turn; change to next color in Color Sequence—140 (147, 154, 161, 168, 175) sc. Remove markers.

Row 45 (47, 49, 51, 53, 55): With new color, [ch 1, sc in next ch-1 space] across, end with ch 1, sc in last sc, turn; change to next color in Color Sequence.

Joining
Note: The back section (between corners) will now be joined to each front section, skipping armhole stitches.
Row 46 (48, 50, 52, 54, 56) (joining row): With new color, [ch 1, sc in next ch-1 space] 32 times, skip next 23 (25, 27, 29, 31, 33) ch-1 spaces (for armhole), ch 1, place marker in last ch-1 space made (for underarm), [sc in next ch-1 space, ch 1] 30 (33, 36, 39, 42, 45) times, place marker in last ch-1 space made (for underarm), skip next 23 (25, 27, 29, 31, 33) ch-1 spaces (for armhole), [ch 1, sc in next ch-1 space] 31 times, end with ch 1, sc in last sc; change to next color in Color Sequence, turn—94 (97, 100, 103, 106, 109) sc.

Body
Row 47 (49, 51, 53, 55, 57): With new color, [ch 1, sc in next ch-1 space] to marked ch-1 space, ch 1, sc in marked ch-1 space at underarm, [ch 1, sc in next ch-1 space] to next marked ch-1 space, ch 1, sc in marked ch-1 space at underarm, [ch 1, sc in next ch-1 space] across, end with ch 1, sc in last sc; change to next color in Color Sequence, turn.

Rows 48 (50, 52, 54, 56, 58): With new color, [ch 1, sc in next ch-1 space] across, end with ch 1, sc in last sc; change to next color in Color Sequence, turn. Do not remove or move markers.

Repeat last row 58 (59, 60, 61, 62, 63) more times or to desired length, changing colors per Color Sequence, end by working a row with A. Fasten off all colors.

SLEEVES
Notes:
1. Sleeves are worked in joined rounds, back and forth. So far, there is no obvious right side or wrong side. Make that decision now and as you work the sleeves you will carry unused strands of colors up the wrong side (inside of sleeve).

2. To avoid big holes at the underarms, begin each sleeve with a sc2tog that bridges the gap.

With same color used in joining row, and moving in the opposite direction of armhole stitches, join yarn with slip st in the sc row edge just before the marked ch-1 space at underarm, inserting hook under two strands of row edge.

Round 1: Ch 1, sc2tog over same row edge and row edge on other side of marked ch-1 space, [ch 1, sc in next ch-1 space] 23 (25, 27, 29, 31, 33) times around armhole, end with ch 1; join with slip st in first sc; change to next color in Color Sequence, turn—24 (26, 28, 30, 32, 34) sc.

Round 2: With new color, [ch 1, sc in next ch-1 space] around, end with ch 1; join with slip st in first sc, turn.

Repeat last round 58 (59, 60, 58, 59, 60) more times or to desired length, changing colors per Color Sequence, end by working a row with A. Fasten off all colors.

FINISHING
Using yarn needle, weave in ends.

Long Cardigan Diagram

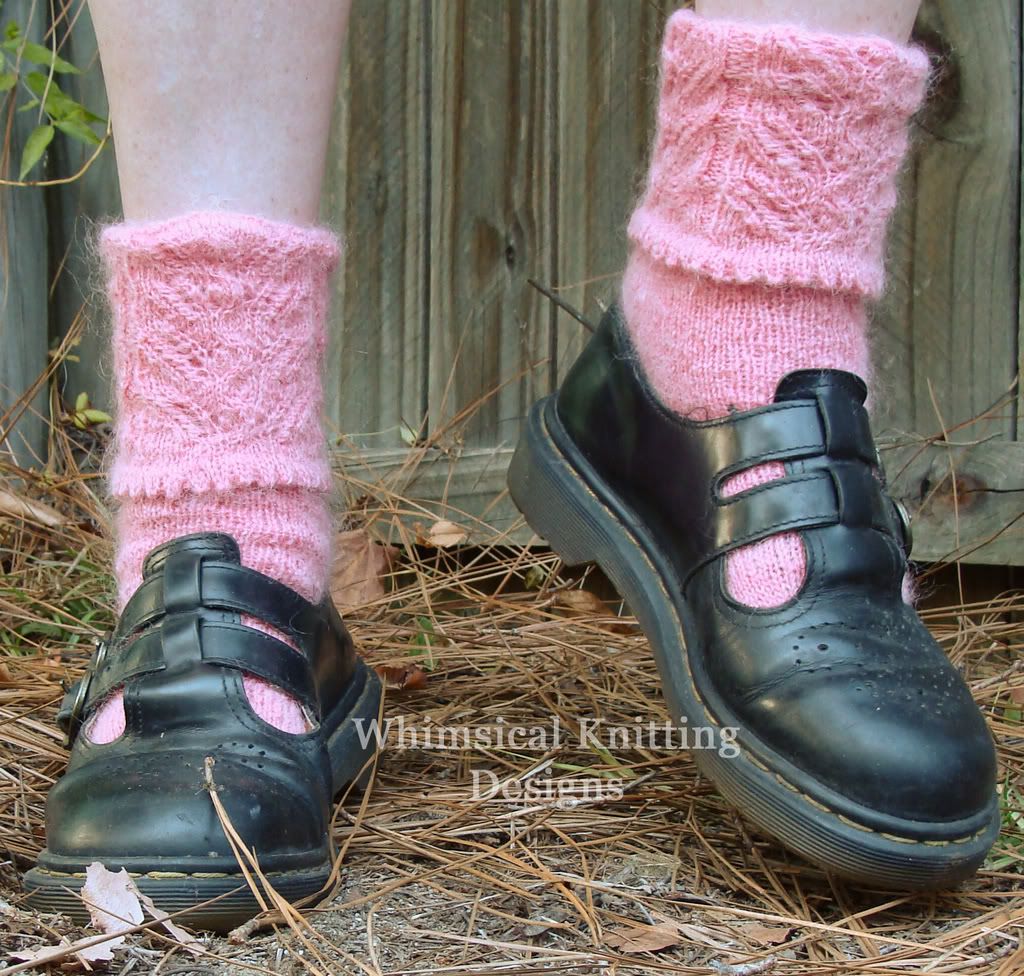
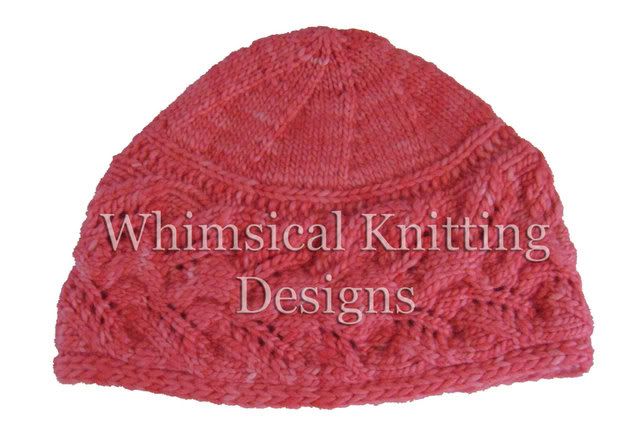
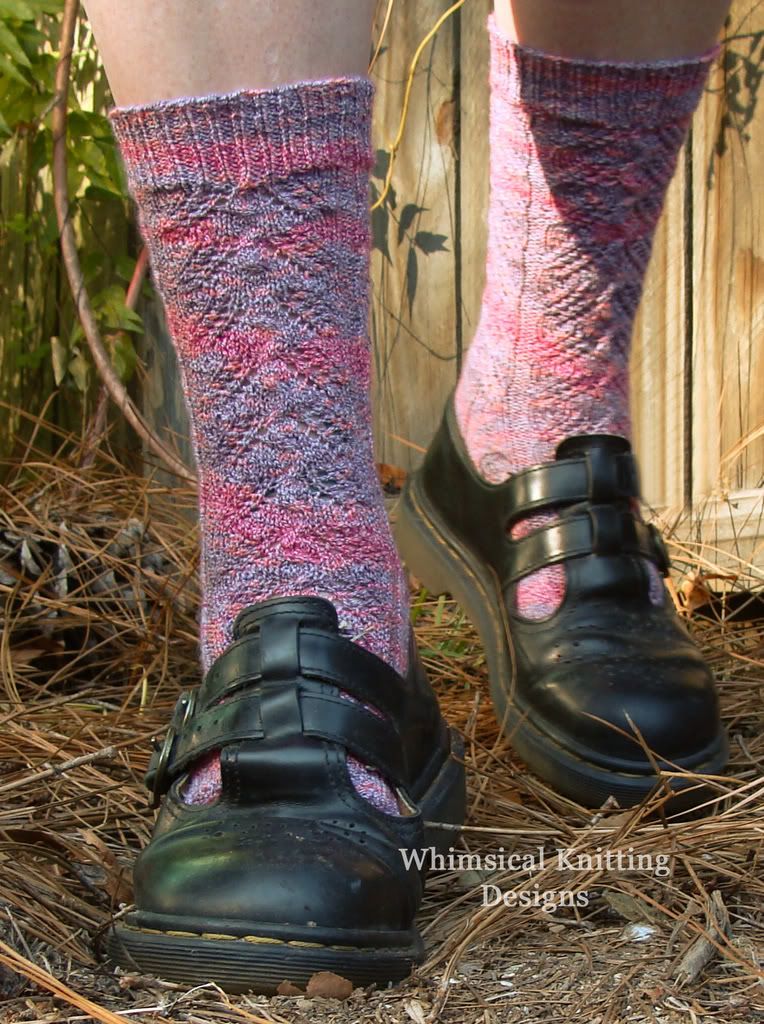
HAT- SOcks- Gloves


Download Patterns clicking here or in the photos
http://freakshare.com/files/dkl4gu8l/ATouchofWhimsySocksVersionTwo.zip.html

Begginers Todays Internet DIscovery: Gloves


Designed by Rebecca Mercier

Stats

Yarn: 1 hank Malabrigo 215 yds. (approx. 1/2 used) or worsted wt. yarn of choice
Needles: size 7 knitting needles and 1 cable needle for cuff; size 7 and 5 dpns,
magic loop or 2 circs for your preferred method of knitting small circumference

knitting in the round

Gauge: 5 sts=1 inch in stockinette stitch
Size: fits 7 in. wrist and hand that is 8 in. in circumference

With size 7 needles cast on 30 sts using provisional cast on.

Wrist Cuff:

Row 1: k1, sl 1 wyif, k1, p2, k5, k2tog, yo, k1, cb4, k1, yo, ssk, k5, p2, k1, sl 1
wyif, k1

Row 2 and all even rows: sl 1 wyif, k1, sl 1 wyif, k2, purl 20, k2, sl 1 wyif, k1, sl
1 wyif

Row 3: k1, sl 1 wyif, k1, p2, k3, k2tog x2, yo, k1, yo, k4, yo, k1, yo, ssk x2, k3,
p2, k1, sl 1 wyif, k1

Row 5: k1, sl 1 wyif, k1, p2, k2, k2tog x2, yo, k1, yo, k6, yo, k1, yo, ssk x2, k2,
p2, k1, sl 1 wyif, k1

Row 7: k1, sl 1 wyif, k1, p2, k1, k2tog x2, yo, k1, yo, k2, cf4, k2, yo, k1, yo, ssk
x2, k1, p2, k1, sl 1 wyif, k1

Row 9: k1, sl 1 wyif, k1, p2, k2tog x2, yo, k1, yo, k10, yo, k1, yo, ssk x2, p2, k1,
sl 1 wyif, k1

Row 11: k1, sl 1 wyif, k1, p2, k2tog, k2, yo, k12, yo, k2, ssk, p2, k1, sl 1 wyif, k1
Row 12: rep row 2

Continue pattern for 7 inches, ending with an even number row. DO NOT BIND OFF, leave the sts live for grafting. Very carefully unzip the provisional cast on
 
 
*Design note* I removed the provisional cast one stitch at a time and put each stitch on a size 7 needle as I unzipped, this way I didn’t lose any stitches as I unzipped the cast on.

Graft the sts from each end of the wrist cuff together using the kitchener stitch. If you prefer, you can use a 3 needle bind off, but this will be more visible than kitchener method. After the ends are grafted together you are ready to pick up sts for the fingerless glove.

Should you prefer wristlets instead of fingerless gloves, this is what you will have:
 

Translations Crochet (English to Spanish)

CH : Chain/ Cadena o cadeneta
CH SP INCR: (vareta, cadeneta, vareta) en el mismo punto
CHAIN: Cadena
DOUBLE CROCHET: Vareta
HALF DOUBLE CROCHET: Media vareta
HOOK: Aguja de crochet
SINGLE CROCHET: Medio punto
SLIP STITCH: Saltar una cadeneta
TREBBLE CROCHET: Vareta Doble


Translations Spanish English- Knitting

Término/ Sinónimo/Traducción al inglés

Abrigo /xxx/coat

Aumentar/ XXX/ increase

Borla/ xxx/ tassel

Cadena o cadeneta/ xxx/ chain stitch

Chal / Reboso (México) Mañanita (México)/shawl

Chalina/ Bufanda/ scarf

Chullo/ XXX/ Peruvian hat

Chompa/ sueter o jersey (España)/ sweater

Crochet/ ganchillo- gancho para tejer (México)/ crochet, hook

Disminución simple/ surjete simple / decrease - skp (slip,knit,pass)- (slip1, knit1, pass the slipped, stitch over. The same as SKP)

Horquilla / Horquilleta/ Hairpin lace

Jalar / tensar, estirar o amarrar (España) / throw away

Lana / estambre / wool, yarn

Lazada / hebra/ yarn over (wrap the yarn around right needle)

loop / Medida / gauge

Palos o palitos de tejer/ dos agujas-agujas de tejer / knitting needles

Pastilla tejida/ motivo (cuadrado, hexágono o círculo) (Argentina) /

Poncho / capa (México) poncho

Punto / Stitch

Punto raso (crochet)/ slip stitch

Punto bajo (crochet) / medio pilar (Guatemala)- media vareta/ single crochet

Punto alto (crochet) / pilar, vareta o macizo (México) punto monito (México) / half double crochet

Punto alto doble (crochet) / doble pilar (Guatemala) doble vareta / double crochet

Punto alto triple (crochet) /triple vareta /treble crochet

Punto alto en relieve (crochet)/ front post double crochet

Pompón / Borla (México) Mota o motita (México) / pom pom

Punto inglés (dos agujas)/ Brioche stitch

Punto santa clara / Punto musgo (México) / Garter stitch

Ropón / chambrita (México) chaqueta de bebé suetercito (Guatemala) / baby jacket

Tapado / echarpe, poncho o abrigo abrochado por delante (España)

Tejer / calcetar (España) / knit

Telar / telar maya o azteca (México) / loom

Daisypath Anniversary

Daisypath Anniversary tickers